
Image Source: www.kitchenaid.com
Guide: How Long To Knead Bread Dough In Kitchenaid Mixer
For most bread recipes, you will knead dough in your KitchenAid mixer for about 6 to 10 minutes. This is often after an initial mix. The exact KitchenAid kneading duration changes based on the dough and your mixer. A common question is, “How long should I knead dough?” The answer depends on many things. We will explore these details to help you get perfect dough every time.
Why Kneading Dough Matters
Kneading dough is vital for good bread. It builds a network called gluten. Gluten gives bread its structure and chew. When you knead, you stretch and fold the dough. This makes gluten strong. Without enough kneading, bread can be flat and crumbly. It might feel heavy. It will not rise well.
The Magic of Gluten Development
Gluten comes from two proteins in flour. Their names are glutenin and gliadin. When you add water, these proteins link up. They form long, stretchy chains. Kneading makes these links stronger. It also makes them more organized. This is gluten development stand mixer style. A strong gluten network traps gas. This gas comes from yeast. Trapped gas makes your bread rise tall and light. It gives bread its open, airy texture. Good gluten also helps hold the bread’s shape. It keeps it from spreading out flat during baking.
What Affects Kneading Time?
Many things change how long you need to knead. No single rule fits all doughs. You must look at your specific dough.
Type of Flour
Different flours have different protein levels. The amount of protein affects kneading time.
- Bread Flour: This flour has high protein. It forms strong gluten quickly. You might knead it for a shorter time. Bread flour is often used for crusty loaves.
- All-Purpose Flour: This flour has less protein. It needs more kneading to build gluten. It makes a softer dough. You can use it for many types of bread.
- Whole Wheat Flour: This flour contains bran and germ. These tiny bits are sharp. They can cut gluten strands. Whole wheat dough often needs more kneading. Or it needs a longer rest. This helps gluten fully develop. It can make the dough feel heavier at first.
- Rye Flour: Rye flour has very little gluten. You do not knead rye dough as much. Over-kneading can make it sticky.
Dough Hydration (How Much Water)
Dough with more water is called high hydration dough. It is often softer and stickier.
- Wet Dough: This dough develops gluten faster. The extra water helps proteins move. But it can feel like sticky dough KitchenAid mixer users may find hard to handle. It might seem too wet at first. Yet, it can make very open and airy bread. Think of ciabatta.
- Stiff Dough: This dough has less water. It is a stiffer dough. It takes longer to knead. It takes more effort to build gluten. It might also warm up slower during kneading. Stiff doughs often make denser bread.
Recipe Instructions
Always follow your recipe’s guide first. Recipes are made for specific dough types. They give a good start for your dough hook mixing time. A good recipe will suggest a time. It will also tell you what to look for. Some recipes might also suggest specific speeds.
Mixer Speed
The speed setting on your KitchenAid matters a lot. We will talk about optimal kneading speed KitchenAid later. Using the wrong speed can harm your mixer. It can also hurt your dough. Too fast can overwork the mixer and dough. Too slow might not build gluten well.
Room Temperature
A warm room can speed up yeast action. Yeast loves warmth. It can also make dough feel warmer faster. This might affect how quickly gluten forms. Warmer dough develops gluten quicker. But if it gets too hot, it can damage the gluten. The yeast can also become too active. A very cold room can slow things down.
Initial Mixing
The time you spend mixing ingredients at the start counts. A good initial mix helps. It brings everything together. This makes the kneading process smoother. It starts the hydration of the flour.
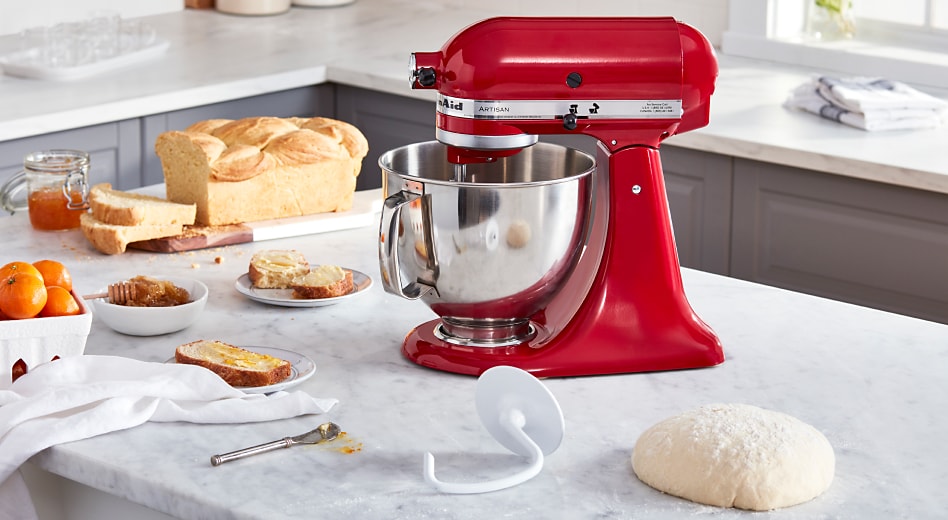
Your KitchenAid Mixer and Kneading
Your KitchenAid mixer is a powerful tool for kneading. It takes the hard work out of it. It saves your arms!
Choosing the Right Attachment
Always use the dough hook for bread dough. The dough hook is shaped to pull, push, and fold the dough. This motion mimics hand kneading. It is designed to work the dough. Other attachments like the flat beater are for cakes or cookies. They will not build gluten well. They can also damage your mixer.
Mixer Size and Capacity
KitchenAid mixers come in different sizes.
* Artisan (5-quart): Good for most home bakers. It can handle up to 4-6 cups of flour. This is enough for one large loaf. Or two small loaves.
* Professional (6-7 quart): These are bigger and more powerful. They can handle more dough. They are for larger batches. Check your mixer’s manual for its max capacity. Do not go over this limit. Overloading can burn out the motor. It can also make your KitchenAid kneading duration longer as the mixer struggles.
Proper Mixer Speed Settings
For most bread doughs, use Speed 2. This is very important.
- Speed 1: Use this to mix ingredients at the start. It brings the dough together. The dough will look rough. It will be shaggy. This usually takes 1 to 2 minutes.
- Speed 2: This is the optimal kneading speed KitchenAid suggests. It is gentle enough not to overwork the motor. It is also fast enough to build gluten well. This speed creates the right action for gluten to form. It should be used for the main kneading time.
- Higher Speeds: Do not use speeds higher than 2 for kneading bread dough. High speeds can:
- Burn out your mixer’s motor. This is especially true for thicker doughs.
- Overheat the dough. Hot dough can harm yeast. It can also damage the gluten structure.
- Make the dough climb the hook too much. This means you have to stop and push it down often.
How to Tell When Dough is Ready
Knowing when your dough is kneaded enough is key. Do not just rely on time. Look and feel the dough. These are the best signs.
Visual Cues
- Smooth Surface: Well-kneaded dough looks smooth. It is not rough or shaggy anymore. It should have a soft sheen.
- Elasticity: It should spring back slowly when you press it with a finger. It should not feel dense or stiff. If it stays indented, it needs more work.
- Clean Bowl: The dough should pull away from the sides of the bowl. It should gather around the dough hook. Some sticky dough KitchenAid mixer users see at first is fine. But it should clean the bowl later. The bottom of the bowl might have a little film. That is okay.
The Windowpane Test
This is the best test for gluten development stand mixer dough. It truly shows if the gluten is strong.
- Take a small piece of dough. It should be about the size of a golf ball.
- Gently stretch it with your fingers. Use both hands. Stretch from the center outwards.
- Stretch it until it is thin enough to see light through it. Try to make it like a very thin piece of chewing gum.
- If it stretches thin without tearing, it is ready. It should look like a small windowpane. You should be able to see your fingers through it.
- If it tears quickly, it needs more kneading. This means under-kneaded bread dough mixer users often see.
Example Windowpane Test Guide
| Dough State | Look / Feel | Windowpane Test Result | Action Needed |
|---|---|---|---|
| Just Mixed | Shaggy, uneven, very sticky. Many dry bits of flour. Does not hold shape. | Tears immediately, very thick. Cannot stretch at all. | Start kneading. |
| Partially Kneaded | Still a bit rough. May stick to sides of the bowl. Looks lumpy. | Stretches a little, then tears quickly. Only pulls a short way. | Continue kneading. It is building strength. |
| Well-Kneaded | Smooth, elastic, pulls cleanly from bowl. Soft and springy. Has a gentle sheen. | Stretches thin enough to see light through. Does not tear easily. Holds its shape. | Ready for proofing. Stop kneading. |
| Over-Kneaded | Loose, possibly wet. Might tear easily even after being initially stiff. Feels lifeless. | Tears quickly. May become sloppy or lose structure if severe. May feel hot. | No more kneading. Let the dough rest. Try to save it or start over (rare with home mixers). |
Common Kneading Mistakes and How to Fix Them
Two common issues are over-kneading and under-kneading. Both affect your bread in big ways.
Over-Kneading Dough KitchenAid
It is very hard to over-knead dough in a home KitchenAid mixer. These mixers are not as strong as commercial ones. They tend to warm up or strain first. But it can happen if you are not careful.
- Signs: The dough might become very stiff at first. Then, it might suddenly become soft and sticky. It might even look sloppy. It might tear easily when you stretch it. It loses its elasticity. It might feel warm or even hot to the touch. It may not hold its shape well.
- Causes: Kneading for too long. Using too high a speed for too long.
- Effects on Bread: Bread made from over-kneaded dough can be tough or dense. It might not rise well. It could have a strange, crumbly texture, even though it feels stiff. The crust might be very hard.
- Fixing It: If you think you have over-kneaded, stop immediately. Do not knead more. Let the dough rest for 10-20 minutes at room temperature. This allows gluten to relax. Sometimes, you can save it. You might try to gently fold it a few times. But if it is too far gone and just tears apart, you may need to start fresh. Over-kneading is less common than under-kneading for home bakers.
Under-Kneaded Bread Dough Mixer
This is much more common for home bakers. Many new bakers stop kneading too soon.
- Signs: The dough looks shaggy and rough. It is very sticky. It does not pull away from the bowl. It does not pass the windowpane test. It feels heavy and dense. It has no elasticity. It might just rip when you try to stretch it.
- Causes: Not kneading long enough. Not using the right speed. Not allowing the flour to fully hydrate.
- Effects on Bread: Bread made from under-kneaded dough will be dense. It will have a tight crumb (small, uneven holes). It will not rise well. It can be hard or crumbly. The flavor might not be as rich. It might be stale quickly.
- Fixing It: Just keep kneading! Add a minute or two more. Check it again with the windowpane test. Repeat until it looks and feels right. Do not add more flour unless the dough is excessively wet. More kneading often solves the problem.
Adjusting Kneading for Different Doughs
Not all doughs are the same. Yeast dough kneading time KitchenAid will vary a lot. You need to know what to expect.
Lean Doughs (e.g., French Bread, Ciabatta, Sourdough)
- Makeup: These doughs are simple. They contain flour, water, yeast (or sourdough starter), and salt. They have no fat, sugar, or eggs.
- Kneading: They often need longer kneading. This is to build very strong gluten. This strong gluten gives them their chewy crust and open, airy interior. Ciabatta dough is often very wet. It can take longer for a sticky dough KitchenAid mixer to handle. You might need to scrape down the sides more often. The dough might slap the sides of the bowl. This is normal for very wet dough. You might aim for 10-15 minutes of kneading.
Enriched Doughs (e.g., Brioche, Challah, Dinner Rolls, Cinnamon Buns)
- Makeup: These doughs are “enriched.” They contain fat (butter, oil), sugar, eggs, and milk. These ingredients add richness and softness.
- Kneading: Fat and sugar can slow down gluten formation. They coat the proteins. This makes it harder for the gluten to link up. You might need to knead enriched doughs longer. A common technique is to add butter or fat slowly. Add it only after some initial kneading. This helps gluten form first. For example, knead for 5-7 minutes. Then add softened butter one piece at a time. Then knead for another 5-10 minutes. The dough will become smooth and elastic. It will be very soft.
Whole Wheat Doughs
- Makeup: These doughs use whole wheat flour. Whole wheat flour contains bran and germ. White flour does not.
- Kneading: The sharp bits of bran and germ can cut gluten strands. This makes it harder to build a strong network. Whole wheat dough needs more kneading. Sometimes, a “rest period” helps. This is called an “autolyse.” Mix the flour and water only. Let it rest for 20-30 minutes. This allows the flour to absorb water fully. It helps gluten start to form. Then add yeast and salt. Knead for 8-12 minutes. The dough might still feel a bit denser than white dough.
Pizza Dough
- Makeup: Pizza dough can be lean or slightly enriched with olive oil.
- Kneading: Pizza dough needs good gluten for a chewy crust. Knead for 5-8 minutes. It should be smooth and elastic.
Steps for Optimal Kneading with Your KitchenAid
Follow these steps for the best results every time.
1. Measure Ingredients Precisely
Use a kitchen scale for flour and water. This is much more accurate than using cups. Small changes in ingredients greatly affect dough consistency. They also impact KitchenAid kneading duration. Too much flour makes dough stiff. Too much water makes it sticky. Precision helps you get it right.
2. Initial Mixing (Speed 1)
- Attach the dough hook to your mixer.
- Add all liquid ingredients to the bowl first. Then add dry ingredients on top. Keep yeast and salt separate at first.
- Start the mixer on Speed 1. Mix until no dry flour remains. This usually takes 1-2 minutes.
- The dough will look shaggy. It will be rough. It might still stick to the bowl. It is just starting to come together.
- Scrape down the sides of the bowl if needed. Use a rubber spatula. This makes sure all ingredients get mixed.
3. Kneading Phase (Speed 2)
- After initial mixing, increase the speed to Speed 2.
- Knead for the suggested recipe time, often 6-10 minutes. But more importantly, watch your dough. The time is a guide. The dough’s feel is the real test.
- The dough should start to pull away from the sides of the bowl. It should mostly stick to the dough hook. It might slap the sides a bit. This is a good sign.
- The dough will become smoother and more elastic as it kneads. It will look less shaggy.
- Occasionally, stop the mixer. Use a spatula to push down any dough that climbs the hook. This ensures even kneading.
4. Checking for Doneness (Visual and Windowpane Test)
- After the initial 6 minutes, stop the mixer.
- Observe the dough. Is it smooth? Does it pull cleanly from the bowl? Does it spring back?
- Then, perform the windowpane test. Take a small piece of dough. Gently stretch it until it is very thin.
- If it is ready, move on to the next step (proofing). If not, knead for 1-2 more minutes. Then check again.
- Repeat until the dough passes the test. Remember, stand mixer bread dough consistency is key. It should feel alive.
5. Oiling the Bowl (Optional)
- Some bakers lightly oil the bowl before kneading. This can prevent dough from sticking. It also makes cleanup easier.
- You can also lightly oil the dough itself. This is done before the first rise. It stops a crust from forming on top. This crust can make the dough not rise well.
Troubleshooting Common Issues
Even with the best plan, issues can pop up. Do not worry. Many problems have simple fixes.
Sticky Dough KitchenAid Mixer
Your dough is sticking to the bowl and hook too much. It is hard to work with.
- Possible Causes: Too much water in the recipe. Not enough flour. Not kneaded enough. Sometimes, the flour itself absorbs less water.
- Solutions:
- Add Flour, Spoon by Spoon: If the dough is truly too wet, add a tablespoon of flour at a time. Let it mix in completely. Wait 30 seconds to a minute. See if the dough pulls away. Do not add too much flour too quickly. This can make the dough stiff.
- Knead Longer: Often, sticky dough just needs more kneading. As gluten develops, the dough becomes less sticky. It gets stronger. It tightens up. Give it another 2-3 minutes of kneading. Then re-evaluate.
- Rest It: Sometimes, a short rest (5-10 minutes) helps. This is called an autolyse or simply resting. It lets the flour fully hydrate. This can make the dough less sticky. Then knead again.
Dough Climbing the Hook
This means the dough wraps around the dough hook and climbs up the shaft. It gets stuck.
- Possible Causes: Too much dough for your mixer’s size. Dough is too stiff. Not enough kneading (dough is not strong enough yet to stay put).
- Solutions:
- Reduce Batch Size: If it happens often, make a smaller batch next time. Your mixer might be too small for the recipe’s amount of flour. Check your mixer’s manual for its maximum capacity.
- Add a Little Water: If the dough is too stiff, add a tiny bit of water (1/2 teaspoon at a time). This makes it a bit softer. It makes it easier for the hook to work it.
- Scrape Down: Stop the mixer. Use a spatula to push the dough back down into the bowl. Then resume kneading. You might need to do this a few times.
Mixer is Straining or Overheating
Your KitchenAid should not struggle or get hot while kneading. If it does, stop.
- Possible Causes: Too much dough for the mixer’s capacity. Dough is too stiff (too little water). Using too high a speed for kneading. An old or worn mixer that needs maintenance.
- Solutions:
- Check Max Capacity: Never exceed your mixer’s stated capacity. This is usually listed in your manual. For most KitchenAids, it is about 4-6 cups of flour for heavy doughs.
- Use Speed 2 ONLY: Stick to Speed 2 for kneading bread dough. Higher speeds are for lighter tasks.
- Reduce Dough Hydration: If a recipe always makes your mixer struggle, try reducing water by a tablespoon or two next time. A slightly stiffer dough is better than a burnt-out mixer.
- Give it a Break: If it feels hot, turn it off. Let it cool down for 15-30 minutes before continuing. This prevents damage to the motor.
- Consider a Stronger Mixer: If you bake large batches often, a professional series KitchenAid might be a better fit.
Taking Care of Your KitchenAid Mixer
Proper care helps your mixer last longer. It also ensures it performs best for KitchenAid kneading duration.
Clean After Each Use
Remove the dough hook right away. Clean it and the bowl with warm, soapy water. Use a soft cloth. Wipe down the mixer body with a damp cloth. Never use harsh cleaners. Dry all parts well.
Do Not Submerge
Never put the mixer base in water. This can damage the motor and electrical parts. It can ruin your mixer.
Listen to Your Mixer
If it sounds like it is struggling, grinding, or smells hot, stop. Let it rest. This prevents damage. Your mixer tells you when it is unhappy.
Lubricate (If Applicable)
Some older KitchenAid models might need lubrication. Check your manual. Modern ones usually do not need this for home use.
Summary of Key Kneading Points
| Factor | Impact on Kneading | KitchenAid Best Practice |
|---|---|---|
| Flour Type | Higher protein = quicker gluten development. Bran/Germ = slower gluten. | Adjust KitchenAid kneading duration based on flour. |
| Dough Hydration | Wetter dough = faster gluten (but sticky). Stiffer = slower gluten. | Monitor stand mixer bread dough consistency. Add flour/water by spoon if needed. |
| Mixer Speed | Too high = motor strain, dough overheating. Too low = weak gluten. | Always use Speed 2 for kneading. Use Speed 1 for initial mix. |
| Kneading Time | General 6-10 minutes, but depends on dough and feel. | Use visual cues (smooth, elastic) and the windowpane test KitchenAid mixer method. |
| Dough Consistency | Aim for smooth, elastic dough that cleans the bowl. | Adjust time, add small amounts of flour/water if needed. |
| Gluten Development | Essential for rise and texture. | Achieved by proper KitchenAid kneading duration and optimal kneading speed KitchenAid. |
Conclusion
Kneading bread dough in your KitchenAid mixer is a rewarding task. It takes much of the effort out of bread making. Remember, the 6 to 10 minute KitchenAid kneading duration is a guide. It is a starting point. The real sign of readiness is how the dough looks and feels. Pay attention to its stand mixer bread dough consistency. Use the windowpane test KitchenAid mixer method. With practice, you will know when your dough is perfectly kneaded. This will lead to delicious homemade bread every time. Happy baking!
Frequently Asked Questions (FAQ)
Q1: Can I knead dough for too long in a KitchenAid mixer?
A1: It is hard to over-knead dough in a standard home KitchenAid mixer. These mixers usually stop before serious damage. But kneading too long can make the dough tough. It can also make it lose its elastic feel. Stick to the 6-10 minute guide and the windowpane test to avoid this.
Q2: What speed should I use for kneading dough on my KitchenAid?
A2: Always use Speed 2 for kneading bread dough. This is the optimal kneading speed KitchenAid recommends for bread. Speed 1 is for initial mixing of ingredients. Higher speeds can strain the motor and overheat the dough.
Q3: My dough is too sticky in the KitchenAid. What should I do?
A3: First, check if you have kneaded long enough. Often, sticky dough just needs more time to build gluten. It will become less sticky as it strengthens. If it is still too sticky after 8-10 minutes, add flour one tablespoon at a time. Mix well after each addition until the dough pulls away.
Q4: How do I know if my dough is kneaded enough without the windowpane test?
A4: Look for these signs: The dough should be smooth and elastic. It should pull away cleanly from the sides of the bowl. It should gather mostly around the dough hook. It should spring back when you poke it lightly with your finger.
Q5: Can I knead whole wheat dough for the same time as white dough?
A5: Whole wheat dough often needs more kneading time. The bran and germ in whole wheat flour can hinder gluten development. Expect to knead it a bit longer. You might also try a short rest (autolyse) before adding salt and yeast. This helps hydration.
Q6: Why does my dough climb up the dough hook?
A6: Dough climbing the hook can mean it is too stiff, or you have too much dough in the mixer. Try adding a tiny bit of water (1/2 teaspoon at a time). Or, if it keeps happening, reduce your batch size for future loaves. Always scrape it down with a spatula.
Q7: How important is gluten development stand mixer style?
A7: Gluten development is very important. It is what gives bread its structure and texture. Without enough gluten development stand mixer dough will not rise well. It will be dense and crumbly. Your stand mixer is excellent for this process.
Q8: What if my yeast dough kneading time KitchenAid feels off?
A8: The yeast dough kneading time KitchenAid suggests (6-10 minutes) is a general guide. Factors like flour type, hydration, and room temperature change it. Always go by how the dough looks and feels. The windowpane test is your best friend.