
Image Source: i.ytimg.com
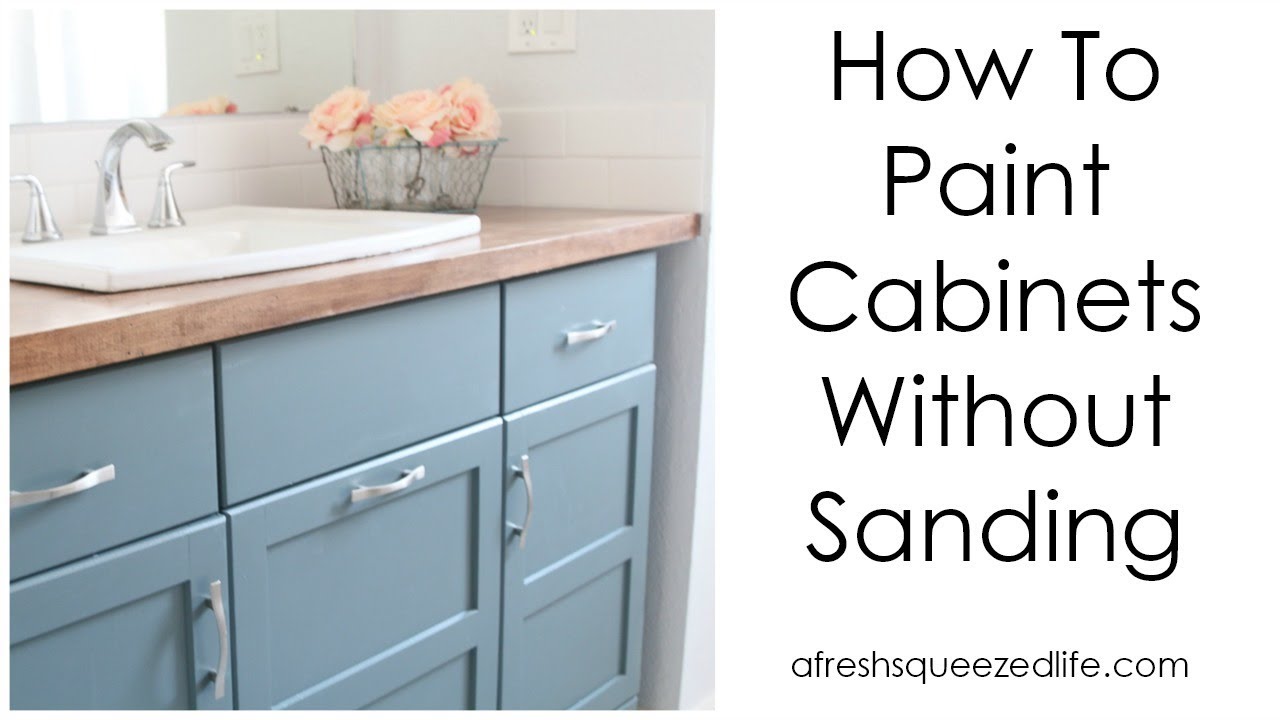
How To: Can You Paint Kitchen Cabinets Without Sanding?
Yes, you can paint kitchen cabinets without sanding them, but it needs careful steps and the right products. This method saves you time and effort, letting you refresh your kitchen fast. The key is to clean well and use special primers and paints that stick to surfaces without roughing them up first.
Why Skip Sanding? The Benefits Explained
Painting kitchen cabinets is a big job. Sanding often seems like a must-do part. But many people look for ways to avoid it. Why? Here are the main reasons:
- Saves Time: Sanding takes many hours. Skipping it cuts down on project time a lot.
- Less Mess: Sanding makes a lot of dust. This dust gets everywhere. It sticks to walls, floors, and counters. No sanding means much less cleanup.
- Less Effort: Sanding is hard work. It can make your arms tired. Not sanding means an easier job for you.
- No Special Tools: You do not need a sander or special sanding paper. This saves money too.
- Good for Fragile Surfaces: Some cabinet types, like laminate, can be harmed by heavy sanding. No sanding protects them.
Even with these perks, painting without sanding needs its own rules. You cannot just slap on paint. The surface must be ready in other ways.
Fathoming Paint Adhesion Without Sanding
How can paint stick if you do not sand? Sanding helps paint stick by making the surface rough. This gives the paint something to grab onto. When you do not sand, you rely on chemicals in the paint. These chemicals help the paint bond. This is often called chemical adhesion.
Special primers and paints are made for this. They have strong sticking power. They can grab onto smooth, slick surfaces. Think of super glue. It does not need a rough surface to stick. These paints work in a similar way. They create a very strong bond with the cabinet material. This bond holds the paint on tight for a long time.
Crucial Steps: How to Prep Cabinets for Painting Without Sanding
Good prep is the most important part when you paint cabinets without sanding. If you skip this, your paint may peel or chip.
Step 1: Taking Off Hardware
First, take off all doors and drawers. Label them so you know where they go later. Take off all hinges, knobs, and pulls. Put them in bags. Label the bags too. This protects your hardware. It also makes painting much easier. You will get a smooth finish this way.
Step 2: Degreasing Kitchen Cabinets Before Painting
This step is very important. Kitchen cabinets get a lot of grease and food grime. This must be gone. Paint will not stick to grease. It will just slide off or peel later.
- Use a Strong Cleaner: A good cleaner for degreasing kitchen cabinets before painting is Trisodium Phosphate (TSP). You can find it at hardware stores. Mix it with water as the label says.
- Other Options: Heavy-duty kitchen degreasers also work well. Simple Green or similar brands are good choices. For natural options, a mix of vinegar and water, or dish soap and water, can help. But these might not be strong enough for very greasy cabinets.
- Wipe Down All Surfaces: Use a clean cloth. Wipe down every part of the cabinets. Do the fronts, backs, and sides. Get into all the corners and cracks.
- Rinse Well: After cleaning, use a clean, damp cloth to wipe off all cleaner residue. Any leftover cleaner can stop the paint from sticking.
- Dry Completely: Let the cabinets dry fully. This can take a few hours. Make sure no wet spots are left. You can use a fan to speed this up.
Step 3: Cleaning with a De-glosser
After degreasing, some people use a liquid de-glosser. This is like a chemical sander. It makes the shiny surface a bit dull. This helps the primer stick better. You do not rub it off. Just wipe it on, and let it work. It does not make dust. This is a good extra step for slick surfaces like laminate. Always wear gloves when using de-glosser.
Step 4: Fixing Imperfections
Even if you do not sand, you still need smooth cabinets. Look for scratches, dents, or holes. Use wood filler for wood cabinets. For laminate, use a suitable filler for that material. Let it dry. Then, gently smooth it with fine-grit sandpaper. This is very light sanding, just to make the filler smooth. It is not for roughing up the whole cabinet.
Step 5: Wiping Down Again
After any light sanding or filling, wipe the cabinets down one more time. Use a tack cloth. This cloth is sticky. It picks up all tiny dust bits. This makes sure your surface is perfectly clean and ready.
Step 6: Taping and Covering
Cover anything you do not want to paint. Use painter’s tape around edges, walls, and inside cabinet frames. Use drop cloths or plastic sheets to cover floors, counters, and appliances. This keeps paint from getting where it should not.
Picking Your Materials: Paint and Primer
Choosing the right paint and primer is key for painting cabinets without sanding. These products are made to stick without rough surfaces.
Best Primer for Cabinets Without Sanding
Primer is the most important part of this method. It is the glue that holds your new paint onto the old surface. Do not skip it.
- Bonding Primer for Kitchen Cabinets: This is your top choice. Bonding primer for kitchen cabinets is made to stick to very smooth, tough surfaces. It grabs onto laminate, old varnish, or even glass. Brands like Zinsser B-I-N Shellac-Base Primer or Kilz Adhesion are very popular. They dry fast and block stains.
- Shellac-Based Primers: These primers are very good at sticking to shiny surfaces. They also block stains and odors. They dry fast, often in under an hour. But they need mineral spirits for cleanup and have strong fumes. Make sure you have good air flow.
- Oil-Based Primers: These also stick well and block stains. They are durable. But they take longer to dry and need mineral spirits for cleanup. Fumes can be strong.
- Water-Based Primers (Acrylic Bonding Primers): Some water-based primers are made to bond well. They are easier to clean up and have fewer fumes. But check the label. Make sure it says “bonding primer” or “high adhesion.” Not all water-based primers are strong enough for this job.
- Self-Priming Cabinet Paint: Some paints claim to be “self-priming.” This means they have primer built into the paint. While convenient, for no-sanding cabinet projects, a separate, dedicated bonding primer is usually better. The primer layer is your main defense against peeling. A self-priming cabinet paint might work on already painted, dull surfaces, but for slick, un-sanded ones, a stand-alone primer is safer.
No-Sanding Cabinet Paint Choices
Once primed, you can use various paints.
- Cabinet-Specific Paints: Many brands make paints just for cabinets. These are often acrylic or enamel-based. They are made to be durable and resistant to chips. They often dry to a hard finish.
- Alkyd (Oil-Modified Water-Based) Paints: These paints give you the hardness of oil paint but clean up with water. They level out nicely, which means fewer brush marks. They are a great choice for a smooth, tough finish.
- Chalk Paint Kitchen Cabinets No Sanding: Chalk paint kitchen cabinets no sanding is a very popular option. Chalk paint sticks to almost anything without sanding or priming. It gives a matte, soft look. It is very easy to use. But chalk paint is porous. It needs a topcoat or wax to protect it from kitchen spills and wear. Without a strong topcoat, its cabinet paint durability no sanding would be low for kitchen use. For a kitchen, choose a strong water-based polycrylic or clear coat for protection.
- Acrylic Latex Enamel Paints: These paints are durable and clean up with water. Look for ones labeled “for trim and doors” or “cabinet paint.” They offer good chip resistance.
Table 1: Primer Options for No-Sanding Cabinets
| Primer Type | Pros | Cons | Best Use Case |
|---|---|---|---|
| Bonding Primer | Superior adhesion, blocks stains, fast dry | Strong fumes (shellac/oil), harder cleanup (shellac/oil) | Most recommended for slick, non-sanded surfaces |
| Shellac-Based | Excellent adhesion, fast-drying, stain-blocking | Strong fumes, needs denatured alcohol for cleanup | Best for very glossy surfaces, stain-blocking |
| Oil-Based | Good adhesion, durable, stain-blocking | Long drying time, strong fumes, needs mineral spirits for cleanup | Good for very worn or stained surfaces, durable finish |
| Water-Based (High-Adhesion) | Easy cleanup, low fumes, quicker dry time | Adhesion can vary, check label for “bonding” or “high adhesion” | For less challenging surfaces, or if fumes are a concern |
Step-by-Step Guide: Painting Cabinets Without Sanding
You have prepped your cabinets. You have your paint and primer. Now, let us paint!
Step 1: Priming Your Cabinets
Priming is not optional. It is the core of refinishing cabinets without sanding.
- Thin Coats: Apply a thin, even coat of your chosen bonding primer. Do not put it on too thick. This can cause drips and a lumpy finish. Thin coats dry faster and stick better.
- Tools: Use a good quality brush for details and corners. Use a small foam roller for flat surfaces. Foam rollers leave fewer marks.
- Drying Time: Let the primer dry completely. Follow the product instructions. This might be 1-2 hours or more. If you rush, the next coat might lift it.
- Second Coat (Optional but Recommended): For best results, apply a second thin coat of primer. This adds extra sticking power and gives a uniform base. Let it dry fully.
Step 2: Applying the First Paint Coat
- Stir Your Paint: Mix your paint well before you start. Do this throughout the painting process.
- Thin First Coat: Apply your first coat of paint thinly. Like primer, thin coats are better than thick ones. They dry faster and stick better. Thick coats can show brush marks.
- Even Coverage: Make sure the paint covers evenly. Do not let it pool in corners.
- Tools: Use the same brush and roller technique as with the primer.
Step 3: Drying Between Coats
This is a critical step for cabinet paint durability no sanding. Most paint problems come from not letting coats dry enough.
- Follow Directions: Read the paint can for drying times between coats. This can be 2-4 hours for latex paints, or much longer for oil-based.
- Test for Tackiness: Gently touch a hidden area. If it feels sticky, it is not ready. If it feels smooth and dry, you can add another coat.
- Patience is Key: Waiting patiently ensures each layer cures properly. This creates a strong, lasting finish.
Step 4: Applying More Paint Coats
Most cabinet projects need two or three coats of paint.
- Repeat Steps: Apply the second and third coats just like the first. Keep them thin and even.
- Light Sand (Optional): Some people choose to do a very light sanding with 220-grit sandpaper between paint coats. This is only to smooth out any tiny bumps or dust. It is not to rough up the surface. If you do this, wipe off all dust with a tack cloth before the next coat. This is not strictly necessary for “no sanding” but can make the finish smoother.
Step 5: Adding a Topcoat or Sealer (Highly Recommended)
For kitchen cabinets, a topcoat or sealer is almost always needed. This protects the paint from daily wear, water, and grease.
- Choose Wisely: A water-based polycrylic is a good choice. It is clear, durable, and does not yellow over time. Oil-based topcoats can yellow.
- Chalk Paint: If you used chalk paint kitchen cabinets no sanding, a topcoat is a must. Wax is an option, but for a kitchen, a polycrylic offers much better protection against water and food.
- Apply Thinly: Apply 2-3 thin coats of the topcoat. Let each coat dry fully as directed.
Step 6: Curing Time
This is the final, and often most overlooked, step. Curing is different from drying.
- Drying: The paint feels dry to the touch.
- Curing: The paint fully hardens and reaches its full strength. This can take weeks, not just hours or days.
- Be Gentle: During the curing period, be very careful with your cabinets. Avoid hard bumps or scrubbing. Let the paint fully harden. For example, don’t put heavy items on shelves or bang doors closed for a few weeks. This waiting period greatly affects the cabinet paint durability no sanding.
Special Cabinet Types: Painting Laminate Without Sanding
Painting laminate cabinets without sanding needs extra care. Laminate is very smooth and non-porous.
- Degreasing is Paramount: Laminate can hold onto grease even more. Make sure it is super clean.
- De-glosser: Using a liquid de-glosser is highly recommended for laminate. It creates a slightly tacky surface for the primer.
- Bonding Primer: A top-quality bonding primer is essential. It is the only way paint will stick long-term to laminate.
- Thin Coats: Apply thin coats of primer and paint. Thick coats are more likely to peel from laminate.
- Topcoat: Always use a durable topcoat on painted laminate for best protection.
Ensuring Cabinet Paint Durability No Sanding
The success of your no-sanding project depends on making it last. Here’s how to ensure cabinet paint durability no sanding:
- Thorough Cleaning and Degreasing: This cannot be stressed enough. Any dirt, grease, or grime will stop the primer and paint from sticking.
- High-Quality Bonding Primer: Invest in the best bonding primer you can find. It is the foundation.
- Proper Paint Choice: Use paints designed for high-traffic areas, like cabinet enamels or hybrid paints. For chalk paint, always use a strong, water-based topcoat.
- Thin, Even Coats: Multiple thin coats are always better than one thick coat. They dry and cure better, leading to a harder finish.
- Adequate Drying Time: Do not rush between coats. Let each layer dry completely.
- Full Curing Time: Give your cabinets weeks to fully cure before heavy use. The paint will get harder and stronger over this time.
- Protective Topcoat: Adding a clear topcoat shields the paint from scratches, moisture, and daily wear. This significantly boosts long-term durability.
- Gentle Cleaning: Once painted, clean your cabinets with mild soap and water. Harsh chemicals or abrasive scrubbers can damage the new finish.
Refinishing Cabinets Without Sanding: More Than Just Paint
Refinishing cabinets without sanding is a broader idea. It means giving your cabinets a new look without the dusty, hard work of sanding. This can include:
- Painting: As discussed, this is the main way.
- Adding New Hardware: Fresh knobs and pulls can change the look a lot.
- Changing Doors: Sometimes, people keep the cabinet boxes but replace just the doors. This is a bigger project but gives a very fresh look.
- Vinyl Wraps: Some choose to put a vinyl wrap on cabinets. This is like a giant sticker. It needs a very clean surface but no sanding.
- Decorative Finishes: Applying glazes or special techniques over paint can add depth without extra sanding.
The “no sanding” method makes all these ways of refinishing much easier. It lowers the barrier to updating your kitchen yourself.
Table 2: Pros and Cons of No-Sanding Cabinet Painting
| Aspect | Pros | Cons |
|---|---|---|
| Time | Much faster project completion | Long drying/curing times still needed |
| Effort | Less physical labor | Needs very thorough cleaning and careful prep |
| Mess | Nearly dust-free | Can still have paint drips if not careful |
| Cost | Saves on sanding supplies | Quality primers and paints can be costly |
| Durability | Good if done right with proper products | Poor if steps are rushed or products are wrong |
| Finish | Smooth, professional if careful | Brush marks possible with wrong tools/technique |
Troubleshooting Common Issues
Even with the best plans, problems can pop up.
Peeling Paint
- Cause: Often, the surface was not clean enough, or the primer did not bond well. Not letting coats dry fully can also lead to peeling.
- Fix: Scrape off peeling areas. Re-clean and re-prime those spots. Then re-paint. Make sure to let each coat dry completely.
Brush Marks or Roller Texture
- Cause: Using the wrong type of brush or roller, applying paint too thickly, or paint drying too fast.
- Fix: Use a good quality synthetic brush for water-based paints. Use a foam roller for flat areas. Apply thinner coats. If the paint dries too fast, you can add a paint extender (flow improver) to slow down drying.
Uneven Finish or Streaks
- Cause: Not stirring paint enough, uneven application, or not enough coats.
- Fix: Stir paint well. Apply thin, even coats. Make sure to apply enough coats (usually 2-3) to get full coverage.
Cost and Time Estimate
Cost:
The cost will vary a lot. This depends on the size of your kitchen, the type of paint, and the brand.
* Primer: $30 – $60 per quart/gallon.
* Paint: $50 – $100 per gallon (for good quality cabinet paint).
* Topcoat: $30 – $50 per quart/gallon.
* Cleaning Supplies: $10 – $20 (TSP, degreaser, rags).
* Tools: $20 – $50 (brushes, rollers, tape, drop cloths).
* Total (Average Kitchen): Expect to spend $200 – $500 on materials. This is much less than hiring a pro or buying new cabinets.
Time:
While it saves on sanding, painting still takes time due to drying and curing.
* Prep (Cleaning, Taping, etc.): 1-2 days
* Priming (2 coats with drying): 1 day
* Painting (2-3 coats with drying): 2-3 days
* Topcoat (2-3 coats with drying): 1-2 days
* Curing Time (Gentle Use): 2-4 weeks (actual full cure can be longer)
You can complete the active painting steps in about 4-7 days of work. But remember, the full curing time is critical for durability.
Conclusion
Painting kitchen cabinets without sanding is a real option. It offers a way to refresh your kitchen without the mess and hard work of sanding. The secret lies in a very clean surface, a high-quality bonding primer, and choosing the right paint. Follow the steps carefully, especially the cleaning and drying times. With patience and good products, you can achieve a durable, beautiful finish that lasts. Your kitchen will look new, and you will be proud of your work.
Frequently Asked Questions (FAQ)
Q1: What is the best no-sanding cabinet paint?
A1: The best no-sanding cabinet paint is often a high-quality acrylic enamel or a hybrid alkyd paint. These are made for toughness. Chalk paint also works without sanding, but it needs a strong topcoat for kitchen use.
Q2: Can I paint over old, chipping paint without sanding?
A2: No. If the old paint is chipping or peeling, you must scrape off all loose paint. Then, smooth the edges. You might need to do some light sanding in these areas. Then, clean and prime. A truly no-sanding method only works if the old finish is sound and stuck down well.
Q3: How long does cabinet paint durability no sanding last?
A3: If done right, with proper prep, good primer, quality paint, and a topcoat, paint applied without sanding can last many years. It can last as long as paint applied with sanding. The key is how well the bonding primer sticks.
Q4: Do I need a topcoat for cabinet paint durability no sanding?
A4: Yes, for kitchen cabinets, a topcoat is highly recommended. It adds a layer of protection against daily wear, water, and grease. Especially if you used chalk paint, a durable topcoat is a must for the kitchen.
Q5: Can I use regular house paint on cabinets without sanding?
A5: Regular wall paint is not tough enough for cabinets. Cabinets see a lot of use and bumps. You need paint made for cabinets or trim. These paints are harder and more resistant to chips. Always use a good bonding primer under any paint if you skip sanding.