
Image Source: hgtvhome.sndimg.com
Can You Spray Paint Kitchen Cabinets: Your Ultimate Guide
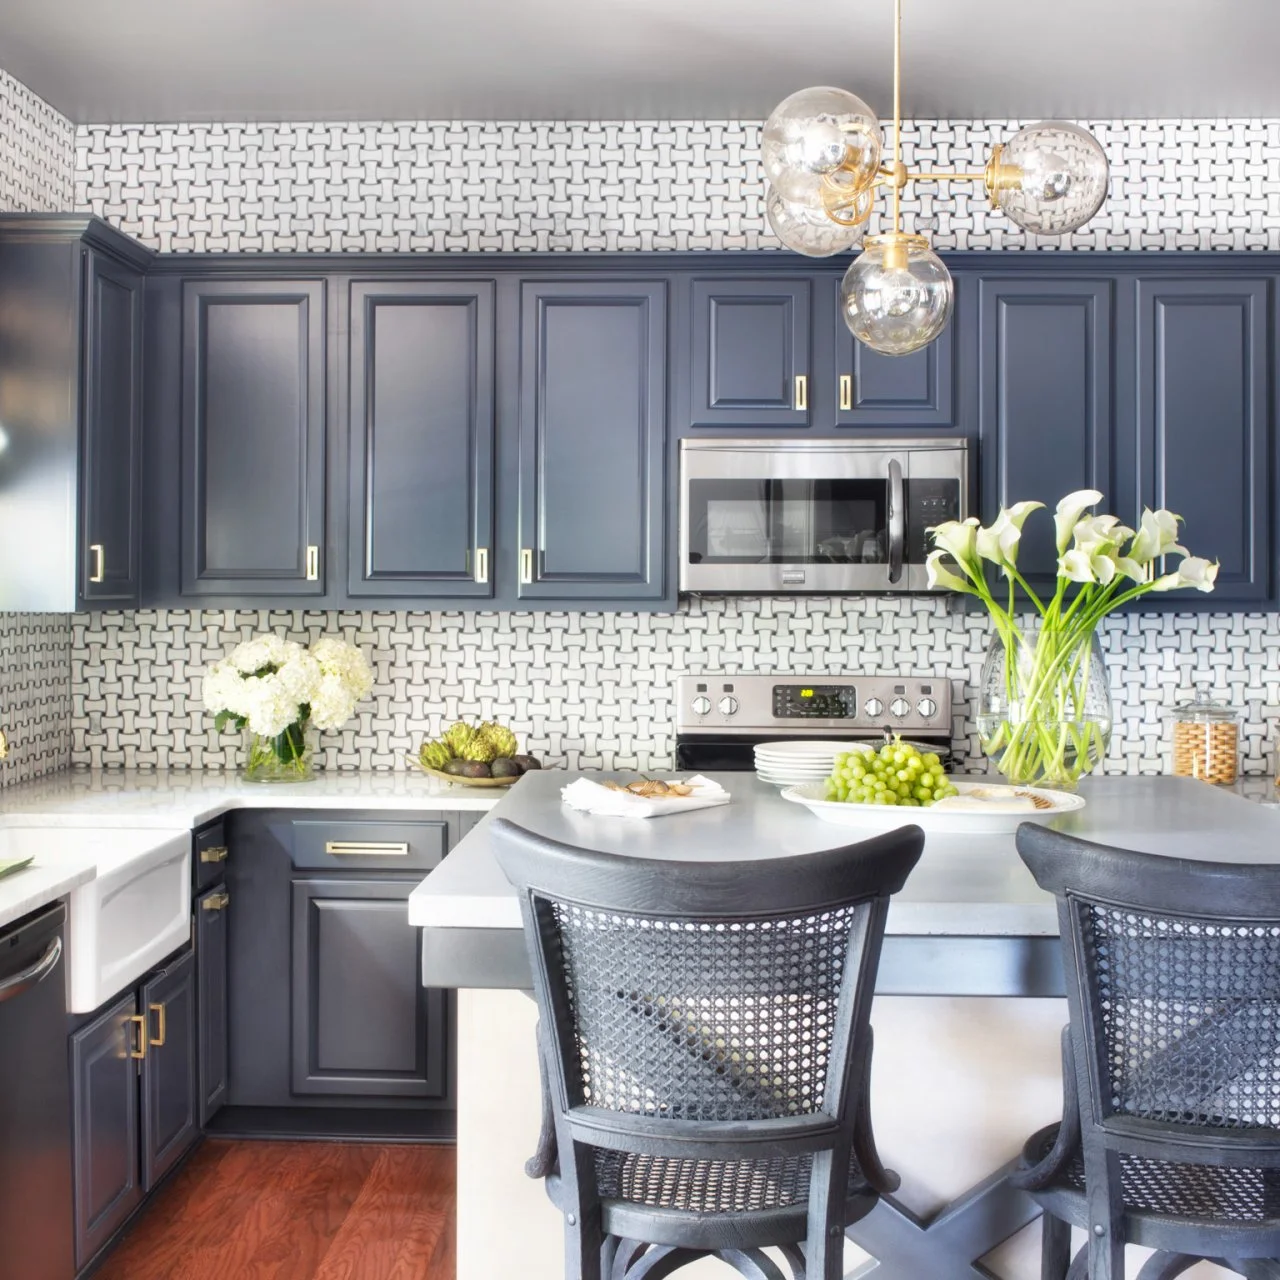
Yes, you can spray paint kitchen cabinets. It is a great way to give your kitchen a new look without spending a lot of money. This method offers a smooth, factory-like finish. You can also spray paint laminate cabinets, but they need special preparation. Doing it right takes time and careful steps. This guide will show you how to get a great result.
Why Spray Painting Your Cabinets is a Good Idea
Spray painting your kitchen cabinets has many good points. It can change your kitchen a lot. It costs less than buying new cabinets. It gives a very smooth finish. This makes your cabinets look like they just came from a shop.
h4 Benefits of a Smooth Finish
When you use a spray painter, the paint goes on very evenly. You will not see brush marks or roller textures. This gives your cabinets a clean, modern look. A smooth finish also makes them easier to clean. Dirt does not get stuck in brush lines.
h4 Saving Money
New kitchen cabinets can cost a lot of money. Spray painting your old ones costs much less. You pay for paint, tools, and a bit of your time. This can save you thousands of dollars. It is a smart choice for people on a budget.
h4 Quick Change
Once you have done the hard work of getting ready, the painting goes fast. Spraying paint is quicker than painting by hand. This means your kitchen will be back to normal sooner. You can enjoy your new kitchen faster.
Things to Think About Before You Start
While spray painting is good, it has some things you need to think about. It needs a lot of preparation. It can be messy. And it needs the right tools. Knowing these things helps you decide if it is right for you.
h4 The Need for Good Prep Work
Getting your cabinets ready is the most important part. If you do not clean and sand well, the paint will not stick. It might peel or chip later. This prep work takes more time than the actual painting. Many people do not do enough prep, and their paint job does not last.
h4 Mess and Safety
Spray painting creates a fine mist of paint. This mist can go everywhere. You need to cover everything you do not want painted. This means floors, counters, walls, and appliances. You also need good air flow. Paint fumes can be bad for your health. Wear a mask to keep yourself safe.
h4 Getting the Right Tools
To get that smooth finish, you often need a special paint sprayer. These can cost money. You also need good quality paint and primer. If you only use spray cans, it can be hard to get an even coat. It can also cost more for a big job.
Getting Ready: Key Steps for a Great Finish
Preparation for spray painting cabinets is very important. It is the secret to a long-lasting and beautiful finish. Do not skip any of these steps. They help the paint stick and look its best.
h4 Step 1: Taking Cabinets Apart
First, take off all doors and drawer fronts. Label each one as you go. This helps you put them back in the right place later. Also, take off all hinges and handles. Put these small parts in bags so you do not lose them.
h4 Step 2: Cleaning Well
Grease and dirt build up on kitchen cabinets. You need to clean them very well. Use a strong cleaner that cuts through grease. A common choice is TSP (Trisodium Phosphate) or a good degreaser. Mix it with water. Wipe down every part of the cabinets and doors. Rinse them with clean water. Let them dry completely. Any oil or dirt left will stop the paint from sticking.
h4 Step 3: Fixing Damage
Look for any dents, scratches, or holes. Fill these with wood filler. Use a putty knife to smooth it out. Let the filler dry fully. Then sand it smooth. If you have any gaps between cabinet frames and walls, fill them with paintable caulk. Smooth the caulk with a wet finger.
h4 Step 4: Sanding Surfaces
Sanding helps the paint stick better. It makes the surface rough enough for the primer. Use a fine-grit sandpaper, like 180 or 220 grit. Lightly sand all surfaces you will paint. You do not need to take off all the old finish. Just rough it up. If cabinets are shiny, sanding dulls them. After sanding, wipe away all dust with a tack cloth or a damp cloth. A sticky tack cloth is best for picking up fine dust.
h4 Step 5: Priming for Success
Applying primer is a must. Primer helps the paint stick. It also blocks stains from coming through. It gives a uniform base color. Choose a primer that works with your paint type. For slick surfaces or laminate, use a bonding primer. For wood, an oil-based or shellac-based primer works well. Apply one or two thin coats. Let each coat dry fully as the label says. Lightly sand again after the primer dries if it feels rough. Then clean off the dust.
h4 Step 6: Protecting Your Space
This is where you make sure paint only goes where you want it. Cover your floors with drop cloths. Use plastic sheeting to cover counters, appliances, and walls. Tape off edges where cabinets meet walls or ceilings with painter’s tape. Make sure the tape is pressed down firmly. This keeps paint lines clean and sharp. If you are spraying inside, seal off the kitchen from the rest of your house. Use plastic sheeting and tape over doorways.
Picking the Right Paint
Choosing the best spray paint for kitchen cabinets is key. The right paint will look good and last a long time. There are different types of paint and finishes to pick from.
h4 Paint Types to Consider
- Latex (Water-Based) Paint: This paint is easy to clean up with water. It dries fast and has low fumes. Newer latex paints are very durable. They are a good choice for kitchen cabinets. Look for cabinet-grade latex paints.
- Oil-Based (Alkyd) Paint: Oil-based paints are very durable. They give a hard, smooth finish. They are good for high-use areas like kitchens. But they take longer to dry. They also have strong fumes and need mineral spirits for clean-up.
- Water-Based Alkyd Paint: This is a mix of latex and oil-based paint. It offers the easy clean-up of latex with the hard finish of alkyd. Many people like this type for cabinets. It often dries to a very hard surface.
- Lacquer Paint: Lacquer gives a very smooth and durable finish. It dries very fast. But it has very strong fumes and is best for pro painters. It needs special spray equipment. It is not often used for DIY projects at home.
h4 Finish Options
The finish is how shiny the paint looks when dry.
* Satin: This finish has a slight shine. It is easy to clean and hides small flaws. It is a popular choice for cabinets.
* Semi-Gloss: This finish is shinier than satin. It is very durable and easy to wipe clean. It shows flaws more than satin.
* Gloss: This is the shiniest finish. It is very durable and easy to clean. But it shows every tiny flaw or bump on the surface. It can look very modern.
For kitchen cabinets, a satin or semi-gloss finish is usually best. They are durable, easy to clean, and hide small marks better than a full gloss.
Tools You Will Need for Spray Painting
You can use spray cans or a paint sprayer machine. Both have their pros and cons.
h4 Using Spray Cans
Spray cans are good for small jobs or touch-ups. They are easy to use and do not need extra cleaning.
* Pros: Easy to use, no clean-up of a sprayer, good for small parts.
* Cons: Can be expensive for a whole kitchen, hard to get an even coat on large surfaces, limited paint color choices. You often need many cans.
h4 Using a Paint Sprayer
For a whole kitchen, a paint sprayer gives the best results. It makes the paint go on very smooth and even.
h5 Types of Paint Sprayers
- HVLP (High Volume Low Pressure) Sprayer: This sprayer uses a lot of air at low pressure. It gives a very fine spray. This means less overspray (paint mist going everywhere). It is great for getting a smooth finish on cabinets. It is good for thinner paints.
- Airless Sprayer Kitchen Cabinets: An airless sprayer uses high pressure to push paint through a small tip. It sprays paint very fast. It is good for thick paints and large areas. It can give a very smooth finish. It produces more overspray than an HVLP. If you use an airless sprayer for kitchen cabinets, make sure to get a fine-finish tip. This helps you control the amount of paint.
Consider renting a good quality sprayer if you do not want to buy one. This saves money and gives you a better tool for the job.
How to Spray Paint Kitchen Cabinets Professionally
Following these steps will help you get a finish that looks like a pro did it.
h4 Setting Up Your Spray Area
Set up a clean, dust-free space. A garage or a spare room works well. Hang the cabinet doors and drawer fronts from hooks or set them on sawhorses. Make sure they are not touching anything. This lets you spray all sides evenly. Make sure you have good lighting. You need to see where the paint is going.
h4 Applying the Paint
Always wear a mask, safety glasses, and gloves. Ensure good airflow. Open windows or use fans to move air out.
h5 Test First
Before you spray your cabinets, test the sprayer. Use a piece of cardboard or scrap wood. Adjust the sprayer’s settings. Look for an even spray pattern. Change the pressure or fan width until you are happy.
h5 First Coats
Start spraying with thin coats. It is always better to do many thin coats than one thick one. Thick coats can run or drip.
* Keep a steady hand: Hold the sprayer about 6-10 inches from the surface. Move it smoothly from side to side. Overlap each pass by about 50%.
* Avoid drips: Do not stop spraying while over the cabinet surface. Start spraying before you reach the edge and stop after you pass it.
* Edges first: Some pros like to spray the edges of the cabinet doors first. Then spray the flat surfaces. This ensures good coverage on all parts.
* Backs then fronts: Spray the back of the doors first. Let them dry. Then flip them over and spray the fronts. This way, if you make a mistake on the back, it is not seen.
h4 Kitchen Cabinet Spray Paint Drying Time
Drying time depends on the paint type, humidity, and temperature.
* Touch Dry: Most paints are “touch dry” in 1-4 hours. This means they are dry enough to touch without paint coming off.
* Recoat Time: The label will tell you how long to wait before adding another coat. This is usually 4-24 hours. Do not rush this step. If you paint too soon, the new coat can pull up the wet paint below.
* Full Cure Time: This is the most important time. Full cure means the paint has hardened completely. For kitchen cabinets, this can take 7 to 30 days. During this time, the paint is still hardening. Be gentle with your cabinets. Avoid hitting them or cleaning them too hard.
It is wise to wait at least 24-48 hours before putting doors and hardware back on. Give them a full week before heavy use. For full cure, wait even longer. This helps ensure the durability of spray painted kitchen cabinets.
How Long Will It Last?
Durability of spray painted kitchen cabinets is very good if you do the work right. A well-prepared and properly painted cabinet finish can last for 5-10 years or even more. It depends on how much you use your kitchen and how well you care for the cabinets.
h4 Factors Affecting Durability
- Preparation: This is the biggest factor. If you do not clean, sand, and prime well, the paint will not stick. It will chip or peel fast.
- Paint Quality: Use high-quality paint made for cabinets or trim. Cheap paint will not stand up to daily use.
- Number of Coats: More thin coats are better than fewer thick ones. They build up a strong, protective layer.
- Curing Time: Let the paint fully cure. If you put stress on the cabinets too soon, the paint will be soft. It will mark easily.
- Daily Use: Kitchen cabinets get a lot of use. Handles are touched often. Doors are opened and closed. High-traffic areas may show wear sooner.
- Cleaning: Use gentle cleaners. Harsh chemicals can damage the paint finish over time.
With good care, your spray-painted cabinets will look good for many years.
What Will It Cost?
The cost to spray paint kitchen cabinets can vary a lot. It depends on if you do it yourself or hire someone. It also depends on the size of your kitchen and the type of materials you use.
h4 DIY Cost
If you do it yourself, your costs will be for materials and tools.
* Paint and Primer: $100 – $300 (for an average kitchen).
* Sanding Supplies: $10 – $30 (sandpaper, tack cloths).
* Cleaning Supplies: $10 – $20 (TSP, degreaser).
* Protective Gear: $15 – $40 (mask, gloves, safety glasses).
* Painter’s Tape and Plastic Sheeting: $20 – $50.
* Spray Cans (if used): $10-$20 per can, can add up fast.
* Paint Sprayer: $100 – $500 (if you buy one), or $40-$100 per day to rent.
Total DIY Cost: Roughly $200 – $800, mostly for materials. If you buy a good sprayer, it could be $500 – $1000.
h4 Professional Cost
Hiring a pro painter costs more. But they have the skills, tools, and experience. They also clean up the mess.
* Cost Factors: Number of cabinets, level of prep needed, type of paint.
* Average Cost: For an average kitchen (20-30 linear feet of cabinets), professional spray painting can cost $1,500 – $5,000 or more. This price often includes all labor, materials, and clean-up.
Here is a simple table to compare costs:
| Item | DIY Estimated Cost (Average Kitchen) | Professional Estimated Cost (Average Kitchen) |
|---|---|---|
| Materials | $150 – $450 | Included in service |
| Tools | $0 – $500 (rent or buy sprayer) | Included in service |
| Labor | Your time | $1,500 – $5,000+ |
| Total Estimated Cost | $200 – $1,000 | $1,500 – $5,000+ |
Hiring a pro saves you time and effort. It also often gives a perfect finish. But doing it yourself saves a lot of money.
DIY Spray Painting Kitchen Cabinets Tips
If you decide to do it yourself, these tips will help you get the best results.
h4 Tip 1: Take Your Time
Do not rush any step, especially the prep work. A good paint job is 80% preparation and 20% painting. Rushing leads to mistakes and poor results.
h4 Tip 2: Many Thin Coats
Always spray many thin coats instead of one or two thick ones. This prevents drips and runs. It also makes the finish stronger and smoother.
h4 Tip 3: Practice Makes Perfect
If you are new to using a spray gun, practice first. Use large pieces of cardboard or scrap wood. Learn how to move the sprayer evenly. Get a feel for how fast to move it and how much paint to put on.
h4 Tip 4: Control Your Environment
- Temperature: Paint sprays best in moderate temperatures, around 60-80°F (15-27°C).
- Humidity: Low humidity is best. High humidity can make paint dry slowly or unevenly.
- Dust: Try to keep your spray area as dust-free as possible. Dust can settle on wet paint.
h4 Tip 5: Clean Your Sprayer Right Away
If you use a paint sprayer, clean it as soon as you finish. Paint can dry inside the sprayer very fast. This can ruin the sprayer. Follow the cleaning steps in your sprayer’s manual.
h4 Tip 6: Think About Lighting
Good light is important. It helps you see if you are getting even coverage. It helps you spot drips or missed spots before the paint dries.
h4 Tip 7: Consider Your Paint Choice
For DIYers, water-based alkyd paints are often a good choice. They clean up with water. They dry faster than oil-based paints. They still give a very hard, smooth finish.
Spray Painting Different Cabinet Types
You might wonder, can you spray paint laminate cabinets or other special types? The answer is usually yes, but with specific steps.
h4 Laminate Cabinets
Yes, you can spray paint laminate cabinets. Laminate surfaces are very smooth and non-porous. This means paint does not stick easily.
* Extra Prep: You must sand them well to create a surface for the primer to grip.
* Bonding Primer: Use a high-quality bonding primer. This type of primer is made to stick to slick surfaces like laminate, plastic, or metal. It creates a strong base for your paint.
* Thin Coats: Apply several very thin coats of paint. This helps prevent drips and ensures good adhesion.
With the right primer and careful prep, laminate cabinets can look just as good as wood ones after spraying.
h4 Wood Cabinets
Wood cabinets are generally easier to paint than laminate. But they still need good prep.
* Grain Filling: If your wood cabinets have a deep grain, you might want to use a grain filler. This fills the tiny grooves in the wood. It gives a super smooth finish. It is an extra step but makes the final look better.
* Knot Sealer: If you have natural wood cabinets, wood knots can bleed through paint. Use a knot-sealing primer on any knots before priming the whole surface.
h4 Previously Painted or Varnished Cabinets
If your cabinets already have paint or varnish, you can spray paint over them.
* Clean and Degrease: Always start with a thorough cleaning.
* Sanding: Lightly sand the old finish. This helps the new paint stick. You do not need to remove all the old paint. Just rough up the surface.
* Primer: A good primer will help bond the new paint to the old finish. It also helps cover the old color.
Wrapping It Up
Spray painting kitchen cabinets is a big job. But it can give you amazing results. It offers a smooth, new look for your kitchen. It costs less than buying new cabinets. The key to success is good preparation. Take your time with cleaning, sanding, and priming. Choose the best spray paint for kitchen cabinets. Use the right tools, like an airless sprayer for kitchen cabinets, if you can. Be patient with kitchen cabinet spray paint drying time and full curing. With careful work, your spray painted kitchen cabinets will look great and last a long time. They will feel like a brand new part of your home.
Frequently Asked Questions (FAQ)
h3 Q1: How long does it take to spray paint kitchen cabinets?
A1: The actual spraying takes a few hours for an average kitchen. But the total time is much longer. Preparing the cabinets (cleaning, sanding, priming) takes 1-3 days. Drying and recoating between coats takes 1-2 days. So, plan for about 3-5 days of active work. The paint also needs a full cure time of 7-30 days, where you need to be gentle with the cabinets.
h3 Q2: Do I need to remove my cabinets to spray paint them?
A2: You should remove the cabinet doors and drawer fronts. This allows you to paint all sides evenly and get a smooth finish. You can spray the cabinet frames (boxes) while they are still in place. Just make sure to cover everything around them very well.
h3 Q3: Can I spray paint my kitchen cabinets with regular spray cans?
A3: Yes, you can. But it is best for smaller kitchens or touch-ups. For a whole kitchen, it can be very costly because you need many cans. It is also harder to get a perfectly smooth, even finish on large surfaces with cans. A paint sprayer often gives better results for bigger jobs.
h3 Q4: What is the best temperature to spray paint cabinets?
A4: The best temperature range is usually between 60°F and 80°F (15°C to 27°C). Avoid painting in very cold or very hot weather. Extreme temperatures can affect how the paint sprays, dries, and cures. High humidity should also be avoided.
h3 Q5: How many coats of paint do I need?
A5: Most cabinet painting jobs need at least two to three thin coats of paint over a good primer. Some colors or paint types might need an extra coat. Always apply thin coats to prevent drips and ensure a smooth, durable finish.
h3 Q6: Can I use chalk paint for spray painting cabinets?
A6: Chalk paint can be spray painted. But it is not the most durable choice for kitchen cabinets. Kitchen cabinets get a lot of use. Chalk paint usually needs a top coat or wax for protection. A cabinet-specific paint (like a water-based alkyd) will give a much harder and more lasting finish for a busy kitchen.