
How long to knead dough in a KitchenAid? Generally, for most bread doughs, you’ll want to knead in your KitchenAid stand mixer for 5-10 minutes on a medium-low speed. For pizza dough, this can be slightly shorter, around 3-7 minutes.
Kneading dough is a foundational step in baking, transforming simple ingredients like flour, water, yeast, and salt into a pliable, elastic structure that gives bread its characteristic chew and rise. While hand-kneading is a time-honored tradition, a KitchenAid stand mixer can be a game-changer, especially for those who bake frequently or handle large batches. But how long do you actually need to knead in this powerful appliance? This comprehensive guide will demystify KitchenAid dough kneading time, helping you achieve perfect results every time.
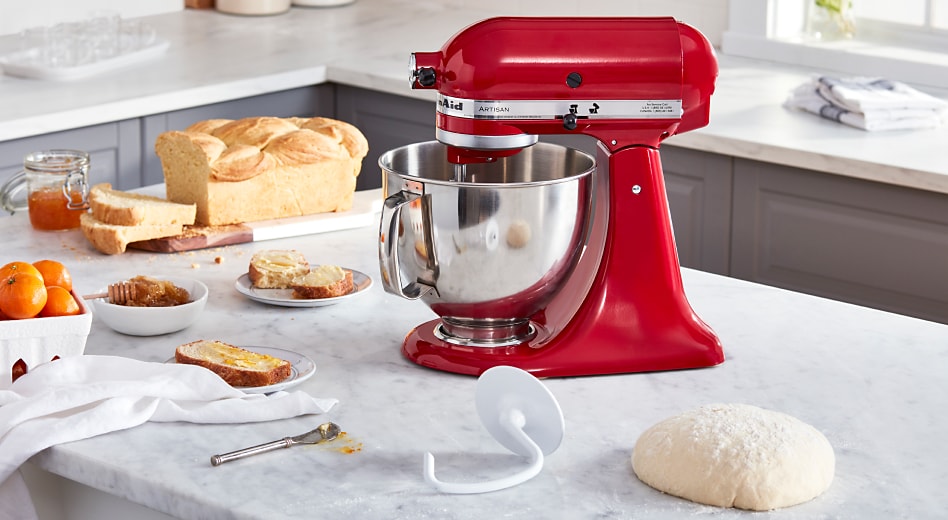
Image Source: www.kitchenaid.com
Deciphering Dough Kneading in a KitchenAid
The primary goal of kneading is to develop gluten. Gluten is a network of proteins formed when flour (specifically wheat flour) comes into contact with water and is then agitated. This network is what gives dough its elasticity and structure, trapping the gases produced by yeast and allowing the bread to rise.
The Science Behind Gluten Development
When you knead dough, you’re essentially stretching and aligning these gluten proteins. Initially, they are short and somewhat disorganized. As you knead, they link together, forming long, elastic strands. This process is crucial for a good bake.
- Initial Stage: The dough will be shaggy and sticky.
- Developing Stage: The dough starts to come together, becoming smoother and less sticky. Gluten strands are beginning to form.
- Final Stage: The dough becomes smooth, elastic, and passes the “windowpane test” (more on this later).
How Long to Knead Dough in a KitchenAid: Key Factors
The exact KitchenAid dough kneading time can vary depending on several factors:
- Type of Flour: High-protein flours (like bread flour) will develop gluten faster than all-purpose flour. Whole wheat flour can be a bit trickier as the bran and germ can interfere with gluten development, often requiring slightly longer kneading.
- Hydration Level: Wetter doughs (higher hydration) tend to be stickier and might take a bit longer to reach the desired elasticity.
- Ingredients: The presence of fats (like butter or oil) or sugars can coat the flour particles and slightly inhibit gluten development, sometimes requiring a bit more stand mixer dough kneading time.
- Mixer Speed: Using the correct speed is crucial.
Best KitchenAid Kneading Speed
KitchenAid mixers are powerful, and using too high a speed can actually be detrimental to your dough. For most bread and pizza doughs, the best KitchenAid kneading speed is typically speed 2 or 4.
- Speed 2: This is a gentler speed, often good for initial mixing and for doughs that are very sticky or have a high hydration. It allows the gluten to develop gradually without overheating the dough.
- Speed 4: This is a common go-to for most standard bread doughs. It provides enough agitation to effectively develop gluten within a reasonable bread dough KitchenAid duration.
Avoid using speeds higher than 4 for extended kneading. High speeds can overheat the motor and, more importantly, can overwork the gluten, leading to tough, dense bread.
How Long to Mix Dough in a KitchenAid for Different Breads
Let’s break down the time to develop gluten KitchenAid needs for common types of dough:
Bread Dough KitchenAid Duration
For a standard white or whole wheat bread loaf, aim for approximately 5-10 minutes on speed 2 or 4.
- Initial Mixing: Start by combining your ingredients on a low speed (speed 1 or 2) for about 1-2 minutes until a shaggy dough forms.
- Kneading: Switch to speed 2 or 4 and knead for 5-10 minutes. You’ll notice the dough transforming from a sticky mass to a smooth, elastic ball that pulls away from the sides of the bowl.
Pizza Dough KitchenAid Kneading
Pizza dough often benefits from slightly less kneading to maintain a tender crust. For most pizza dough recipes, 3-7 minutes on speed 2 or 4 is usually sufficient.
- Initial Mixing: Mix on speed 1 or 2 for 1-2 minutes until combined.
- Kneading: Knead on speed 2 or 4 for 3-7 minutes. The goal is a smooth, elastic dough that’s still pliable. Over-kneading pizza dough can make it tough and difficult to stretch.
Enriched Doughs (Brioche, Challah, Cinnamon Rolls)
Enriched doughs contain ingredients like eggs, butter, milk, and sugar, which can interfere with gluten development. They often require a bit more stand mixer dough kneading time.
- Initial Mixing: Combine ingredients on a low speed.
- Kneading: For enriched doughs, you might need 8-15 minutes on speed 2 or 4. The dough may remain slightly softer and stickier than lean doughs due to the fat content, but it should still become smooth and elastic.
Sourdough Dough KitchenAid Kneading
Sourdough can be a bit more delicate due to the wild yeast. The time to develop gluten KitchenAid needs for sourdough will depend heavily on the starter’s activity and the hydration of your dough.
- Initial Mixing/Autolyse: Many sourdough bakers perform an “autolyse” where flour and water are mixed and rested before adding the starter and salt.
- Kneading: After adding starter and salt, you might knead for 5-10 minutes on speed 2 or 4. Some bakers prefer to develop gluten through a series of folds during the bulk fermentation rather than solely relying on mixer time.
Judging When Your Dough is Ready
Knowing how long to knead is only part of the equation. The real skill lies in recognizing when your dough is perfectly kneaded. This is where the “windowpane test” comes in.
The Windowpane Test
This is the gold standard for checking gluten development:
- Take a small piece of dough.
- Gently stretch it between your fingers.
- If you can stretch it thin enough to see light through it without tearing, the gluten is well-developed.
If the dough tears easily, it needs more kneading. If it feels very stiff and resists stretching, you might be close to over-kneading.
Other Indicators of Well-Kneaded Dough:
- Smoothness: The dough should look smooth and feel pliable.
- Elasticity: It should spring back slowly when poked with a finger.
- Cleans the Bowl: The dough should primarily pull away from the sides of the mixer bowl. A little sticking at the very bottom is usually fine.
- Slightly Tacky but Not Sticky: The dough should feel slightly tacky to the touch but shouldn’t stick excessively to your fingers when you touch it.
Dough Kneading Tips KitchenAid Users Should Know
To get the most out of your KitchenAid, follow these dough kneading tips KitchenAid users swear by:
- Start with the Right Attachments: Always use the dough hook attachment for kneading.
- Don’t Overload Your Mixer: If you’re making a very large batch of dough, it’s better to divide it into two smaller batches to avoid straining your mixer’s motor. Check your KitchenAid manual for capacity limits.
- Scrape Down the Bowl Periodically: Even with the dough hook, sometimes dough can climb up the hook or stick to the sides. Stop the mixer occasionally and scrape down the sides and bottom of the bowl with a spatula to ensure even kneading.
- Monitor Dough Temperature: Over-kneading can generate heat, which can kill yeast. If your dough feels warm to the touch, it might be a sign you’ve kneaded for too long or at too high a speed.
- Adjust Flour as Needed (Sparingly): If your dough is excessively sticky and won’t form a cohesive ball even after a few minutes of kneading, you can add flour, one tablespoon at a time, until it starts to pull away from the bowl. Conversely, if it seems too dry and crumbly, add water, a teaspoon at a time. Be conservative with these additions.
The KitchenAid Mixer Dough Cycle
While KitchenAid mixers don’t have a specific “dough cycle” button like some automated bread makers, the process of kneading in a KitchenAid can be thought of as its own KitchenAid mixer dough cycle. This cycle involves:
- Initial incorporation of ingredients.
- Gradual gluten development through mechanical agitation.
- Reaching the desired elastic consistency.
By setting the correct speed and timing, you are effectively creating your own KitchenAid mixer dough cycle.
What Happens If I Don’t Knead Enough?
If you don’t knead dough enough in your KitchenAid, you’ll likely end up with bread that is:
- Dense: The gluten network won’t be strong enough to trap the gases from the yeast, resulting in a heavy loaf.
- Crumbly: The texture will be less cohesive and may fall apart easily.
- Poorly Risen: The limited gluten development means the dough can’t expand as much during proofing and baking.
- Tougher Crust: In some cases, under-kneaded dough can result in a less desirable crust texture.
What Happens If I Knead Too Much?
Over-kneading in a KitchenAid is also a possibility, though often less common than under-kneading if you’re paying attention. If you knead dough too much, you might experience:
- Toughness: The gluten strands become over-stretched and can break down, leading to a tough, rubbery texture in the final product.
- Dryness: Over-worked dough can sometimes become dry and difficult to handle.
- Lack of Rise: While counter-intuitive, extreme over-kneading can sometimes break down the gluten structure, hindering the dough’s ability to rise.
- Overheating: As mentioned, excessive kneading, especially at higher speeds, can heat the dough and negatively impact the yeast.
Proofing Dough After KitchenAid Kneading
Once your dough has been properly kneaded in the KitchenAid, the next crucial step is proofing dough after KitchenAid kneading. This is the process where the yeast ferments, producing carbon dioxide gas, which makes the dough rise.
The First Rise (Bulk Fermentation)
- Shape the Dough: Gently shape the kneaded dough into a ball.
- Place in a Greased Bowl: Lightly grease a clean bowl with oil or cooking spray. Place the dough in the bowl and turn it to coat all sides.
- Cover: Cover the bowl tightly with plastic wrap or a clean, damp kitchen towel.
- Find a Warm Spot: Place the bowl in a warm, draft-free place. Ideal temperatures are usually between 75-85°F (24-29°C). Your oven with the light on (but the oven off!) is often a good spot.
- Time: The duration for the first rise can vary greatly, typically from 1 to 2 hours, or until the dough has doubled in size. This is where your dough’s activity and ambient temperature play a big role.
The Second Rise (Proofing the Shaped Loaf)
After the first rise and shaping your loaf or rolls, you’ll need a second proof.
- Shape: Shape your dough into its final form (loaf, rolls, pizza base, etc.).
- Place on Baking Sheet or in Pan: Place the shaped dough on a parchment-lined baking sheet or in your prepared baking pan.
- Cover: Cover loosely with plastic wrap or a clean kitchen towel.
- Proofing Location: Again, find a warm spot.
- Time: This second rise is usually shorter, often 30-60 minutes, or until the dough looks puffy and has increased significantly in volume. It should feel airy and spring back slowly when gently poked.
Can I Knead Dough in my KitchenAid for Too Long?
Yes, you absolutely can knead dough in your KitchenAid for too long. While KitchenAid mixers are robust, over-kneading can lead to tough, rubbery bread due to the overdevelopment and eventual breakdown of gluten strands. It can also overheat the dough, which is detrimental to yeast activity. Always rely on the windowpane test and your dough’s texture rather than just a set timer.
How Long Does It Take to Develop Gluten in a KitchenAid?
The time to develop gluten KitchenAid needs typically ranges from 5 to 10 minutes for most standard bread doughs, and 3 to 7 minutes for pizza dough. This time is an estimate, and factors like flour type, hydration, and mixer speed can influence the exact duration. The key is to knead until the dough passes the windowpane test.
What is the Best Speed to Knead Dough in a KitchenAid?
The best KitchenAid kneading speed is generally Speed 2 or 4. Speed 2 is gentler and good for wetter or enriched doughs, while Speed 4 is effective for most standard bread doughs. Avoid speeds higher than 4 for extended kneading, as this can overheat the dough and the mixer, and potentially overwork the gluten.
What is a KitchenAid Mixer Dough Cycle?
A KitchenAid mixer dough cycle refers to the entire process of using the stand mixer with the dough hook to develop gluten in dough. While there isn’t a dedicated “dough cycle” button, setting the appropriate speed (typically 2 or 4) and kneading for the correct amount of time (5-10 minutes for bread) effectively creates this cycle for gluten development.
Frequently Asked Questions (FAQ)
Q1: My KitchenAid dough is sticking to the sides of the bowl even after 10 minutes. What should I do?
A1: If your dough is excessively sticky and isn’t pulling away after 10 minutes of kneading on speed 2 or 4, it might be too wet. Add flour one tablespoon at a time, allowing the mixer to incorporate it for about 30 seconds to a minute after each addition. Stop when the dough starts to come together and pull away from the sides. Be careful not to add too much flour, as this can make the dough tough.
Q2: Can I leave my KitchenAid running unattended for the entire kneading time?
A2: It’s generally recommended to supervise your KitchenAid while kneading, especially when you’re learning how long to knead specific doughs. This allows you to check the dough’s consistency, stop if it’s overheating, or scrape down the sides if necessary. Some bakers may feel comfortable stepping away for a few minutes once they are very familiar with their recipe and mixer.
Q3: What kind of flour is best for using with a KitchenAid for bread making?
A3: For most bread making, bread flour is recommended due to its higher protein content, which leads to better gluten development and a chewier loaf. All-purpose flour can be used, but you might need slightly longer kneading times, and the resulting bread may be a bit softer.
Q4: How does the temperature of my ingredients affect kneading time in a KitchenAid?
A4: Colder ingredients will require slightly longer kneading times as the dough will take longer to reach an optimal temperature for gluten development. Warmer ingredients might speed up the process but also increase the risk of overheating the dough. Aim for room-temperature or slightly cool ingredients for best results.
Q5: Is it okay to use the “dough” speed setting on my KitchenAid mixer?
A5: KitchenAid mixers typically have speeds numbered from 1 to 10. There isn’t a specific “dough” setting. As mentioned, Speed 2 or 4 are generally considered the best speeds for kneading most types of dough. Refer to your KitchenAid manual for specific recommendations for your model.
Q6: I’m making a no-knead bread recipe. Can I still use my KitchenAid?
A6: No-knead recipes are designed to develop gluten through long resting periods (often in the refrigerator) rather than intense kneading. While you could use your KitchenAid for the initial mixing of ingredients, the entire point of a no-knead recipe is to avoid or minimize mechanical kneading. You would typically just mix the ingredients until just combined and let the time do the work.
Q7: How do I know if my dough is proofing correctly after KitchenAid kneading?
A7: After your initial kneading in the KitchenAid, you’ll let the dough rise. Signs of correct proofing include the dough doubling in size, appearing puffy and airy, and when gently poked with a floured finger, the indentation slowly springs back, leaving a small mark. If it springs back immediately, it needs more time. If it collapses, it may have over-proofed.
By following this guide, you’re well-equipped to master the art of kneading dough in your KitchenAid, ensuring delicious, perfectly textured baked goods every time. Happy baking!