
Determining the right number of recessed lights for your kitchen involves a few key steps, but generally, you’ll want to aim for consistent, even illumination across your entire space to create a functional and inviting environment. The goal is to achieve optimal recessed lighting without creating glare or dark spots. This guide will walk you through the process, covering everything from basic spacing to advanced kitchen lighting layout considerations.
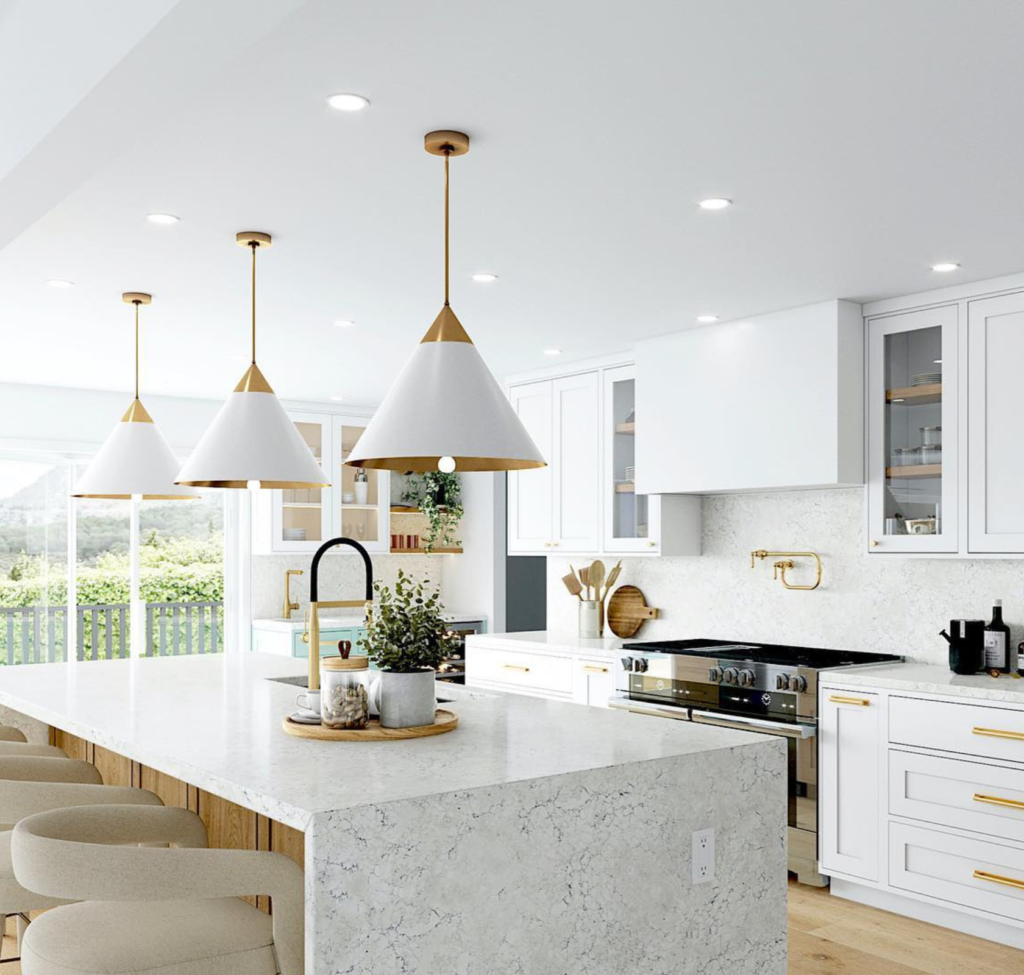
Image Source: blog.1800lighting.com
Planning Your Kitchen Lighting Layout
A well-planned kitchen lighting layout is crucial for both functionality and aesthetics. Recessed lights, often called can lights or downlights, provide excellent general illumination, also known as kitchen ambient lighting. They’re sleek, unobtrusive, and can transform a kitchen from dim and uninviting to bright and practical. When thinking about how much lighting for kitchen spaces, consider the activities that happen there: cooking, cleaning, dining, socializing, and even homework. Each activity might require different layers of light.
Measuring Your Kitchen Space
Before you can calculate how many recessed lights you need, you must know the dimensions of your kitchen. Measure the length and width of the room accurately. This information is fundamental for determining recessed lighting spacing and the overall count.
Calculating Light Needs: The 1.5-Watt Rule
A common guideline for determining the total wattage needed for a room is the 1.5-watt per square foot rule. This rule helps ensure adequate brightness for general illumination.
Formula:
Total Wattage = Room Square Footage × 1.5
Example:
For a 10ft x 12ft kitchen (120 sq ft):
Total Wattage = 120 sq ft × 1.5 watts/sq ft = 180 watts
This gives you a target for the total brightness. However, it’s important to remember that LED lights are much more energy-efficient than traditional incandescent bulbs. So, if you’re using LEDs, you’ll be looking at a much lower actual wattage to achieve the same brightness. For instance, a 10-watt LED can replace a 60-watt incandescent bulb.
Lumens vs. Watts
It’s more helpful to think in terms of lumens, which measure light output, rather than watts, which measure energy consumption. For general kitchen lighting, aim for about 20-50 lumens per square foot.
Formula:
Total Lumens Needed = Room Square Footage × 20-50 lumens/sq ft
Example:
For a 120 sq ft kitchen:
Low end: 120 sq ft × 20 lumens/sq ft = 2400 lumens
High end: 120 sq ft × 50 lumens/sq ft = 6000 lumens
You’ll need to select recessed lights whose bulbs (or integrated LEDs) collectively provide this lumen output.
Determining Recessed Light Count and Spacing
Once you have a grasp of your room’s size and desired brightness, you can move on to figuring out the optimal recessed lighting placement and spacing. This is where things get more specific.
The Ceiling Height Factor
Ceiling height plays a significant role in how widely you can space your lights and how bright they need to be. Higher ceilings require more lights or brighter bulbs to achieve the same level of illumination as lower ceilings.
Low Ceilings (8 feet and below)
For standard 8-foot ceilings, lights can be spaced a bit further apart.
Medium Ceilings (9-10 feet)
As ceilings get higher, you’ll need to adjust your spacing.
High Ceilings (11 feet and above)
With very high ceilings, you’ll need a more concentrated lighting plan.
Recessed Lighting Spacing Rules of Thumb
There are several popular methods for determining recessed lighting spacing. These are guidelines, and you should always adjust based on your specific kitchen layout and personal preference.
Rule 1: Spacing Based on Ceiling Height
A common recommendation is to space lights according to your ceiling height.
- Formula: Ceiling Height (in feet) × 2 = Maximum Spacing (in feet)
Example:
For an 8-foot ceiling: 8 ft × 2 = 16 feet. This means you could theoretically space lights up to 16 feet apart. However, this is the maximum, and for even lighting, you’ll want them closer.
- A more practical approach: Ceiling Height (in feet) – 2 feet = Ideal Spacing (in feet)
Example:
For an 8-foot ceiling: 8 ft – 2 ft = 6 feet. This suggests spacing lights about 6 feet apart.
Rule 2: Spacing Based on Fixture Wattage or Lumen Output
Another method involves spacing based on the light output of the individual fixtures.
- Formula: Beam Spread of Fixture (in feet) = Spacing (in feet)
The beam spread is usually indicated on the packaging or specification sheet of the recessed light fixture. It tells you how wide the cone of light is. If a fixture has a 10-foot beam spread, you’d space them approximately 10 feet apart.
Rule 3: The Grid Method
This method is excellent for creating a uniform lighting pattern. Imagine your kitchen as a grid.
- Divide Room Dimensions by Desired Spacing: Decide on a spacing distance (e.g., 4-6 feet). Divide both the length and width of your kitchen by this spacing.
- Number of Lights Along Each Dimension: The result of the division will give you an idea of how many lights you need along each wall. Round up to ensure coverage.
- Adjust for Overlap: Recessed lights cast a cone of light. To ensure no dark gaps, the edges of these cones should overlap slightly. Aim for a 10-20% overlap.
Example:
Consider a 10ft x 12ft kitchen. Let’s aim for 5-foot spacing.
- Along the 10ft wall: 10 ft / 5 ft = 2 sections. You might need 3 lights to cover this (one at each end, one in the middle).
- Along the 12ft wall: 12 ft / 5 ft = 2.4 sections. You’ll need 3 lights along this wall.
This suggests a 3×3 grid, totaling 9 lights. However, this might be too many. Let’s refine it.
Refined Grid Method (Considering Overlap and Task Areas):
Let’s try 6-foot spacing for a 10ft x 12ft kitchen.
- Along the 10ft wall: 10 ft / 6 ft ≈ 1.67. You’ll need 2 lights. Position them about 2.5 feet from each end of the wall. The center-to-center distance will be 5 feet.
- Along the 12ft wall: 12 ft / 6 ft = 2. This means 3 lights are needed along this wall. Position them 3 feet from each end. The center-to-center distance will be 6 feet.
This arrangement would give you 2 lights along one dimension and 3 lights along the other, resulting in 6 lights total. This is a more reasonable starting point.
Using a Recessed Light Calculator
For a quick estimate, a recessed light calculator can be very helpful. These online tools typically ask for your room dimensions, ceiling height, and sometimes the desired lumen output per fixture. They will then suggest a number of lights and a potential layout. While useful, always cross-reference with manual calculations and consider your specific needs.
Kitchen Ambient Lighting and Task Lighting
Recessed lights are primarily used for ambient lighting, but their placement can also contribute to task lighting.
Ambient Lighting: The Foundation
Ambient lighting is the overall illumination of a room. For a kitchen, this means ensuring every corner is adequately lit. Placing recessed lights in a grid pattern across the ceiling is the most common and effective way to achieve this.
Task Lighting: Illuminating Work Areas
While recessed lights provide general light, dedicated task lighting is crucial for areas where detailed work is done, such as countertops, the stove, and the sink.
- Under-cabinet lighting: This is essential for illuminating countertops and is a great complement to overhead recessed lights.
- Pendants over islands: Pendant lights add style and focused light to kitchen islands or peninsulas.
- Track lighting or directional recessed lights: These can be aimed at specific work surfaces if needed.
When planning your kitchen ambient lighting with recessed lights, think about how they can indirectly illuminate these task areas.
Recessed Lighting Placement Strategies
The placement of your recessed lights is as important as the number you use.
General Ceiling Pattern
- Grid Layout: As discussed, a grid is the standard for even illumination. Space lights equidistant from walls and from each other.
- Centering: Avoid placing lights directly over key work areas if they will create shadows. For example, a light directly above a cooktop might cast shadows from your body onto the food. Instead, place them slightly in front or to the sides.
Avoiding Shadows and Glare
- Shadows: When a light source is directly behind you while you’re working at a counter, your body can cast a shadow. Placing lights slightly in front of the work surface, or using under-cabinet lighting, minimizes this.
- Glare: Glare occurs when light is too intense or directly in your line of sight. Using diffused lenses, recessed lights with deep baffles, or dimmer switches can help control glare. Choosing recessed lights with a wider beam angle can also spread light more evenly, reducing intense points.
Specific Kitchen Zones
- Perimeter Lighting: Placing lights about 2-3 feet away from the walls around the perimeter of the kitchen can provide excellent wall wash, highlighting cabinetry and making the space feel larger.
- Central Area Lighting: Additional lights in the center of the room ensure the main circulation paths are well-lit.
- Island/Peninsula Lighting: If you have a kitchen island or peninsula, consider placing recessed lights around it, rather than directly over the center. This avoids creating a “spotlight” effect and can be combined with pendant lights for a layered look.
Calculating Recessed Light Count with Edge Spacing
A refined approach to determining recessed light count often involves a slightly different spacing calculation, taking into account the distance from walls.
- Formula for Spacing: Ceiling Height (in feet) x 2 = Max Distance Between Lights.
- Formula for Distance from Walls: Ceiling Height (in feet) / 2 = Distance from Wall.
Example:
For a 10ft x 12ft kitchen with 8ft ceilings:
- Distance from walls: 8 ft / 2 = 4 feet.
- Spacing between lights: 8 ft x 2 = 16 feet (maximum). For better coverage, let’s aim for 6 feet between lights.
Layout:
- Along the 10ft wall:
- Place lights 4 feet from each end. This leaves 2 feet in the middle.
- If you place two lights 4 feet from each end, the distance between them is 2 feet, which is too close.
- Let’s adjust. If we use 3 lights along the 10ft span, they could be spaced at roughly 3.33 feet apart (10ft / 3 lights). Placing them about 1.67 feet from each wall and then evenly spaced. Center to center would be 3.33 ft.
- Along the 12ft wall:
- Using the 4-foot rule from the walls, you have 4 feet on each side, leaving 4 feet in the middle. This suggests 3 lights could work.
- If we use 3 lights along the 12ft span, they could be spaced at roughly 4 feet apart (12ft / 3 lights). Place them 4 feet from each end. Center to center would be 4 ft.
This would mean a 3×3 grid of 9 lights. Let’s re-evaluate spacing.
Revised Calculation:
Let’s use a 5-foot spacing for both dimensions for a 10ft x 12ft kitchen with 8ft ceilings.
- Along the 10ft wall: To get good coverage with 5ft spacing, you’d ideally need lights at 2.5ft, 7.5ft. This requires 2 lights. Spacing: 5ft. Distance from walls: 2.5ft.
- Along the 12ft wall: To get good coverage with 5ft spacing, you’d ideally need lights at 2.5ft, 7.5ft, 12.5ft (but wall is only 12ft). So, 3 lights at 3ft, 7.5ft, 11ft. Spacing: ~4ft and ~3.5ft. Distance from walls: 3ft and 1ft. This isn’t ideal.
Let’s try 6-foot spacing again for a 10ft x 12ft kitchen with 8ft ceilings.
- Along the 10ft wall:
- Distance from wall: 4ft. This leaves 2ft in the middle. We can’t fit two lights with 6ft spacing.
- Let’s space them differently. Place one light centered at 5ft from the wall. Now we have 5ft on each side. If we place lights at 2.5ft and 7.5ft, the spacing is 5ft, and distance from wall is 2.5ft. This works for 2 lights.
- Along the 12ft wall:
- Distance from wall: 4ft. This leaves 4ft in the middle. We can fit 3 lights.
- Place lights at 4ft, 8ft. Distance from wall: 4ft. Spacing: 4ft. This works for 3 lights.
So, for a 10ft x 12ft kitchen, you might opt for 2 lights along the 10ft dimension and 3 lights along the 12ft dimension, totaling 6 lights. This configuration provides good coverage without over-lighting.
Selecting the Right Recessed Lights
Choosing the correct recessed lights is vital for achieving your desired illumination.
Types of Recessed Fixtures
- IC-Rated (Insulation Contact): These fixtures can be installed directly against building insulation without risk of fire. Most modern recessed lights are IC-rated.
- Non-IC Rated: These require a minimum clearance from insulation, meaning you might need to frame out around them, which can be more complex.
- Air-Tight Fixtures: These are designed to prevent air leakage through the ceiling, improving energy efficiency.
Trim Styles
The trim is the visible part of the recessed light.
- Baffle Trim: Features ribbed or grooved surfaces to reduce glare. Good for general lighting.
- Reflector Trim: Has a smooth, mirrored surface that reflects light. Can be brighter.
- Gimbal Trim: Allows the light source to be tilted and aimed, useful for highlighting artwork or specific areas.
- Adjustable Trim: Similar to gimbal but usually rotates as well as tilts.
Bulb Types (or Integrated LEDs)
- LEDs (Light Emitting Diodes): The most popular choice today due to their energy efficiency, long lifespan, and variety of color temperatures.
- Halogen/Incandescent: Older technologies, less efficient and generate more heat. Not recommended for new installations.
Color Temperature (Kelvin)
The color temperature of your lights affects the mood of your kitchen.
- Warm White (2700K-3000K): Mimics incandescent bulbs, creating a cozy and inviting atmosphere. Good for general kitchen ambient lighting.
- Cool White/Bright White (3500K-4000K): Brighter and more neutral. Good for task lighting and areas where alertness is needed.
- Daylight (5000K-6500K): Mimics natural daylight. Can be too harsh for some kitchens, but useful for very specific task areas.
For a balanced kitchen ambient lighting, 3000K or 3500K is often a good choice.
Beam Spread
- Narrow Beam (e.g., 15-30 degrees): Concentrates light in a small area. Good for accent lighting.
- Medium Beam (e.g., 40-60 degrees): A good balance for general lighting, providing a wider spread.
- Wide Beam (e.g., 70-90 degrees): Spreads light over a large area. Useful for very large rooms or when fewer lights are used.
Dimmers and Controls
Installing dimmer switches on your recessed lights is highly recommended. They allow you to adjust the light level based on the time of day or the activity, adding flexibility to your kitchen lighting. Smart home integration can also offer advanced control options.
Layering Light for a Complete Kitchen Fixture Recommendations
While recessed lights form the backbone of kitchen illumination, a truly functional and beautiful kitchen uses multiple layers of light.
Layer 1: Ambient Lighting (Recessed Lights)
This is your overall, general illumination. As we’ve discussed, this is where your recessed lights shine.
Layer 2: Task Lighting
This layer focuses light on specific work areas.
- Under-cabinet lighting: Essential for countertops. LED strips or puck lights are excellent options.
- Over-the-stove lights: Many modern range hoods include built-in lighting. If yours doesn’t, consider a small task light or a directional recessed light placed strategically.
- Sink lighting: A recessed light or a pendant positioned to illuminate the sink area is beneficial.
Layer 3: Accent Lighting
This layer adds visual interest and highlights architectural features or decorative items.
- In-cabinet lighting: Creates a warm glow within glass-front cabinets.
- Toe-kick lighting: Subtle lighting under cabinets can create a modern, floating effect.
- Wall-mounted fixtures: Sconces can add a decorative touch and provide softer light.
Kitchen Fixture Recommendations Summary:
- Recessed Lights: Use for overall ambient light. Aim for consistent spacing based on ceiling height and room dimensions.
- Pendant Lights: Ideal for islands and peninsulas, providing focused task light and a decorative element.
- Under-Cabinet Lights: Crucial for countertop task lighting.
- Sconces/Wall Lights: Can add decorative flair and softer ambient light.
- Task-Specific Lights: Integrated lights in range hoods or specialized fixtures for cooktops.
Finalizing Your Recessed Lighting Plan
After considering all the factors, it’s time to finalize your plan.
Review and Adjust
Look at your proposed layout. Does it feel balanced? Are there any areas that might be too dim or too bright? Imagine yourself performing common kitchen tasks in the space.
Consider Future Needs
Will you be updating appliances or changing your kitchen layout in the future? Try to plan for flexibility where possible.
Professional Consultation
If you’re unsure, consulting with an electrician or a lighting designer can be invaluable. They can help you refine your kitchen lighting layout and ensure all electrical codes are met.
By following these guidelines, you can confidently determine how many recessed lights for a kitchen you need, ensuring a bright, functional, and inviting space. Achieving optimal recessed lighting is a balance of science and art, tailored to your unique kitchen.
Frequently Asked Questions (FAQ)
Q1: How many recessed lights do I need for a 10×10 kitchen?
For a 10×10 kitchen (100 sq ft) with standard 8-foot ceilings, a good starting point is 4-6 recessed lights. Using the spacing rule of thumb (ceiling height – 2 feet = spacing), you’d aim for roughly 6-foot spacing. This could translate to two lights along each 10-foot wall, spaced about 5 feet apart, and about 2.5 feet from the walls.
Q2: What is the best spacing for recessed lighting in a kitchen?
The best spacing depends on your ceiling height and the beam spread of your chosen fixtures. A common guideline is to space lights approximately every 4-6 feet for an 8-foot ceiling. For higher ceilings, you might need closer spacing or brighter bulbs. Always ensure the edges of the light cones overlap slightly for even coverage.
Q3: Can I use fewer recessed lights than recommended?
You can use fewer recessed lights, but this will likely result in less even illumination and potential dark spots. You may need to supplement with other light sources like pendant lights or stronger task lighting to compensate for the reduced ambient light.
Q4: How far should recessed lights be from the wall?
A good rule of thumb is to place recessed lights half the distance of their spacing from the wall. So, if you’re spacing lights 5 feet apart, place them about 2.5 feet from the walls. This helps create a more even light distribution and a “wall wash” effect.
Q5: What is the best type of recessed light for a kitchen?
For kitchens, LED recessed lights are generally the best choice due to their energy efficiency, long lifespan, and variety of color temperatures and beam spreads. Look for IC-rated, air-tight fixtures for optimal performance and energy savings. A fixture with a baffle trim is often preferred to reduce glare.
Q6: How much lighting is needed for a kitchen?
For general ambient lighting in a kitchen, aim for approximately 20-50 lumens per square foot. This means a 100 sq ft kitchen might need between 2000 and 5000 lumens in total. The actual number of fixtures and their lumen output per fixture will determine if you meet this requirement.
Q7: Should recessed lights be centered in a kitchen?
While a grid layout is common, centering lights directly over work areas like countertops or a stove can sometimes create shadows. It’s often better to place them slightly in front of or to the sides of work areas, or to rely on under-cabinet lighting for focused task illumination.
Q8: What’s the difference between ambient and task lighting?
Ambient lighting is the general, overall illumination of a room, providing a comfortable base level of light. Task lighting is more focused and brighter, directed at specific areas where activities like cooking, reading, or chopping occur. Recessed lights are primarily for ambient lighting, while under-cabinet lights or pendants are better suited for task lighting.