
A clogged kitchen faucet aerator can lead to a weak, sputtering stream of water, making everyday tasks like washing dishes or filling a pot frustrating. So, how do you clean a kitchen faucet aerator? You can clean your kitchen faucet aerator by carefully unscrewing it, soaking it in vinegar, gently scrubbing it, and then reassembling and reattaching it. This simple maintenance can restore your faucet’s performance and keep your kitchen sink looking its best.
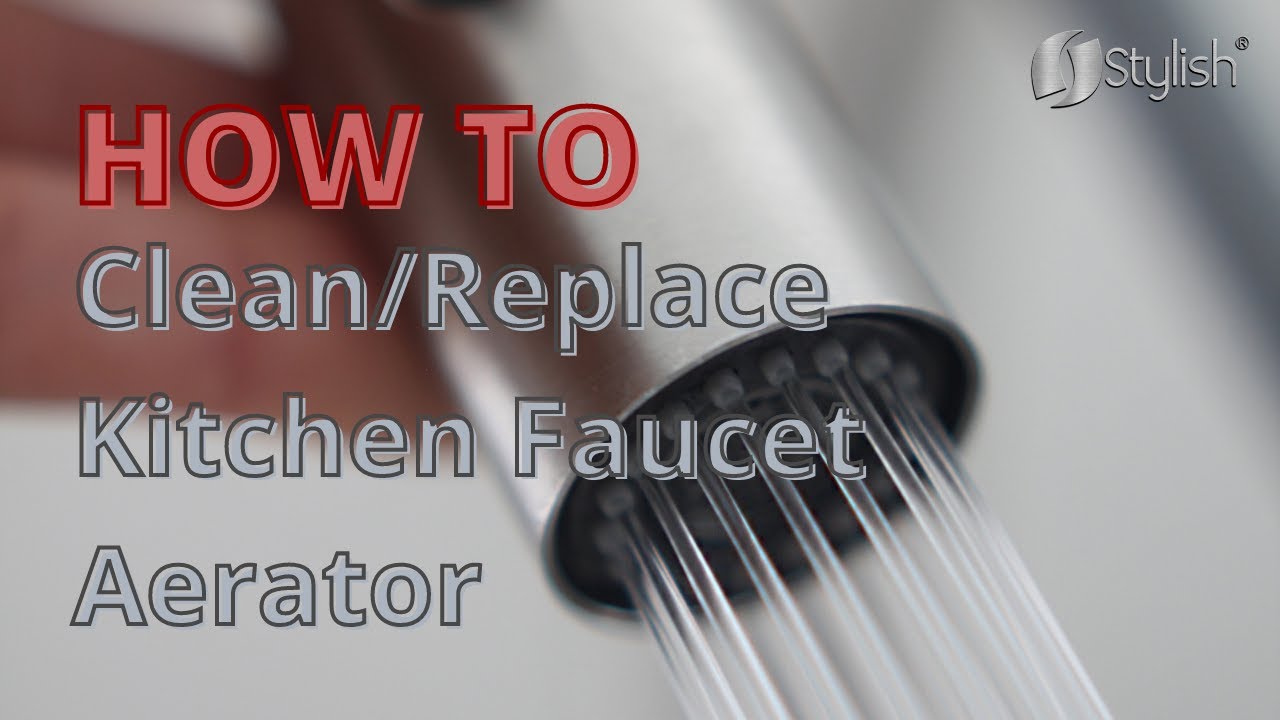
Image Source: i.ytimg.com
Why Your Faucet Aerator Needs Regular Cleaning
Your kitchen faucet aerator is a small but mighty component. It’s the little nozzle at the very end of your faucet spout that mixes air with water. This mixing creates a smooth, splash-free stream, and it also helps to save water by reducing the overall flow. Over time, however, minerals from your water supply, along with tiny debris, can build up inside the aerator. This buildup, known as limescale or sediment, can clog the small holes in the aerator.
When your faucet aerator gets clogged, you’ll notice a few common signs:
- Weak Water Flow: The water pressure from your faucet decreases significantly.
- Sputtering Stream: Instead of a steady stream, the water comes out in uneven bursts or sprays in different directions.
- Uneven Spray Pattern: The water might spray to one side or in a scattered pattern.
- Reduced Water Volume: Even when the pressure seems okay, less water comes out than usual.
These symptoms are usually a clear indication that it’s time to clean your faucet aerator. Ignoring these signs can not only be annoying but can also put unnecessary strain on your faucet’s internal components. Regular faucet maintenance, including cleaning the aerator, is key to a long-lasting, efficient, and beautiful kitchen faucet.
The Impact of Mineral Buildup
Tap water, especially in certain regions, can be “hard.” Hard water contains a high concentration of dissolved minerals, primarily calcium and magnesium. When water evaporates or flows through your faucet, these minerals can be left behind, forming a white, chalky deposit known as limescale. This limescale can easily accumulate within the intricate parts of your faucet aerator.
What Happens When You Don’t Clean It?
If you don’t clean your faucet aerator, the mineral buildup will continue to grow. This can lead to:
- Further Reduction in Water Flow: Eventually, the aerator can become so clogged that almost no water can pass through.
- Damage to Aerator Parts: Stubborn mineral deposits can become difficult to remove, and aggressive cleaning methods might damage the delicate faucet aerator parts.
- Potential Faucet Aerator Leak: In rare cases, persistent clogging and pressure buildup might contribute to a faucet aerator leak, although this is more commonly caused by worn-out seals or improper installation.
- Overall Decreased Faucet Performance: The primary function of the aerator – providing a smooth, efficient stream – is compromised.
The good news is that cleaning a faucet aerator is a straightforward DIY task that anyone can do with a few common household items. It’s a quick and effective way to bring your faucet back to life and ensure you have that satisfying, strong water stream you expect.
Getting Ready: Tools and Materials
Before you dive into cleaning your kitchen faucet aerator, it’s important to gather the necessary tools and materials. Having everything ready will make the process smoother and more efficient.
Essential Tools for the Job
You won’t need a lot of fancy equipment for this task. Here’s what you should have on hand:
- Adjustable Wrench or Pliers: This is crucial for loosening the aerator if it’s stuck. It’s best to use an adjustable wrench for a snug fit, but pliers can work in a pinch. Important Note: Always wrap the aerator or the faucet spout with a soft cloth or paper towel before using a wrench or pliers. This will prevent scratching or damaging the finish of your faucet, keeping that shiny kitchen faucet looking pristine.
- Small Bowl or Container: To soak the aerator in your cleaning solution.
- Old Toothbrush or Small Scrub Brush: For gently scrubbing away mineral deposits. A soft-bristled brush is best to avoid damaging the aerator parts.
- Soft Cloths or Paper Towels: For drying the aerator and wiping up any spills.
- Distilled White Vinegar: The star of our cleaning solution!
- Optional: Baking Soda: For a more abrasive paste if mineral deposits are particularly stubborn.
Choosing the Right Cleaning Solution
Distilled white vinegar is the go-to cleaner for faucet aerators due to its acidic nature. The acetic acid in vinegar effectively breaks down mineral deposits like limescale.
- Vinegar Cleaning Faucet: Plain distilled white vinegar is usually sufficient. You don’t need fancy cleaning products.
- For Tough Stains: If you have very hard water and stubborn buildup, you can create a paste by mixing baking soda with a little vinegar. Apply this paste to the aerator and let it sit for a bit longer.
Step-by-Step Guide: How to Clean Your Faucet Aerator
Let’s break down the process of cleaning your kitchen faucet aerator into simple, manageable steps. Follow these instructions carefully to ensure a successful clean.
Step 1: How to Remove a Faucet Aerator
The first step is to carefully remove the aerator from your faucet.
- Identify the Aerator: Look at the very end of your faucet spout. The aerator is the part that screws onto the end. It might be a cylindrical piece.
- Determine the Type: Most kitchen faucet aerators are designed to be unscrewed by hand. However, some can be tight and may require a tool.
- Manual Removal: Try to unscrew the aerator by hand by turning it counter-clockwise. If it moves freely, you’ve got it!
- Using Tools (If Necessary): If it’s too tight to remove by hand, wrap a soft cloth or paper towel around the aerator to protect its finish. Then, use your adjustable wrench or pliers to gently grip the aerator and turn it counter-clockwise. Apply steady pressure, but avoid overtightening or forcing it, as this could damage the aerator or the faucet itself. If you’re struggling to remove faucet aerator, ensure you have a good grip and are turning it the correct way.
Step 2: Disassembling the Aerator (If Applicable)
Once removed, you may notice that the aerator is made up of several small faucet aerator parts. Many aerators can be gently pulled apart or unscrewed further to expose the internal components, such as screens and flow-restricting discs.
- Observe the Structure: Take note of how the parts fit together before you take them apart. This will be helpful for reassembly.
- Gentle Separation: Most aerators have a casing that holds a screen and a washer or seal. You might be able to pull these out gently with your fingers or the tip of a small screwdriver. Be careful not to lose any of these small pieces.
Step 3: The Vinegar Soak
This is where the magic of vinegar cleaning faucet happens.
- Prepare the Solution: Pour enough distilled white vinegar into your small bowl or container to fully submerge the aerator and its parts.
- Soak the Aerator: Place the aerator and any disassembled parts into the vinegar.
- Soaking Time: Let the aerator soak for at least 30 minutes. For heavily clogged aerators, you might need to soak them for a few hours or even overnight. The vinegar will work to dissolve the mineral deposits.
Step 4: Scrubbing Away the Buildup
After soaking, it’s time to gently scrub away the loosened debris.
- Rinse First: Remove the aerator parts from the vinegar and rinse them under running water.
- Gentle Scrubbing: Use your old toothbrush or small scrub brush to gently scrub away any remaining mineral deposits or gunk. Pay attention to the small holes and internal mesh screens.
- For Stubborn Residue: If some deposits are still stuck, you can try the baking soda paste. Mix a small amount of baking soda with a little vinegar to form a paste, apply it to the stubborn areas, let it sit for a few minutes, and then scrub again. This helps to unclog faucet aerator effectively.
Step 5: Rinsing and Inspecting
Thoroughly rinse all the parts to remove any leftover vinegar, baking soda, or loosened debris.
- Flush Thoroughly: Make sure all the vinegar and residue are completely washed away.
- Check for Completeness: Ensure all the faucet aerator parts are clean and free of obstruction. You should be able to see through the mesh screen clearly.
Step 6: Reassembly and Reattachment
Now, it’s time to put your aerator back together and reattach it to your faucet.
- Reassemble: Carefully reassemble the aerator, making sure all the parts are in their original positions. Ensure the washer or seal is properly seated. This is important to prevent a faucet aerator leak.
- Reattach: Screw the aerator back onto the end of your faucet spout, turning it clockwise. Hand-tighten it first.
- Final Tightening (If Needed): If it feels loose, use your cloth-wrapped wrench or pliers to give it a quarter-turn more. Again, avoid overtightening.
Step 7: Testing Your Work
Turn on your kitchen faucet and enjoy the results of your hard work!
- Check the Flow: You should notice a strong, steady stream of water without sputtering or spraying.
- Look for Leaks: Ensure there are no leaks around the base of the aerator. If there is a faucet aerator leak, you might need to tighten it slightly more, or the washer/seal might be damaged and require replacement.
Troubleshooting Common Faucet Aerator Issues
Even with the best intentions, you might encounter a few hiccups. Here are some common problems and how to fix them:
Aerator Won’t Budge
If you’re struggling to remove faucet aerator, several things could be the cause:
- Severe Mineral Buildup: The minerals may have essentially “welded” the aerator in place.
- Overtightening: Previous installation might have been too forceful.
- Corrosion: In very rare cases, metal components can corrode.
Solutions:
- Longer Vinegar Soak: Try soaking for 24 hours.
- Penetrating Oil (Use with Caution): For metal faucets, a small amount of penetrating oil applied carefully to the threads away from the spout opening might help. Wipe away any excess thoroughly.
- Aerator Wrench: Specialized aerator wrenches are available that provide a better grip without damaging the finish.
- Professional Help: If it still won’t budge, it might be time to call a plumber.
Water Still Sputters After Cleaning
If you’ve cleaned the aerator and the problem persists, consider these possibilities:
- Internal Aerator Damage: The internal screen or flow restrictor might be damaged or warped.
- Other Faucet Blockages: The issue might be further up in the faucet, in the supply lines, or even the water supply itself.
- Worn-Out Washer/Seal: A damaged or missing washer can cause leaks and affect flow.
Solutions:
- Inspect Aerator Parts: Carefully examine all the faucet aerator parts for any damage. If any are cracked or deformed, you’ll need to replace them.
- Consider Aerator Replacement: If your aerator is old or heavily damaged, purchasing a new one might be the easiest solution. This brings us to the next point.
When to Consider Faucet Aerator Replacement
Sometimes, cleaning isn’t enough. If your aerator is old, damaged, or excessively corroded, it might be time for a faucet aerator replacement.
-
Signs It’s Time for Replacement:
- Cracked or broken aerator casing.
- Damaged or worn-out rubber washer or seal.
- Persistent sputtering or leaks even after thorough cleaning.
- Desire for an upgrade to a more efficient or feature-rich aerator.
-
Choosing a Replacement Aerator:
- Match the Size and Thread Type: Most kitchen faucet aerators are standard, but there are variations. You can usually unscrew your old aerator and take it to a hardware store to find an exact match. Look for aerator parts kits if your original is damaged.
- Consider Flow Rate: Aerators have different flow rates (measured in gallons per minute or GPM). Standard kitchen faucets often have a GPM of 1.8 or 2.2. You might opt for a low-flow aerator to save water.
- Brand Compatibility: While most are universal, sticking to the same brand as your faucet can sometimes ensure a better fit.
-
How to Replace: The process is the same as cleaning: remove the old aerator, screw on the new one, and hand-tighten, followed by a slight tightening with a wrench if needed.
Maintaining Your Shiny Kitchen Faucet
Keeping your kitchen faucet aerator clean is a vital part of overall faucet maintenance. By performing this simple task regularly, you contribute to the longevity and optimal performance of your entire faucet.
Frequency of Cleaning
How often should you clean your faucet aerator? It depends on your water quality.
- Hard Water Areas: If you have hard water, you might need to clean your aerator every 1-3 months.
- Soft Water Areas: In areas with softer water, cleaning every 6 months might be sufficient.
- Observe Your Faucet: The best indicator is your faucet’s performance. If you notice any reduction in water flow or sputtering, it’s time for a clean.
Additional Faucet Maintenance Tips
Beyond the aerator, a few other tips can help keep your kitchen faucet in top shape and maintain that shiny kitchen faucet look:
- Wipe Down Regularly: After each use, wipe down the faucet spout and handles with a soft cloth to prevent water spots and mineral buildup from forming.
- Clean the Faucet Body: Use a mild soap and water solution with a soft cloth to clean the rest of the faucet. Avoid abrasive cleaners or scouring pads, which can scratch the finish.
- Check for Leaks: Periodically check the base of the faucet and the connections for any signs of a faucet aerator leak or other water leaks.
- Lubricate Moving Parts (If Necessary): Some older faucets might benefit from occasional lubrication of handles or joints, but this is less common with modern designs.
By integrating these simple steps into your kitchen cleaning routine, you can ensure your faucet always looks its best and functions perfectly. A clean aerator contributes to a visually appealing and highly functional kitchen space.
Frequently Asked Questions (FAQ)
Q1: What happens if I don’t clean my faucet aerator?
A1: If you don’t clean your faucet aerator, mineral deposits and debris will build up. This can lead to a weak or sputtering water stream, reduced water flow, and potentially damage the aerator itself.
Q2: Can I use CLR or other heavy-duty cleaners on my faucet aerator?
A2: While CLR can be effective for mineral buildup, it’s generally recommended to start with gentler methods like vinegar. Harsh chemicals can sometimes damage the materials of the aerator or the faucet finish. Always test in an inconspicuous area first if you choose to use a stronger cleaner.
Q3: How do I know if I need to replace my faucet aerator instead of just cleaning it?
A3: You should consider faucet aerator replacement if the aerator is cracked, broken, if the internal parts are visibly damaged, or if cleaning doesn’t resolve issues like sputtering or leaks. Sometimes, an aerator is simply too old or corroded to be effectively cleaned.
Q4: My faucet aerator is stuck. What’s the best way to remove it?
A4: First, try to remove it by hand. If it’s too tight, wrap a soft cloth around the aerator to protect the finish, then use an adjustable wrench or pliers to gently turn it counter-clockwise. If it still won’t budge, try a longer soak in vinegar or consider a specialized aerator wrench.
Q5: How often should I clean my kitchen faucet aerator?
A5: This depends on your water quality. For hard water, clean it every 1-3 months. For softer water, every 6 months may be sufficient. The best indicator is your faucet’s performance – clean it when you notice a weak or sputtering stream.
Q6: What are faucet aerator parts?
A6: Faucet aerator parts are the individual components that make up an aerator, typically including the outer casing, a mesh screen, a flow-restricting washer or disc, and a rubber washer or seal. These parts work together to create a smooth, aerated stream of water.
Q7: How do I prevent a faucet aerator leak?
A7: To prevent a faucet aerator leak, ensure that the rubber washer or seal is properly seated during reassembly and that the aerator is not overtightened. If a leak persists after cleaning or replacement, the washer or seal might be damaged and need replacement.
Q8: Is vinegar cleaning faucet safe for all finishes?
A8: Vinegar is generally safe for most common faucet finishes like chrome and stainless steel. However, if you have a faucet with a special finish (like brushed nickel, oil-rubbed bronze, or painted finishes), it’s always a good idea to test the vinegar on a small, hidden area first to ensure it doesn’t cause discoloration or damage.
By following these steps and tips, you can easily maintain your kitchen faucet for a beautiful and functional sink.