
Image Source: i.ytimg.com
How To Clean A Kitchenaid Ice Maker: Easy Steps
Can you clean a Kitchenaid ice maker with vinegar? Yes, you can use a diluted vinegar solution to clean and descale your Kitchenaid ice maker. It’s a common and effective method for removing mineral buildup and ensuring your ice is fresh and pure.
Keeping your Kitchenaid ice maker clean is vital for producing the best-tasting ice and ensuring the appliance lasts for a long time. Over time, mineral deposits from your water can build up inside the machine, affecting its performance and the quality of the ice it produces. Regular Kitchenaid ice maker maintenance is key to preventing issues like slow ice production or ice with an off-taste. This guide will walk you through the simple steps for cleaning Kitchenaid ice maker components, descaling Kitchenaid ice maker workings, and cleaning ice bucket Kitchenaid units. We’ll cover everything from a basic clean to a deep clean Kitchenaid ice maker operation, and even touch on preventing mold Kitchenaid ice maker can encounter.
Why Regular Cleaning is Crucial for Your Kitchenaid Ice Maker
Think of your Kitchenaid ice maker like any other kitchen appliance that handles food and water. It needs a good scrub from time to time.
- Hygiene: Water left standing can become a breeding ground for bacteria, mold, and mildew. Regular cleaning ensures the ice you make is safe and free from contaminants.
- Performance: Mineral buildup, often called limescale, can clog water lines and sensors within the ice maker. This can slow down ice production, lead to smaller ice cubes, or even cause the machine to stop working altogether.
- Taste: Stale water or residue from mold can impart unpleasant flavors and odors to your ice. Clean ice means clean-tasting drinks.
- Longevity: Proper maintenance, including cleaning, helps protect the internal components of your ice maker from damage caused by mineral deposits and corrosion, extending its lifespan.
Gathering Your Cleaning Supplies
Before you begin the Kitchenaid ice maker cleaning process, gather what you’ll need. Having everything ready makes the task much smoother.
- Mild Dish Soap: For general cleaning of external parts.
- White Vinegar: An excellent natural descaler.
- Water: For rinsing and diluting.
- Soft Cloths or Sponges: Avoid abrasive scrubbers that can scratch surfaces.
- Small Brush (like an old toothbrush): For reaching tight spots.
- Bucket or Basin: For soaking removable parts.
- Clean Towels: For drying.
- Optional: Kitchenaid Ice Maker Cleaning Solution: Some manufacturers offer specific cleaning solutions. If you prefer a commercial product, ensure it’s approved for ice makers. Always follow the product’s instructions carefully.
Step-by-Step Guide: How To Clean A Kitchenaid Ice Maker
This guide will help you tackle every part of your Kitchenaid ice maker, ensuring a thorough clean.
Step 1: Turn Off and Unplug
Safety first! Always make sure your ice maker is turned off and unplugged from the power outlet before you start any cleaning. This prevents electrical shock and ensures the machine doesn’t accidentally turn on.
Step 2: Empty the Ice Maker
Remove all the ice from the ice bin. You can discard it, or if it’s clean, you can store it in a separate container in your freezer. Also, remove any water that might be left in the bottom of the ice maker.
Step 3: Clean the Ice Bin and Scoop
The ice bin and scoop are usually removable. This is a great place to start your Kitchenaid ice maker cleaning.
- Dish Soap and Water: Wash the ice bin and scoop in your sink with warm, soapy water.
- Scrub Gently: Use a soft cloth or sponge to remove any residue or ice chips.
- Rinse Thoroughly: Make sure all soap is rinsed away.
- Dry Completely: Towel dry the bin and scoop thoroughly to prevent water spots and inhibit mold growth.
Step 4: Clean the Interior Surfaces
This is where we focus on the main Kitchenaid ice maker cleaning inside the unit.
- Mild Soap Solution: Mix a small amount of mild dish soap with warm water.
- Wipe Down: Dampen a soft cloth with the soapy water and wipe down all interior surfaces, including the ice-making mechanism, walls, and any visible water lines.
- Rinse (Carefully): Use a clean cloth dampened with plain water to wipe away any soap residue. Be careful not to get too much water into electrical components.
- Dry: Use a clean, dry towel to wipe all surfaces dry.
Step 5: Descaling Your Kitchenaid Ice Maker
Over time, minerals from water can build up, requiring descaling Kitchenaid ice maker components. This is crucial for proper function.
Using White Vinegar for Descaling
White vinegar is a powerful, natural cleaner that effectively breaks down mineral deposits.
- Prepare the Solution: Mix equal parts white vinegar and water. For example, if your water reservoir holds 4 cups, use 2 cups of vinegar and 2 cups of water.
- Fill the Reservoir: Pour the vinegar and water solution into the ice maker’s water reservoir.
- Run a Cycle (Optional but Recommended): If your model allows, run a short cleaning or ice-making cycle with the vinegar solution. This helps the solution reach all the internal parts. Check your user manual to see if this is recommended for your specific model. Some manuals suggest running a full cycle with the descaling solution and then discarding the ice.
- Let it Sit: If you’re not running a cycle, let the vinegar solution sit in the reservoir for about 30 minutes to an hour to allow it to work on the mineral buildup.
- Drain the Solution: Drain the vinegar solution completely from the reservoir.
- Rinse Thoroughly: This is a very important step to how to sanitize Kitchenaid ice maker. Fill the reservoir with clean, fresh water. Run several cycles with just water, discarding the ice after each cycle, until you can no longer smell or taste vinegar. This ensures all descaling solution is removed.
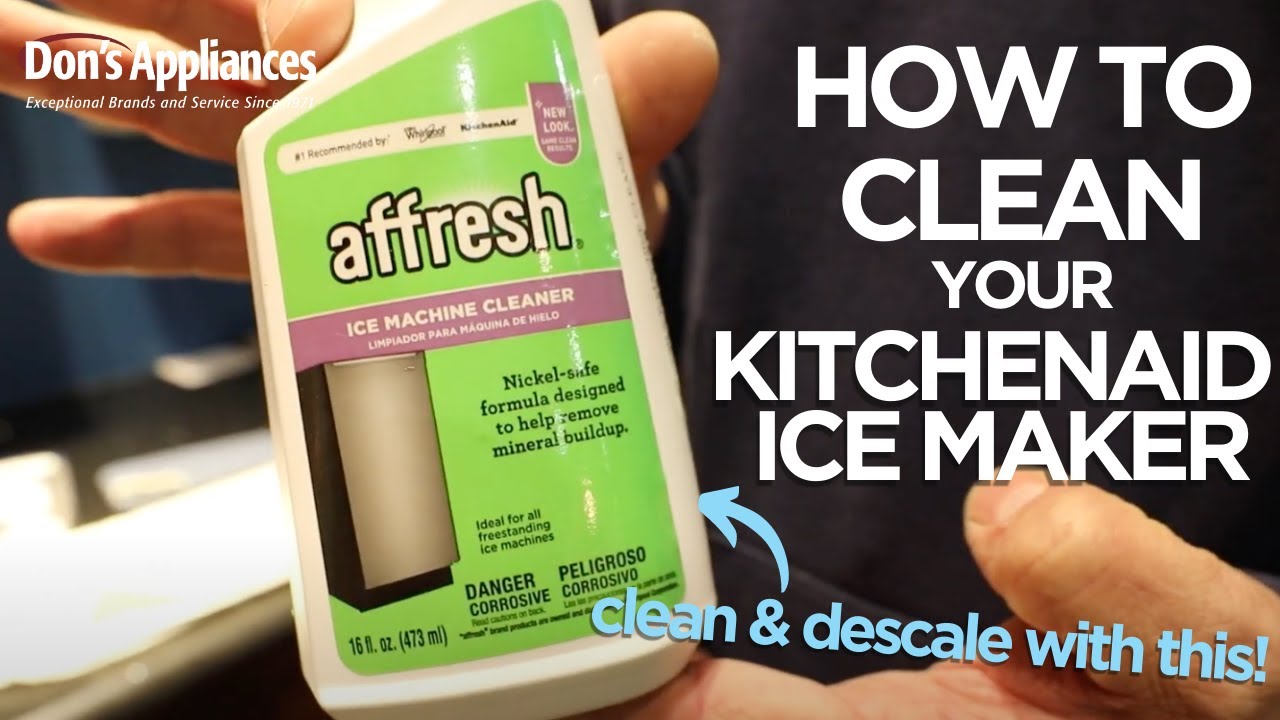
Using a Commercial Kitchenaid Ice Maker Cleaning Solution
If you prefer a commercial cleaner, follow these general steps, but always refer to the product’s specific instructions.
- Prepare the Solution: Mix the cleaner with water as directed on the product label.
- Fill and Run: Pour the solution into the water reservoir and run a cleaning cycle as instructed.
- Drain and Rinse: Drain the cleaning solution and then run multiple cycles with fresh water to thoroughly rinse the system. Discard all ice produced during these rinsing cycles.
Step 6: Cleaning the Exterior
Don’t forget the outside of your appliance!
- Wipe Down: Use a damp cloth with a little mild dish soap to wipe down the exterior surfaces of your Kitchenaid ice maker.
- Clean the Control Panel: If there’s a control panel, use a slightly damp cloth and avoid spraying cleaner directly onto it.
- Dry and Polish: Dry the exterior with a clean, dry cloth. You can use a stainless steel cleaner if your model has stainless steel accents, following the product’s instructions.
Step 7: Reassemble and Dry
Once all parts are clean and rinsed, ensure everything is completely dry before reassembling. This is a key step in preventing mold Kitchenaid ice maker might develop if left damp.
- Air Dry: Allow removable parts like the ice bin and scoop to air dry completely on a clean towel.
- Wipe Again: Give the interior a final wipe-down with a dry cloth to catch any lingering moisture.
Step 8: Replug and Run a Test Cycle
Once everything is clean and dry:
- Plug In: Plug your Kitchenaid ice maker back into the power outlet.
- Turn On: Turn the ice maker back on.
- New Ice: Let the ice maker run a new batch of ice. Discard the first batch of ice to ensure no residual cleaning solution remains.
How Often Should You Clean Your Kitchenaid Ice Maker?
Consistent Kitchenaid ice maker maintenance is key. Aim for a thorough cleaning every 3-6 months, depending on your water quality and how often you use the ice maker. If you have hard water, you might need to descale more frequently, perhaps every 2-3 months.
- Monthly: A quick wipe-down of the ice bin and exterior can help keep things tidy between deeper cleans.
- Every 3-6 Months: Perform a full cleaning, including descaling.
- After Periods of Disuse: If you haven’t used your ice maker for a while, give it a good clean and run a few cycles of fresh water before making ice for consumption.
Addressing Specific Kitchenaid Ice Maker Cleaning Tasks
Let’s break down some of the more specific aspects of Kitchenaid ice maker cleaning.
Cleaning Ice Bucket Kitchenaid Units
The ice bucket, or ice bin, is where the ice is stored. This is one of the most important parts to keep clean.
- Removal: Most Kitchenaid ice makers have a removable ice bin. Consult your user manual for specific instructions on how to detach it.
- Washing: Wash the ice bin with warm, soapy water. Use a soft sponge or cloth.
- Stubborn Stains: For any tough residue, you can create a paste of baking soda and water and gently scrub the affected areas. Rinse very well.
- Drying: Ensure the ice bin is completely dry before placing it back into the unit. Any moisture can lead to mold.
Deep Clean Kitchenaid Ice Maker Operations
A deep clean Kitchenaid ice maker might be necessary if you haven’t cleaned it in a while or if you notice persistent odors or performance issues. This involves going through all the steps above, potentially running the descaling solution multiple times, and paying extra attention to crevices.
- The Water Lines: When descaling, the vinegar solution should run through the internal water lines. If you suspect clogs, running the solution a second time might be beneficial, followed by extensive rinsing.
- Sensors and Paddles: Use a small brush (like an old toothbrush) dipped in the cleaning solution to gently scrub around ice sensors, paddles, or any other moving parts. Ensure you rinse these areas well.
Kitchenaid Ice Maker Troubleshooting and Cleaning
Sometimes, cleaning can resolve common Kitchenaid ice maker troubleshooting issues.
- Slow Ice Production: Mineral buildup can slow down the freezing process. Regular descaling is the primary solution.
- Cloudy Ice: This can be due to dissolved minerals or air trapped in the water. Using filtered water can help.
- Off-Taste or Odor: This is often a sign of bacteria or mold growth. Thorough cleaning and sanitizing are necessary. Running a cleaning cycle with a mild bleach solution (1 tablespoon bleach per gallon of water, followed by extensive rinsing with fresh water) can help eliminate odors, but only if your manual permits it and always rinse extremely thoroughly. Check your manual for any specific recommendations on sanitizing.
Preventing Mold Kitchenaid Ice Maker Issues
Mold thrives in damp, dark environments. Here’s how to prevent it:
- Regular Cleaning: This is the most effective way to prevent mold.
- Dry Thoroughly: Always ensure all parts are completely dry after cleaning.
- Air Out: If you’re not using the ice maker for an extended period, consider turning it off and leaving the ice bin door ajar to allow air circulation.
- Filtered Water: Using filtered water can reduce the mineral content, which sometimes contributes to a favorable environment for microbial growth.
Special Considerations for Different Kitchenaid Ice Maker Models
While the general cleaning steps are similar, specific models might have unique features or cleaning recommendations. Always refer to your Kitchenaid ice maker’s user manual for the most accurate and model-specific instructions.
- Built-in vs. Countertop: Built-in units might have slightly different access points for cleaning compared to portable countertop models.
- Water Filter: If your Kitchenaid ice maker has a water filter, remember to replace it according to the manufacturer’s recommendations. A clogged or old filter can affect water quality and ice production.
Can You Use Bleach to Clean a Kitchenaid Ice Maker?
While bleach can be a strong disinfectant, it’s generally not recommended for routine cleaning of ice makers unless specifically stated in your user manual. The strong odor of bleach can be difficult to remove completely, and any residual bleach can make the ice taste unpleasant and be harmful if consumed. If your manual permits it for sanitizing purposes, use it sparingly, dilute it correctly, and rinse the unit multiple times with fresh water, discarding all ice produced during these rinse cycles. The primary method for how to sanitize Kitchenaid ice maker for general cleaning is usually vinegar.
The Importance of Filtered Water
Using filtered water can significantly reduce the amount of minerals and impurities that enter your ice maker. This means less buildup, fewer potential clogs, and purer tasting ice. If your water is particularly hard, investing in a water filter for your home or using a filtered water pitcher for your ice maker’s reservoir can make Kitchenaid ice maker maintenance much easier.
Table: Quick Cleaning Checklist
| Task | Frequency | Key Supplies | Notes |
|---|---|---|---|
| Empty Ice Bin & Scoop | Daily/As Needed | Clean Cloth | Discard old ice, store fresh if applicable. |
| Wipe Down Exterior | Weekly | Mild Soap, Damp Cloth | Avoid harsh chemicals. |
| Clean Ice Bin & Scoop | Monthly | Mild Soap, Soft Sponge | Ensure thorough drying. |
| Interior Wipe-Down | Every 3 Months | Mild Soap, Damp Cloth | Be careful around electrical parts. |
| Descale Ice Maker | Every 3-6 Months | White Vinegar or Cleaner | Follow descaling steps carefully. |
| Rinse After Descaling | After Descaling | Fresh Water | Run multiple cycles, discard ice. |
| Replace Water Filter | As per Manual | New Water Filter | Crucial for water quality. |
Frequently Asked Questions About Kitchenaid Ice Maker Cleaning
Here are some common questions people have about keeping their Kitchenaid ice maker clean:
Q1: What if my Kitchenaid ice maker smells musty?
A1: A musty smell usually indicates mold or mildew. You’ll need to perform a deep clean, focusing on the descaling process with vinegar and ensuring all parts are thoroughly dried. Leaving the unit door ajar for a while after cleaning can also help air it out.
Q2: Can I use a dishwasher to clean the ice bin?
A2: Many ice bins are dishwasher safe, but always check your user manual first. If you do use the dishwasher, ensure it’s on the top rack with a gentle cycle.
Q3: My ice maker is producing ice slowly. What should I do?
A3: This is often a sign of mineral buildup. The first step is to perform a thorough descaling. Also, ensure the water line to the ice maker is not kinked or obstructed.
Q4: How do I know if my Kitchenaid ice maker needs cleaning?
A4: Signs include: slow ice production, cloudy ice, ice with an off-taste or odor, or visible residue inside the unit. Regular cleaning is also recommended even if you don’t see obvious signs.
Q5: What is the best Kitchenaid ice maker cleaning solution?
A5: For most Kitchenaid ice makers, a solution of equal parts white vinegar and water is highly effective for both cleaning and descaling. If you prefer a commercial product, ensure it is specifically designed for ice makers and approved by Kitchenaid or is a generic ice maker cleaner that is safe for food-grade appliances. Always follow the product’s instructions.
By following these comprehensive steps for Kitchenaid ice maker cleaning, you can ensure you always have fresh, clean ice. Regular Kitchenaid ice maker maintenance, including descaling Kitchenaid ice maker components and properly cleaning ice bucket Kitchenaid parts, will keep your appliance running smoothly and efficiently for years to come. Remember, a little effort in cleaning can prevent bigger Kitchenaid ice maker troubleshooting issues down the line and help in preventing mold Kitchenaid ice maker might develop.