
Image Source: i.ytimg.com
Easy Steps: How To Install Kitchen Sink Strainer On Cast Iron
A kitchen sink strainer is a vital part of your sink. It stops food bits and other items from going down your drain. This keeps your pipes clear. Installing a new strainer, especially on a heavy cast iron sink, is a job many homeowners can do. You can save money by doing it yourself. This guide will show you how. We make it easy to follow. You will learn the best ways to get it right. This helps stop leaks and keeps your sink working well.
Grasping the Basics of Your Sink Strainer
Before we start, let’s learn a bit about your sink. It helps to know the parts you are working with. This makes the job easier.
What a Kitchen Sink Strainer Is
A kitchen sink strainer is a metal cup. It fits into the hole of your sink. It has small holes to let water pass through. But it catches larger food particles. Most strainers also have a stopper. You can use it to hold water in the sink. This is handy for washing dishes.
Why Cast Iron Sinks Are Unique
Cast iron sinks are very strong. They are also very heavy. They last a long time. But their surfaces can be rough. This means you need a good seal when installing a strainer. A poor seal can lead to drips and leaks. This is why careful work is key. You want to stop water from getting where it should not.
Getting Your Tools Ready
Gathering your tools first makes the job flow smoothly. You do not want to stop in the middle to find something. Here is a list of what you will need.
Tools
- Plumber’s Putty or Silicone Sealant: This seals the strainer flange. It stops water leaks.
- New Sink Strainer Kit: This kit usually has all the parts. It includes the strainer flange, rubber gasket, friction washer, and locknut. Make sure it fits your sink.
- Basin Wrench: This special wrench helps tighten parts in tight spots. It is a very useful tool.
- Adjustable Wrench or Pliers: For general tightening or loosening.
- Screwdriver: Often needed for small screws on the drain assembly.
- Bucket or Bowl: To catch any water drips when you remove the old parts.
- Rags or Towels: For cleaning and wiping up spills.
- Utility Knife or Putty Knife: To scrape off old sealant.
- Flashlight or Headlamp: To see well under the sink.
- Wire Brush or Scouring Pad: For cleaning the sink hole.
Materials
- New Sink Strainer Kit: Be sure it is the correct size. Most sinks use a 3.5-inch diameter strainer.
- Plumber’s Putty: This is a clay-like substance. It forms a watertight seal. It is a go-to for many plumbers.
- Silicone Sealant: An alternative to plumber’s putty. It makes a very strong, lasting seal. It is great for leak prevention.
- Rubber Gasket: This soft ring creates a seal between metal parts. It comes with your new drain assembly.
- Locknut: This large nut tightens the strainer to the sink. It holds everything firmly.
- Drain Assembly: This term covers all the parts. It includes the strainer, gaskets, and nuts. It connects the sink to the trap.
Preparing Before You Start
Good prep work makes any job easier. It also helps avoid mistakes. Take your time with these steps.
Clearing the Area
First, empty out the cabinet under your sink. Move any cleaning supplies or other items. You need a clear space to work. This helps you move freely. It also makes it easier to see what you are doing. Put down old towels or newspaper. This catches any drips.
Turning Off the Water
This is a very important step. You do not want water spraying everywhere. Find the water shut-off valves. They are usually under the sink. There are two valves. One is for cold water. The other is for hot water. Turn both valves fully clockwise. This stops the water flow. Open your sink faucet. Let any water left in the pipes drain out.
Removing the Old Strainer
If you are replacing an old strainer, you need to take it out first. This part can be tricky. Old parts might be stuck.
Steps for Removing an Old Strainer
- Look Under the Sink: Find the drainpipe connection. It connects to the strainer. You will see a large nut. This is the tightening nut or locknut. It holds the strainer in place.
- Use Your Wrench: Get your basin wrench or adjustable wrench. Place it on the locknut. Turn it counter-clockwise. This loosens the nut. It might be very tight. You might need to use some force.
- Support the Top: Have someone hold the strainer from the top. Or, use a pair of pliers inside the strainer basket. This stops it from spinning while you loosen the nut.
- Remove the Parts: Once the locknut is off, remove the rubber gasket and friction washer. Then, from the top, lift the old strainer flange out of the sink.
- Deal with Stubborn Parts: If the nut is rusted, use a penetrating oil. Spray it on the nut. Wait a few minutes. Then try again. Sometimes, you might need to cut the old nut off. Use a hacksaw or reciprocating saw. Be very careful. Do not damage the sink itself.
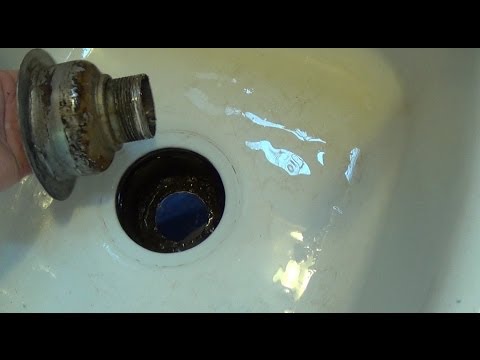
Cleaning the Sink Hole
This step is key for a good seal. The new strainer needs a clean surface.
- Scrape Away Old Material: Use a utility knife or putty knife. Scrape off any old plumber’s putty or silicone sealant. Do this from both the top and bottom of the sink hole.
- Clean the Surface: Get a wire brush or scouring pad. Scrub the rim of the sink hole. Make sure it is clean. There should be no dirt, rust, or old gunk. Wipe it dry with a rag. A clean surface helps the new seal work well. For cast iron sinks, this is extra important. Their surfaces can be rough. A clean surface lets the new sealant fill all the tiny gaps.
Step-by-Step Installation Guide
Now, you are ready to put in the new strainer. Follow these steps carefully. This will help prevent any leaks.
Phase 1: Setting the Strainer Flange
This is the top part of your new drain assembly. It sits in the sink basin.
Applying Plumber’s Putty or Silicone Sealant
This step is very important for leak prevention. It makes a watertight seal.
- Choose Your Sealant: You can use plumber’s putty or silicone sealant.
- Plumber’s Putty: Take a small amount of putty. Roll it into a rope shape. It should be about 1/2 inch thick.
- Silicone Sealant: If you use silicone, apply a thin bead. Put it around the underside rim of the strainer flange.
- Apply to Strainer Flange: Place the putty rope around the underside rim of the strainer flange. Make sure it is a full circle. It should meet itself. This creates a good seal. If using silicone, make a continuous bead.
Placing the Strainer Flange
- Insert into Sink Hole: Carefully put the strainer flange into the drain hole in the sink. Push it down firmly. It should sit flat.
- Press Down: Apply pressure from the top. This makes the plumber’s putty or silicone spread out. It fills any small gaps. You should see some putty squeeze out from under the rim. This means you used enough.
Phase 2: Assembling Below the Sink
Now, you will work from under the sink. These parts secure the strainer flange. They also help prevent leaks.
- Adding the Rubber Gasket:
- Slide the large rubber gasket onto the threaded part of the strainer. Make sure it is flat. The wider side of the gasket often faces up, against the bottom of the sink. This creates a good seal.
- This rubber gasket is a key part of the drain assembly. It stops water from getting past the sink bottom.
- Placing the Friction Washer:
- Next, slide the friction washer onto the threads. This washer is usually made of cardboard or plastic. It helps the locknut turn smoothly. It also helps to keep the locknut from loosening over time.
- Securing with the Locknut:
- Screw the large locknut onto the threads of the strainer. Start by hand. Turn it clockwise until it is snug.
- This locknut is crucial. It pulls the strainer flange down tightly. This makes the plumber’s putty or silicone create a strong seal.
- Using a Basin Wrench for Tightness:
- Once the locknut is hand-tight, use your basin wrench. Or use adjustable pliers.
- Tighten the locknut firmly. Turn it clockwise. Do not overtighten. This can crack the sink or strip the threads. Tighten it just enough so the strainer flange no longer spins from the top. And it feels very secure.
- The basin wrench lets you reach this tightening nut easily. It has a long handle and a swiveling jaw. This makes it perfect for tight spaces under a sink. For a cast iron sink drain, a good, tight connection here is very important.
Phase 3: Connecting the Drain Assembly
Now you will connect the tailpiece. This is the first part of your drainpipe.
- Attaching the Tailpiece:
- Your new strainer kit likely came with a short pipe. This is the tailpiece. It connects to the strainer. It then goes to the P-trap.
- Slide the large nut and rubber washer onto the tailpiece.
- Screw the tailpiece onto the bottom of the strainer body. Hand-tighten it first.
- Then, use an adjustable wrench to tighten it fully. Again, do not overtighten. It should be snug.
- Checking for Proper Alignment:
- Make sure the tailpiece points correctly towards your P-trap. The P-trap is the U-shaped pipe. It holds water. This water stops sewer gases from coming into your home. Ensure all connections are straight and aligned. This prevents future leaks.
Phase 4: Final Checks and Testing
You are almost done! These final steps ensure everything works well.
- Cleaning Excess Putty/Sealant:
- Wipe away any plumber’s putty that squeezed out. Use a rag. You can also use a utility knife. Do this gently. Do not scratch your sink. Do this both inside and outside the sink basin. Also, wipe away any from under the sink.
- If you used silicone, let it dry for the time recommended on the package. This is usually a few hours. Check the product label.
- Turning Water Back On:
- Go back under the sink. Turn the hot and cold water shut-off valves back on. Turn them counter-clockwise until they are fully open.
- Testing for Leaks:
- Close the sink stopper. Fill the sink with water. Fill it about halfway. Let it sit for 10-15 minutes.
- While the sink is full, look very carefully under the sink. Use your flashlight. Check all connections. Look for any drips or wet spots. Pay close attention to the strainer flange, the locknut, and the tailpiece connections.
- After waiting, pull the stopper. Let all the water drain out. Watch for leaks as the water drains. This puts pressure on the system. It helps find small leaks.
- If you see any leaks, you might need to tighten the specific nut a bit more. Or, you might need to re-do the sealing step.
Important Tips for Success
Here are some extra tips to make your job go smoothly.
Do Not Overtighten
It is easy to overtighten nuts. This can cause damage. Plastic parts can crack. Metal threads can strip. This means they will not hold. Tighten until it is snug and secure. Then, give it just a small extra turn. But do not use all your strength.
Choosing the Right Sealant
Plumber’s putty is good for metal-to-metal contact. It stays soft. This makes it easy to remove later if needed. Silicone sealant makes a stronger, more permanent bond. It is better for rough surfaces. Cast iron sinks often have a rough surface. So, silicone sealant can be a great choice for them. It helps with excellent leak prevention. Read the instructions on your sealant.
Dealing with Stubborn Old Parts
Old parts can be stuck. Rust is a common problem.
* Penetrating Oil: Spray a rust-loosening oil on nuts. Let it sit for a while. It helps break down the rust.
* Heat: A heat gun or hair dryer can warm up metal. This helps expand it. It can make nuts easier to turn. Be careful with heat. Do not use open flames near pipes or wood.
* Cutting: As a last resort, use a hacksaw or cutting tool. Cut off old, stubborn nuts. Always wear safety glasses. Be careful not to cut the sink or other good pipes.
When to Call a Pro
Most people can do this job. But some cases need a plumber.
* Ongoing Leaks: If you keep having leaks after trying to fix them, call a plumber.
* Major Damage: If the sink itself is cracked during removal, you might need help.
* Complex Plumbing: If your drain system is very old or complex, a plumber can help. They can make sure everything is up to code. They know all about cast iron sink drain systems.
Keeping Your New Strainer Working Well
Once installed, a little care helps your strainer last longer.
Regular Cleaning
Food bits, grease, and soap can build up. Clean your strainer often.
* Daily Wipe Down: A quick wipe after washing dishes helps.
* Weekly Scrub: Remove the strainer basket. Scrub it with a brush and dish soap. This keeps it clean and free of grime.
* Deep Clean: Every few months, take the strainer apart. Clean all parts. Check for any hair or debris in the drainpipe right under the strainer.
Checking for Wear
Over time, parts can wear out.
* Rubber Gasket: The rubber gasket can become hard or crack. This can cause leaks. Check it every few years. Replace it if it looks bad.
* Strainer Basket: The metal can corrode or bend. If your strainer basket does not hold water well, it might need replacing.
By following these easy steps, you can install your kitchen sink strainer on cast iron with confidence. You will have a leak-free and well-working sink. This DIY project is rewarding. It helps you learn about your home.
Frequently Asked Questions (FAQ)
Q1: Can I use silicone sealant instead of plumber’s putty?
Yes, you can use silicone sealant. It creates a very strong, lasting seal. It is often preferred for rough surfaces like cast iron sinks. Make sure it is kitchen and bath silicone. Let it cure fully before testing for leaks.
Q2: What if the old locknut is rusted stuck?
First, try a penetrating oil. Spray it on the nut. Let it soak for 15-30 minutes. Use a basin wrench or strong pliers. If it still won’t move, you might need to carefully cut the nut off. Use a hacksaw or a cutting tool. Be very careful not to damage the sink itself or surrounding pipes.
Q3: How tight should I make the locknut?
Tighten the locknut until it is snug and secure. It should hold the strainer firmly in place. The strainer should not spin when you try to turn it from the top. Do not overtighten. Over-tightening can crack your sink or strip the threads. Tighten it just past hand-tight.
Q4: Why is my new strainer leaking after installation?
Leaks often happen if the sealant or gasket is not right.
1. Check the Sealant: Did you use enough plumber’s putty or silicone? Was it applied evenly? Make sure there are no gaps.
2. Check the Gasket: Is the rubber gasket sitting flat? Is it oriented correctly?
3. Tightness: Is the locknut tight enough? It might need another quarter turn.
4. Clean Surface: Was the sink hole clean before installation? Old gunk can stop a good seal.
If leaks persist, you may need to take the strainer out and re-do the sealant application. Ensure a super clean, dry surface.
Q5: Do I need special tools for a cast iron sink?
A basin wrench is very helpful. Cast iron sinks are thick. This means the strainer’s threads can be shorter than on thinner sinks. A basin wrench helps you reach and tighten the locknut in tight spots. Otherwise, the tools are mostly the same as for other sink types.