
What is a kitchen backsplash and why is it important? A kitchen backsplash is a decorative and protective layer of material installed on the wall behind your countertops and stove. It shields your walls from splatters, stains, and grease, making cleaning easier and preserving the aesthetic of your kitchen. Choosing the right backsplash is a crucial step in any kitchen renovation, adding personality and style while serving a vital functional purpose.
When embarking on a kitchen renovation, the backsplash is often one of the most impactful design elements. It’s your opportunity to infuse color, texture, and pattern into the heart of your home. But with a vast array of backsplash materials and ever-evolving trends, how do you make the perfect choice? This comprehensive guide will walk you through everything you need to know, from deciphering material properties to embracing the latest design ideas.
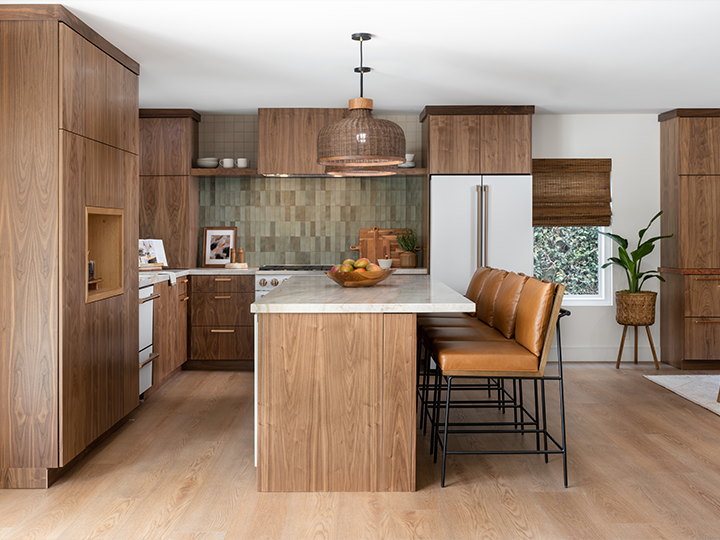
Image Source: www.jasmine-roth.com
Exploring Your Backsplash Material Options
The world of backsplash materials is diverse, offering something for every taste and budget. Each material brings its own unique characteristics in terms of durability, maintenance, cost, and aesthetic appeal. Making informed decisions about these backsplash materials is key to achieving both beauty and practicality.
Ceramic and Porcelain Tile Choices
Ceramic and porcelain tiles are perennial favorites for a reason. They are incredibly versatile, durable, and come in an almost endless range of colors, patterns, and finishes.
- Ceramic Tile:
- Pros: Generally more affordable than porcelain, easier to cut for DIY installation. Available in a vast array of styles, from classic subway tiles to intricate mosaics.
- Cons: Can be more prone to chipping or cracking than porcelain if subjected to heavy impact. Less water-resistant than porcelain, though still suitable for most kitchen applications.
- Porcelain Tile:
- Pros: Extremely durable, denser, and less porous than ceramic. Highly resistant to water, stains, and heat. Excellent for high-traffic areas.
- Cons: Can be more expensive than ceramic. Harder to cut, which might make DIY installation more challenging.
Table 1: Ceramic vs. Porcelain Tile
| Feature | Ceramic Tile | Porcelain Tile |
|---|---|---|
| Durability | Good, but can chip or crack | Excellent, very hard and dense |
| Water Resistance | Good, but less than porcelain | Excellent, very low water absorption |
| Heat Resistance | Good | Excellent |
| Cost | Generally lower | Generally higher |
| Installation | Easier to cut, good for DIY | Harder to cut, may require professional installation |
| Appearance | Wide variety of styles and finishes | Wide variety of styles, can mimic natural stone |
Natural Stone: Timeless Elegance
For a touch of natural beauty and sophistication, consider natural stone backsplashes. These materials offer unique variations and a luxurious feel.
- Marble: Known for its classic veining and elegant appearance. It adds a high-end look to any kitchen.
- Pros: Beautiful, luxurious, timeless.
- Cons: Porous and prone to staining and etching from acids (like lemon juice or vinegar). Requires regular sealing and careful maintenance. Can be expensive.
- Granite: Extremely durable and heat-resistant. Offers a rich, often speckled appearance.
- Pros: Very durable, heat and stain-resistant (when sealed). Wide range of colors and patterns.
- Cons: Can be heavy and requires proper support. Needs to be sealed periodically to prevent staining.
- Travertine: Offers a warm, earthy look with natural holes and texture.
- Pros: Unique natural beauty, warm aesthetic.
- Cons: Porous and requires sealing. The natural holes can collect grease and grime if not properly sealed and maintained.
- Limestone: Similar to marble but often with a softer, more muted appearance.
- Pros: Elegant and sophisticated.
- Cons: Very porous, susceptible to staining and etching. Requires frequent sealing and meticulous care.
Glass: Modern Shine and Reflectivity
Glass backsplashes offer a sleek, modern, and airy feel. They can reflect light, making your kitchen appear brighter and larger.
- Glass Tile: Available in a multitude of colors, shapes, and finishes, including glossy, frosted, and metallic.
- Pros: Easy to clean, water-resistant, reflects light beautifully, modern aesthetic.
- Cons: Can be prone to chipping or cracking, especially if thin. May show water spots and streaks easily. Installation requires precision to avoid breakage.
- Solid Glass Panels: Large, seamless panels of tempered glass.
- Pros: Extremely easy to clean, no grout lines, very modern and minimalist. Can be back-painted in any color.
- Cons: Can be expensive. Professional installation is almost always required due to the weight and fragility of the panels. Can show smudges easily.
Metal: Industrial Chic and Durability
Metal backsplashes bring an industrial or contemporary edge to a kitchen. They are durable and easy to clean.
- Stainless Steel: A popular choice for its sleek, modern look and excellent durability.
- Pros: Highly durable, heat-resistant, easy to clean, resistant to stains and corrosion. Modern and professional aesthetic.
- Cons: Can show fingerprints and smudges. Can be scratched by abrasive cleaners. Installation can be tricky due to its rigidity.
- Copper: Offers a warm, rich patina that develops over time.
- Pros: Unique aesthetic, develops a beautiful patina.
- Cons: Can be expensive. Can react to acidic foods and may require sealing. Can be dented.
- Aluminum: Lightweight and offers a brushed or polished finish.
- Pros: Lightweight, easy to cut and install.
- Cons: Softer than stainless steel, can scratch more easily.
Other Notable Materials
- Quartz: While typically used for countertops, quartz can also be used for backsplashes, offering a seamless, highly durable, and non-porous surface. It provides a very modern and hygienic option.
- Stacked Stone or Ledge Stone: These offer a dramatic textural element, creating a natural, rugged look. They can be more challenging to clean due to the uneven surfaces.
- Peel-and-Stick Tiles: A DIY-friendly option, often made of vinyl or other composite materials. They are affordable and easy to install, but may not offer the same durability or long-term aesthetic as traditional materials.
Key Considerations for Your Backsplash Design Ideas
Beyond the material itself, several other factors will influence your final backsplash choice and overall kitchen design.
Countertop Matching: A Crucial Pairing
The relationship between your backsplash and your countertops is paramount. A successful pairing can elevate your entire kitchen’s look.
- Complementary Colors and Patterns: If your countertops are busy or strongly patterned (like a granite with a lot of variation), a simpler, more understated backsplash in a coordinating color is often best. Conversely, if your countertops are a solid, neutral color, you have more freedom to experiment with patterned or textured tiles for your backsplash.
- Material Harmony: Consider the overall feel you want to achieve. A marble countertop pairs beautifully with a marble subway tile backsplash for a cohesive, luxurious look. A butcher block countertop might look stunning with a more rustic ceramic tile or even a metal backsplash.
- Height of the Backsplash: Will your backsplash go all the way up to the cabinets, or just a few inches behind the countertop? This decision impacts the visual weight and the amount of material needed. An all-the-way-up backsplash is a bold statement, while a shorter one can feel more subtle.
Grout Selection: The Unsung Hero
Grout plays a more significant role in backsplash design than many people realize. Grout selection can either blend seamlessly or create a striking contrast, fundamentally altering the appearance of your tiled backsplash.
- Color Matters:
- Matching Grout: Using grout that closely matches the tile color creates a cohesive, seamless look, allowing the tile pattern or shape to be the main focus.
- Contrasting Grout: A contrasting grout color, such as white grout with dark tiles or dark grout with white tiles, can highlight the individual tiles and define patterns, adding visual interest and a more graphic feel.
- Type of Grout:
- Sanded Grout: Used for grout lines wider than 1/8 inch. It contains sand for strength and durability.
- Unsanded Grout: Used for grout lines narrower than 1/8 inch. It’s smoother and less prone to scratching delicate tiles like glass.
- Epoxy Grout: Highly durable, stain-resistant, and waterproof. It’s an excellent choice for high-splash areas but is more expensive and can be trickier to install.
- Grout Colors: Modern grout colors range from classic whites and grays to bold blacks, earthy browns, and even vibrant hues. Consider the overall color scheme of your kitchen when making your grout colors choice.
Embracing Current Backsplash Trends
Staying on top of trends can inspire your kitchen renovation, but remember that timeless designs often have the most longevity.
- Large Format Tiles: Moving away from small mosaics, larger tiles (like 12×24 inches or even larger slabs) are becoming increasingly popular. They create a more streamlined look with fewer grout lines, making cleaning easier.
- Natural Textures: Materials that mimic natural textures, like wood-look porcelain or stone with pronounced veining, are in demand. They bring warmth and organic beauty into the kitchen.
- Geometric Patterns: Bold geometric tiles, from hexagons and arabesques to more complex tessellations, add a strong design statement and a touch of artistic flair.
- Bold Colors and Dramatic Finishes: While neutrals remain popular, there’s a growing trend towards bolder colors, especially in matte finishes or deep jewel tones, as well as metallic finishes for a touch of glam.
- Backsplashes Extending to the Ceiling: For a dramatic effect, extending the backsplash material all the way up to the ceiling behind the range or behind floating shelves creates a striking focal point.
- Mixed Materials: Combining different materials, such as a tiled backsplash with a narrow band of metal or stone accent, can create a unique and custom look.
Making the Installation Decision: DIY vs. Professional
Once you’ve selected your material and design, the next critical step is installation. Deciding between DIY installation and hiring a professional depends on your skill level, the complexity of the material, and your available time.
DIY Installation: A Rewarding Challenge
Tackling a backsplash installation yourself can be a rewarding way to save money and gain a sense of accomplishment, especially for simpler tile choices. A good backsplash installation guide is essential for a successful outcome.
- Pros: Cost savings, personal satisfaction, control over the process.
- Cons: Can be time-consuming, requires specific tools and skills, potential for mistakes that can be costly to fix, some materials are not DIY-friendly.
- When to DIY:
- Using standard ceramic or porcelain tiles (like subway tile).
- You have prior tiling experience or are willing to learn and practice.
- You have the necessary tools (tile saw, notched trowel, level, tile nippers, etc.).
- You have a flexible timeline.
Professional Installation: Expertise and Efficiency
For complex materials or intricate designs, professional installation ensures a high-quality finish and protects your investment.
- Pros: Expertise and experience lead to a flawless finish, saves you time and effort, handles potential challenges expertly, guarantees on workmanship.
- Cons: Higher cost.
- When to Hire a Pro:
- Working with natural stone, glass, or metal that requires precise cuts and careful handling.
- Complex patterns or mosaics.
- Large format tiles or seamless panels.
- If you lack confidence or experience in tiling.
- You want the job done quickly and perfectly.
Backsplash Installation Guide: Key Steps (General Overview)
- Preparation: Clean the wall thoroughly. Ensure the surface is smooth and dry. Mark out your layout lines using a level and pencil.
- Mixing Adhesive: Prepare your tile adhesive or thin-set mortar according to the manufacturer’s instructions.
- Applying Adhesive: Use a notched trowel to spread the adhesive evenly onto the wall in small sections. The notch size depends on the tile size.
- Setting Tiles: Place tiles onto the adhesive, pressing firmly. Use tile spacers to ensure consistent grout lines. Check for level and plumb as you go.
- Cutting Tiles: Measure and cut tiles as needed, especially around outlets and corners. A wet saw is often necessary for precise cuts, particularly with harder materials.
- Grouting: Once the adhesive has cured (usually 24-48 hours), remove spacers and apply grout using a grout float, pressing it into the gaps.
- Cleaning Grout: Wipe away excess grout with a damp sponge, rinsing the sponge frequently.
- Sealing (if applicable): For porous materials like natural stone, apply a sealant once the grout has cured to protect against stains.
Important Note: Always consult the specific installation instructions for your chosen material and adhesive.
Frequently Asked Questions (FAQ)
Q1: What is the most durable backsplash material?
Porcelain tile and stainless steel are generally considered the most durable materials for kitchen backsplashes due to their resistance to scratches, stains, and moisture.
Q2: Can I use the same material for my backsplash as my countertop?
Yes, absolutely! Using the same material for both the countertop and backsplash can create a sleek, cohesive, and modern look, especially with materials like quartz or solid stone slabs.
Q3: How high should my backsplash go?
Traditionally, backsplashes extended a few inches above the countertop. However, it’s now very common to extend them all the way to the underside of your kitchen cabinets, or even to the ceiling, for a more dramatic and protective finish.
Q4: How do I clean my backsplash?
Cleaning methods vary by material. Generally, mild soap and water are safe for most materials. For natural stone, use pH-neutral cleaners. For stainless steel, use a stainless steel cleaner. Avoid abrasive cleaners on most surfaces to prevent scratching.
Q5: What are the most popular backsplash trends right now?
Current trends include large format tiles, natural textures, geometric patterns, bold colors, and extending backsplashes to the ceiling.
Choosing the perfect kitchen backsplash is a journey that involves balancing aesthetics, functionality, and your personal style. By exploring the diverse range of backsplash materials, considering countertop matching, and paying attention to details like grout selection, you can create a kitchen that is both beautiful and practical. Whether you opt for a classic tile choices like subway tile or embrace a bold contemporary trend, your backsplash will be a defining feature of your kitchen renovation. Remember to weigh the benefits of DIY installation against professional installation to ensure a fantastic result for your updated kitchen.