
Can you remove the bowl from a Kitchenaid mixer? Yes, absolutely! Removing the bowl from your Kitchenaid stand mixer is a fundamental step in using and maintaining your appliance. It’s a simple process, but knowing the correct technique ensures you can easily switch bowls, clean them, or access the mixer’s motor base for maintenance or repairs. This guide will walk you through the entire process of Kitchenaid mixer bowl removal, from the most common methods to troubleshooting when the Kitchenaid bowl is stuck.
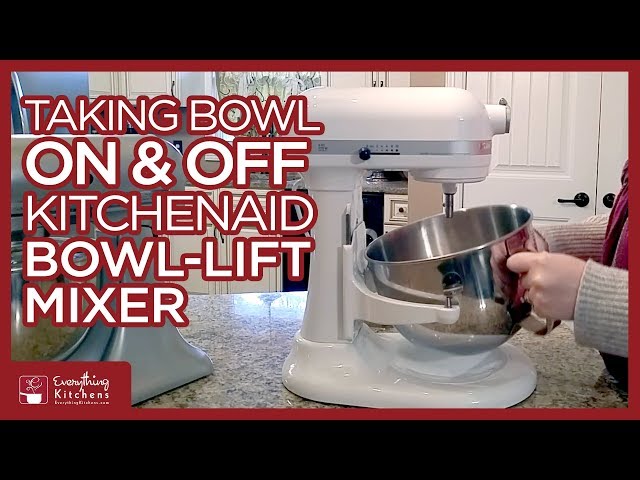
Image Source: i.ytimg.com
Detaching Your Kitchenaid Bowl: A Step-by-Step Guide
The design of Kitchenaid stand mixers prioritizes user-friendliness, and this extends to bowl detachment. For most Kitchenaid models, the process involves a simple twist and lift.
The Standard Twist-and-Lift Method
This is the most common way to remove the bowl from your Kitchenaid stand mixer.
- Ensure the Mixer is Off and Unplugged: Safety first! Always make sure your mixer is turned off and unplugged from the power outlet before attempting to remove the bowl or any attachments.
- Locate the Bowl Lock Mechanism: On the base of the mixer, where the bowl sits, you’ll find a mechanism designed to secure the bowl. This is usually a lever or a slot that engages with a tab on the bowl.
- Turn the Bowl Counter-Clockwise: Grasp the bowl firmly with one hand. With your other hand, apply a gentle but firm twisting motion to the bowl in a counter-clockwise direction. You should feel a slight resistance as the bowl disengages from its locked position.
- Lift the Bowl Off: Once you’ve turned the bowl about a quarter turn, you should be able to lift it straight up and away from the mixer base.
This method works for the vast majority of Kitchenaid stand mixer models, including tilt-head and bowl-lift designs.
Variations Based on Mixer Type
While the twist-and-lift is standard, there can be minor variations depending on your specific Kitchenaid model.
Tilt-Head Mixers
Kitchenaid tilt-head mixers are incredibly popular due to their easy access to the bowl.
- Bowl Engagement: The bowl on tilt-head models typically locks into place with a twist. The mixer head can then be tilted back for easier access to the bowl and beater.
- Removal Process: Follow the standard twist-and-lift method described above. The mechanism is usually quite straightforward.
Bowl-Lift Mixers
These models are designed for heavier-duty tasks and often have a more robust bowl locking system.
- Bowl Engagement: Bowl-lift mixers feature a lever on the side of the mixer. This lever is used to raise or lower the bowl carriage. The bowl itself often slides onto posts and is secured by a latch or a twist mechanism at the base.
- Removal Process:
- Lower the bowl carriage to its lowest position using the lever.
- Grasp the bowl and twist it counter-clockwise, similar to the tilt-head models.
- Once unlocked, lift the bowl straight up.
Unlocking Mixer Bowl: What to Do When It Feels Stuck
Sometimes, despite following the standard procedure, the Kitchenaid bowl can feel stuck. This is a common issue, and there are several reasons and solutions for a Kitchenaid bowl stuck.
Common Reasons for a Stuck Bowl
- Food Debris or Sticky Residue: Over time, ingredients like sugar, honey, or flour can bake onto the locking mechanism or the rim of the bowl, creating a sticky bond.
- Improper Seating: If the bowl wasn’t perfectly aligned when it was locked, or if it shifted during operation, it can sometimes be difficult to unlock.
- Wear and Tear: Like any appliance, parts of your Kitchenaid mixer can wear down over time, leading to a tighter fit or a less responsive locking mechanism.
- Over-tightening: Accidentally twisting the bowl too forcefully can sometimes make it harder to remove.
Kitchenaid Bowl Fixes for a Stuck Bowl
When you’re faced with a stubborn Kitchenaid bowl, try these troubleshooting steps to unlatch Kitchenaid bowl:
-
Gentle Wiggling:
- With the mixer unplugged, try gently wiggling the bowl side-to-side while continuing to turn it counter-clockwise.
- Apply steady, even pressure. Avoid jerky movements, which could damage the mechanism.
-
Warm Water Flush:
- For sticky residue, a gentle flush with warm water can work wonders.
- Turn the mixer upside down (if possible, with the bowl still attached and unplugged).
- Pour a small amount of warm (not hot) water around the base of the bowl where it connects to the mixer. Let it sit for a few minutes to soften any dried-on ingredients.
- Try the twist-and-lift method again. You might need to use a dish towel for a better grip.
-
Dish Soap Application:
- If water alone doesn’t do the trick, add a drop or two of dish soap to the warm water. The soap will help break down grease and sticky substances.
- Again, let it sit for a few minutes before attempting to twist.
-
Use a Towel for Grip:
- A dry dish towel or a silicone grip mat can significantly improve your hold on the bowl, making it easier to apply the necessary torque.
-
Check for Obstructions:
- Carefully inspect the locking mechanism and the rim of the bowl for any visible debris.
- Use a soft brush or a damp cloth to clean away any foreign material.
-
Avoid Excessive Force:
- It’s important to be firm but not overly aggressive. Forcing the bowl can damage the locking mechanism or the mixer base, leading to more significant kitchen appliance repair needs.
Removing Mixer Attachment When Bowl is Off
Once the bowl is successfully removed, you might need to detach any mixing attachments (like the whisk, dough hook, or flat beater) that are still in the mixer.
Detaching Mixer Attachments
- Ensure Mixer is Off and Unplugged: This is crucial before reaching into the mixer’s head.
- Locate the Attachment Locking Pin: On most Kitchenaid mixers, the attachment is held in place by a small pin. You’ll see the top of this pin protruding from the attachment’s shaft.
- Press the Pin and Twist:
- With your thumb, press the locking pin inwards. You should feel it depress slightly.
- While keeping the pin pressed, twist the attachment counter-clockwise.
- The attachment should then slide off the shaft.
Table: Common Kitchenaid Mixer Attachments and Removal Tips
| Attachment Type | Removal Technique |
|---|---|
| Whisk (Wire Whip) | Press pin, twist counter-clockwise, slide off. |
| Dough Hook | Press pin, twist counter-clockwise, slide off. |
| Flat Beater | Press pin, twist counter-clockwise, slide off. |
| Pastry Beater | Press pin, twist counter-clockwise, slide off. |
It’s good practice to remove attachments when they are not in use and to clean them promptly after each use. This prevents dried-on food from making their removal more difficult later on.
Kitchenaid Bowl Replacement: When and How
Occasionally, you might need to replace your Kitchenaid mixer bowl. This could be due to damage, a desire for an additional bowl, or if a previous attempt to fix a stuck bowl resulted in damage.
When to Consider a Kitchenaid Bowl Replacement
- Cracks or Chips: If your glass bowl has any cracks or chips, or if your stainless steel bowl has sharp edges, it’s time for a replacement for safety reasons.
- Dents or Warping: Significant dents or warping in a metal bowl can affect its stability and how it locks into the mixer.
- Lost or Damaged Locking Tabs: If the tabs on your bowl that engage with the mixer’s locking mechanism are broken or missing, the bowl won’t secure properly.
- Desire for a Different Material or Size: Kitchenaid offers bowls in various materials (stainless steel, glass, ceramic) and sizes to suit different needs.
- Stuck Bowl Repair Failure: If you’ve tried all the troubleshooting steps for a stuck bowl and it remains immobile, or if you accidentally damaged it during the process, replacement is the best option.
How to Choose and Purchase a Replacement Bowl
- Identify Your Mixer Model: The most crucial step is knowing your Kitchenaid mixer’s model number. This is usually found on a label on the bottom or back of the mixer base. Common series include Artisan, Classic, Professional, and various specific model numbers within those lines (e.g., KSM150PS, KSM7580B).
- Check Bowl Compatibility: Kitchenaid bowls are generally designed to be compatible with specific mixer head types and capacities.
- Artisan/Classic (Tilt-Head): These often use 4.5-quart or 5-quart bowls.
- Professional (Bowl-Lift): These typically use larger capacity bowls, such as 5-quart, 6-quart, or 7-quart.
- Check the Diameter: For tilt-head models, sometimes a slightly different diameter bowl can fit if the locking mechanism is compatible. However, sticking to the recommended size is best.
- Where to Buy:
- Kitchenaid Official Website: This is the most reliable source for genuine Kitchenaid parts and accessories.
- Authorized Retailers: Large appliance stores or kitchenware specialty shops that carry Kitchenaid products may also stock replacement bowls.
- Online Marketplaces: Websites like Amazon, eBay, or specialized appliance parts stores can be options, but always verify the seller’s reputation and ensure the bowl is compatible with your model. Look for listings that explicitly state compatibility with your mixer series or model number.
Installing a New Bowl
Installing a new Kitchenaid mixer bowl is as simple as removing the old one.
- Unplug the Mixer: Always ensure the appliance is powered off and unplugged.
- Align the Bowl: Position the new bowl over the mixer base, aligning the tabs or grooves on the bowl with the corresponding slots on the mixer.
- Twist to Lock: Gently turn the bowl clockwise until it locks securely into place. You should feel a definite click or resistance when it’s properly seated.
- Test: If it’s a tilt-head model, ensure the mixer head can be lowered and locked. For bowl-lift models, ensure the carriage securely holds the bowl.
Troubleshooting Common Kitchenaid Mixer Issues Beyond Bowl Removal
While bowl removal is a key skill, other issues can arise with your Kitchenaid stand mixer. Knowing how to address them can save you time and money on kitchen appliance repair.
Mixer Head Won’t Lock
If the tilt-head mechanism isn’t locking, it could be due to:
- Obstruction: Check for debris in the hinge area or the locking latch.
- Bent Lever: The lever that locks the head might be slightly bent.
- Internal Mechanism Issue: This might require professional service.
Bowl Won’t Turn or Lock
This directly relates to bowl removal issues but might also indicate:
- Bent Locking Tabs: The metal tabs on the base of the bowl might be bent. Gently try to straighten them with pliers, but be cautious not to break them.
- Worn Mixer Base Mechanism: The internal components that engage the bowl might be worn.
Speed Control Problems
If your mixer isn’t running at the correct speeds:
- Electronic Control Board: For mixers with electronic speed control, this board might be faulty.
- Motor Issues: More complex internal motor problems.
In cases of significant mechanical or electrical issues, contacting Kitchenaid customer support or a qualified appliance repair technician is recommended.
Maintaining Your Kitchenaid Mixer for Longevity
Proper maintenance ensures your Kitchenaid stand mixer, including its bowl and locking mechanisms, functions smoothly for years.
Regular Cleaning
- Bowls: Wash glass and stainless steel bowls by hand with warm, soapy water or in the dishwasher (check your manual for specific instructions).
- Attachments: Clean all mixing attachments thoroughly after each use.
- Mixer Base: Wipe down the exterior of the mixer with a damp cloth. Never immerse the base in water.
Lubrication
- Kitchenaid mixers have internal gears that require lubrication. This is typically a service performed every few years. If your mixer sounds unusually noisy or stiff, it might need professional lubrication.
Storage
- Store your mixer in a clean, dry place. If possible, use the dust cover provided or a breathable fabric cover to protect it from dust and debris.
Frequently Asked Questions (FAQ)
Here are some common questions people have about Kitchenaid mixer bowl removal and related issues:
Q1: How do I know if my Kitchenaid bowl is compatible with my mixer?
A1: Always check your mixer’s model number and refer to the Kitchenaid website or your mixer’s manual for compatible bowl sizes and types. Stainless steel bowls are generally very versatile, but glass bowls can have specific fit requirements.
Q2: Can I use a bowl from a different brand of mixer with my Kitchenaid?
A2: It is generally not recommended. Mixing brands can lead to improper fitting, poor performance, and potential damage to both the bowl and the mixer. Always use Kitchenaid-approved bowls for your Kitchenaid mixer.
Q3: My Kitchenaid glass bowl has a small chip on the rim. Is it still safe to use?
A3: For safety reasons, it’s best to replace a glass bowl with any chips or cracks. The damage can worsen during mixing, potentially leading to the bowl breaking or glass fragments getting into your food.
Q4: What if the locking pin for my attachment is stuck?
A4: Try applying a small amount of penetrating oil (like WD-40, but be sure to clean it thoroughly before next use with food) to the pin and letting it sit. Gently try to press and twist the pin again. If it remains stuck, do not force it, as you could damage the attachment or the mixer shaft.
Q5: My tilt-head mixer is wobbly when mixing. What could be the problem?
A5: A wobbly tilt-head can be caused by loose hinge screws or worn bushings. You can try tightening the screws at the hinge points. If the issue persists, it might require professional service to replace worn internal parts.
Q6: How often should I replace the beater or whisk attachments?
A6: Attachments are designed for durability. Replace them if they become bent, warped, or if the coating starts to chip or peel. Regular cleaning and proper storage will extend their lifespan.
Q7: Can I remove the bowl from a Kitchenaid hand mixer?
A7: Kitchenaid hand mixers typically don’t have removable bowls in the same way stand mixers do. The beaters or dough hooks are removed directly from the hand mixer unit, usually by pressing a release button.
Q8: My Kitchenaid bowl seems too tight even when unlocked. What’s a better solution than force?
A8: If the bowl feels tight even after unlocking, ensure there’s no debris or residue at the locking points. Sometimes a slight expansion or contraction due to temperature changes can cause this. Gently rocking the bowl while trying to lift it might help. If it’s a persistent issue, inspect the bowl’s tabs and the mixer’s base for any signs of wear or damage that might require attention or a potential Kitchenaid bowl replacement.
By following these guidelines, you can confidently remove, detach, and maintain your Kitchenaid mixer bowls and attachments, ensuring your appliance remains a reliable workhorse in your kitchen.