
Yes, you can easily replace the filter in your KitchenAid refrigerator yourself. This guide will walk you through the entire process, from finding the right filter to completing the installation. Replacing your KitchenAid refrigerator water filter is crucial for ensuring clean, great-tasting water and ice, and it’s a straightforward maintenance task that most homeowners can accomplish without a service call. This article will cover where to find your filter, how often to change it, and the step-by-step process for a successful water filter installation KitchenAid.
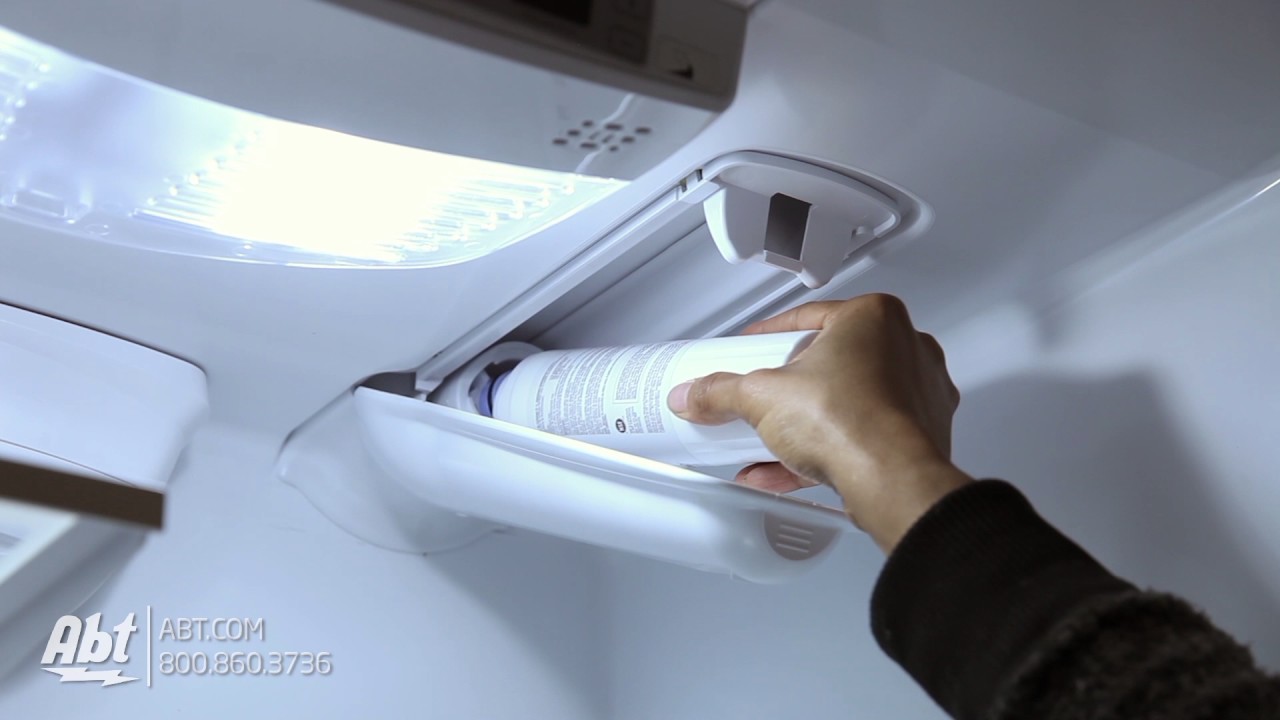
Image Source: i.ytimg.com
Why Change Your KitchenAid Refrigerator Water Filter?
Your refrigerator’s water filter does more than just make your water taste better. It’s a vital component that removes impurities, sediments, chlorine, and other contaminants that can affect the quality of your drinking water and ice. Over time, these contaminants build up in the filter, reducing its effectiveness and potentially leading to:
- Reduced Water Flow: A clogged filter can significantly slow down the flow of water from your dispenser.
- Unpleasant Tastes and Odors: As the filter becomes saturated, it can no longer effectively remove chlorine and other substances that cause off-tastes and smells.
- Potential Health Concerns: While most municipal water is safe, filters can provide an extra layer of protection against certain contaminants.
- Damage to Internal Components: In some cases, sediment can build up in the water lines and ice maker, leading to costly repairs.
This is why regular KitchenAid refrigerator water filter replacement is essential for maintaining optimal performance and ensuring the health and enjoyment of your household.
How Often to Change KitchenAid Fridge Filter
How often to change KitchenAid fridge filter depends on a few factors, but the general recommendation is every six months. However, if you notice any of the following signs, it might be time to change refrigerator filter sooner:
- Slow water dispensing: If your water dispenser is noticeably slower than usual.
- Cloudy or discolored water: This indicates the filter is no longer effectively removing impurities.
- Unpleasant taste or odor: If your water or ice starts to taste or smell bad, the filter needs replacing.
- The refrigerator’s indicator light: Many KitchenAid refrigerators have a built-in indicator light that will alert you when it’s time to replace the filter.
The lifespan of a filter can also be affected by:
- Water quality in your area: If your local water has a high concentration of contaminants, the filter will get clogged faster.
- Usage: The more you use your water dispenser and ice maker, the more the filter will work.
Where is the KitchenAid Refrigerator Filter Located?
Locating the filter is the first step in your KitchenAid refrigerator water filter replacement journey. The kitchenaid fridge filter location varies depending on the model. Here are the most common places to look:
KitchenAid Side by Side Filter Locations
For KitchenAid side by side filter models, the filter is typically found in one of two places:
- Inside the refrigerator compartment, in the upper right corner: Open the refrigerator door. Look towards the top right interior wall. You might see a small grille or cover that conceals the filter.
- In the base grille at the bottom of the refrigerator: Some models have the filter located behind the kick plate or base grille at the very bottom front of the refrigerator. You may need to remove this grille to access the filter.
KitchenAid French Door Refrigerator Filter Locations
For KitchenAid French door refrigerator filter models, the most common locations are:
- Inside the refrigerator compartment, in the upper right corner: Similar to side-by-side models, open the refrigerator door and check the upper right interior. There’s usually a compartment or cover that houses the filter.
- In the crisper drawer area: Some newer models might have the filter located near the crisper drawers, often behind a small access panel.
- In the base grille: Again, the bottom front grille is a common spot for filters on French door models as well.
Pro Tip: If you’re unsure about your specific model, consult your refrigerator’s owner’s manual. It will provide detailed diagrams and instructions for locating and replacing the filter. You can usually find a digital version of your manual on the KitchenAid website by entering your refrigerator’s model number.
Choosing the Best KitchenAid Refrigerator Filter
When it comes to best KitchenAid refrigerator filter, you have a few options:
- OEM (Original Equipment Manufacturer) Filters: These are filters made by KitchenAid or their authorized suppliers. They are specifically designed for your refrigerator model and are guaranteed to fit and perform as intended. While they can be more expensive, they offer the highest level of assurance for compatibility and filtration quality.
- Aftermarket or Compatible Filters: These are filters made by third-party manufacturers that are designed to work with KitchenAid refrigerators. They can be significantly cheaper than OEM filters. However, it’s crucial to ensure the aftermarket filter is certified by NSF International (or a similar reputable certification body) for safety and performance. Look for filters that specifically state they are compatible with your KitchenAid refrigerator model number.
What to look for in a filter:
- NSF Certification: Ensure the filter has an NSF certification, particularly NSF/ANSI Standard 42 for aesthetic effects (like taste and odor) and NSF/ANSI Standard 53 for health effects (like lead or microbial reduction).
- Compatibility: Double-check that the filter is listed as compatible with your specific KitchenAid refrigerator model.
- Filter Life: Most filters are rated for about six months or 300-500 gallons of water.
Table 1: Common KitchenAid Water Filter Models and Their Compatibility
| Filter Model Number | Typical Compatibility | Key Features |
|---|---|---|
| UKF8001 | Various French Door & Side-by-Side models | Reduces chlorine taste and odor, lead, sediment |
| Whirlpool WHKF-DUDE | Often compatible with many KitchenAid models | Similar reductions to UKF8001, often a cost-effective alternative |
| EDRI-600 | Commonly used in many KitchenAid refrigerators | Offers advanced filtration, removing a wider range of contaminants |
Always verify the filter model number recommended in your owner’s manual or on the existing filter in your refrigerator before purchasing a new one.
Step-by-Step Guide: How to Replace Filter in KitchenAid Refrigerator
Now that you know where to look and what filter to buy, let’s get to the refrigerator water filter change steps. This process is designed to be straightforward.
Tools You Might Need:
- New KitchenAid refrigerator water filter (OEM or certified compatible)
- A small towel or absorbent cloth
- A bowl or container to catch any drips (optional)
The Process:
Step 1: Locate the Water Filter
As discussed earlier, open your refrigerator door or locate the base grille. Find the filter housing. It usually looks like a cylindrical unit with a twist-off or push-button release mechanism.
Step 2: Prepare for Filter Removal
- Turn off the water supply (Recommended for some models): While not strictly necessary for all KitchenAid models, it’s a good practice to shut off the water supply valve to your refrigerator before changing the filter. This valve is typically located behind the refrigerator or under the sink. If you cannot locate or access it, proceed with caution, as there might be a small amount of water that drips out.
- Remove any protective caps: Some new filters come with plastic caps on the ends. Remove these before installation.
Step 3: Remove the Old Filter
This is where the water filter installation KitchenAid procedure differs slightly depending on your model.
- For twist-off filters:
- Grasp the filter firmly.
- Turn it counter-clockwise (lefty-loosey) about a quarter turn until it stops.
- Gently pull the filter straight out. Some water may drip, so have your towel ready.
- For push-button release filters:
- Look for a button or latch near the filter housing.
- Press the button or release the latch while simultaneously pulling the filter straight out.
Important Note: Don’t force the filter. If it feels stuck, double-check if there’s a release mechanism you missed or if you’re turning it in the correct direction.
Step 4: Prepare the New Filter
- Remove the old filter: Make sure you’ve pulled the old filter completely out.
- Remove the packaging: Unwrap your new filter and remove any protective caps from the ends.
- Remove the date cap (if applicable): Some filters come with a small date cap on the end. Remove this before installation.
Step 5: Install the New Filter
Now it’s time for the water filter installation KitchenAid.
- For twist-off filters:
- Align the new filter with the housing, ensuring it’s facing the correct direction (usually indicated by arrows or notches).
- Push the filter gently into the housing.
- Turn it clockwise (righty-tighty) about a quarter turn until it locks into place. You should feel or hear a click.
- For push-button release filters:
- Align the new filter with the housing.
- Push the filter straight in until it clicks or latches securely.
Ensure the filter is fully seated and locked. An improperly installed filter can leak or not function correctly.
Step 6: Flush the New Filter
This is a critical step after installing any new water filter.
- Turn the water supply back on if you turned it off.
- Dispense water: Run about 2 to 3 gallons of water through the dispenser. This flushes out any air pockets and loose carbon fines from the new filter. The water may appear cloudy or discolored at first – this is normal. Continue dispensing until the water runs clear.
- Discard the first few batches of ice: If your refrigerator makes ice, discard the first two or three batches.
Step 7: Reset the Filter Indicator Light (If Applicable)
Many KitchenAid refrigerators have a filter indicator light. The method to reset it varies by model:
- Common methods include:
- Pressing and holding a specific button (e.g., “Water,” “Ice,” “Filter,” or “Options”) for a few seconds.
- Navigating through the display menu to find a filter reset option.
Refer to your owner’s manual for the exact procedure to reset your specific model’s filter indicator.
Congratulations! You have successfully completed your KitchenAid refrigerator water filter replacement.
Troubleshooting Common Issues
While the process is generally simple, you might encounter a few minor issues:
-
Filter won’t twist or lock:
- Check alignment: Ensure the filter is correctly aligned with the housing.
- Remove excess packaging: Make sure all protective caps and tape are removed.
- Try a different angle: Gently try inserting and twisting at a slightly different angle.
- Verify compatibility: Ensure you have the correct filter model for your refrigerator.
-
Water leaks after installation:
- Reseat the filter: Remove the filter and reinstall it, ensuring it’s pushed in firmly and twisted/locked correctly.
- Check O-rings: Inspect the O-rings on the filter for any damage. If damaged, the filter may need to be replaced.
- Ensure the housing is clean: Wipe down the filter housing to remove any debris that might prevent a proper seal.
-
Water flow is still slow:
- Flush the filter: If you haven’t flushed it adequately, air pockets can slow the flow. Continue flushing.
- Check for kinks in the water line: Ensure the water line behind the refrigerator isn’t kinked.
- Consider filter lifespan: If it’s been over six months, the filter might be prematurely clogged.
Frequently Asked Questions (FAQ)
Here are answers to some common questions about KitchenAid refrigerator water filter replacement:
Q1: How do I know which KitchenAid refrigerator filter to buy?
A: The best way to know which filter to buy is to check your refrigerator’s owner’s manual or look at the label on your existing filter. You can also find your refrigerator’s model number on a sticker inside the refrigerator compartment (usually on the side wall) and search online for compatible filters.
Q2: Can I use a generic or compatible filter instead of a genuine KitchenAid filter?
A: Yes, you can use compatible aftermarket filters, but it’s essential to choose those that are certified by NSF International for quality and safety. Ensure the compatible filter specifically states it’s designed for your KitchenAid refrigerator model.
Q3: My new filter is making noise or vibrating. Is that normal?
A: Some new filters may make gurgling or vibrating noises as air is pushed out during the initial flushing process. This is usually normal and should subside after you’ve flushed a few gallons of water through it.
Q4: How long does it take for the water to taste normal after changing the filter?
A: After flushing the filter, the water should taste normal immediately. If the taste issue persists, try flushing more water or ensure the filter is correctly installed and that you’re using the correct replacement model.
Q5: What happens if I don’t change the KitchenAid refrigerator water filter?
A: If you don’t change the filter, it will eventually become clogged. This leads to reduced water flow, poor water and ice taste and odor, and potentially damage to your refrigerator’s water system.
Q6: Where can I buy KitchenAid refrigerator water filters?
A: You can purchase KitchenAid refrigerator water filters from major appliance retailers, home improvement stores, online marketplaces like Amazon, and directly from the KitchenAid website.
By following this comprehensive guide, you can confidently perform your KitchenAid refrigerator water filter replacement and enjoy fresh, clean water and ice for your household. Regular maintenance ensures your refrigerator functions optimally and provides the best quality water for your family.