
Yes, you absolutely can spray paint kitchen cupboards! It’s a fantastic DIY project that can dramatically transform your kitchen’s appearance without the hefty price tag of professional cabinet refinishing. If you’ve been dreaming of a kitchen cabinet makeover, read on for the ultimate guide to DIY cabinet spray painting.
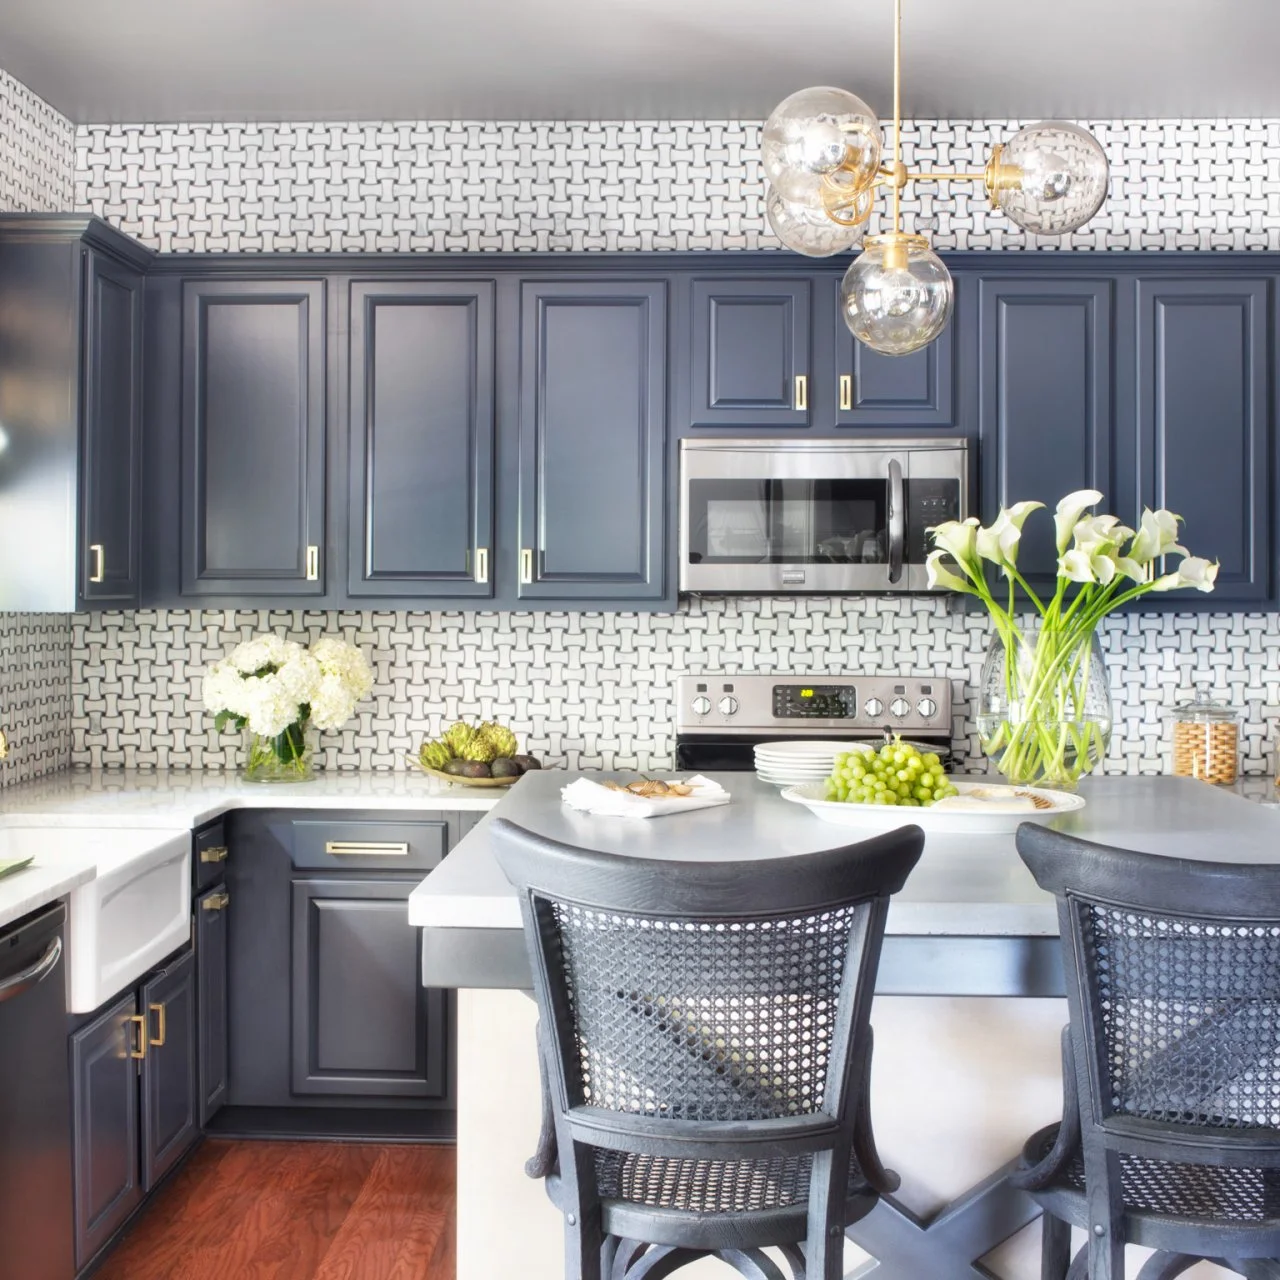
Image Source: hgtvhome.sndimg.com
Why Spray Paint Your Kitchen Cupboards?
Painting kitchen cabinets is one of the most impactful ways to update your kitchen. While brush or roller painting is an option, spray painting offers a smoother, more professional-looking finish. It’s a method that, when done correctly, can rival the look of brand-new cabinetry.
Advantages of Spray Painting:
- Superior Finish: Spraying creates an even, factory-like finish with no brush strokes or roller marks.
- Efficiency: For large projects or intricate cabinet doors, spraying can be significantly faster than brushing or rolling.
- Durability: When the right paint and technique are used, the finish can be very durable and resistant to wear and tear.
- Cost-Effectiveness: Compared to the cabinet painting cost for professional services or replacing cabinets entirely, DIY spray painting is a budget-friendly option.
Potential Challenges:
- Preparation is Key: This is arguably the most crucial step. Skipping or rushing preparation will lead to a poor finish.
- Overspray: You need to protect surrounding areas from paint mist.
- Ventilation: Proper ventilation is essential for safety and paint curing.
- Technique: Learning the right spray pattern and distance takes practice.
Your Kitchen Cabinet Makeover: Step-by-Step
Embarking on a kitchen cabinet makeover using spray paint requires careful planning and execution. Let’s break down the process into manageable steps.
Step 1: Planning Your Project
Before you even think about buying paint, have a clear plan. This includes choosing your color, paint type, and gathering all necessary supplies.
Choosing Your Color and Finish:
Consider the overall style and feel you want for your kitchen.
- Classic Whites and Grays: Timeless and versatile, they brighten spaces.
- Deep Blues and Greens: Add a touch of sophistication and depth.
- Wood Tones: If you have older wood cabinets, you might want to enhance or update their natural look.
The finish is also important:
- Satin: Offers a slight sheen, durable, and easier to clean than matte.
- Semi-Gloss: A bit more shine, very durable, and excellent for high-traffic areas.
- Matte: Offers a modern, flat look but can be less forgiving with imperfections and harder to clean.
Selecting the Best Spray Paint for Cabinets:
Not all spray paints are created equal, especially for a high-wear area like kitchen cabinets. Look for paints specifically designed for cabinets or furniture, or a high-quality enamel.
- Enamel Paints: Oil-based enamels offer exceptional durability and a hard finish but can have strong fumes and require mineral spirits for cleanup. Water-based (latex) enamels are easier to use and clean up with water, and modern formulas are very durable.
- Cabinet-Specific Paints: Brands often offer lines formulated for cabinets, providing excellent adhesion and durability.
Consider using a spray can cabinet paint for smaller projects or touch-ups, but for an entire kitchen, a paint sprayer (either electric or air-powered) will give a more consistent and professional result and is often more economical in the long run than multiple cans.
What You’ll Need:
- Spray Paint: Choose a high-quality enamel or cabinet-specific paint.
- Primer: Essential for good adhesion and a uniform color.
- Paint Sprayer: HVLP (High Volume, Low Pressure) sprayers are ideal for DIYers for fine finishes. You can also use aerosol cans, but be prepared for more effort and potentially less uniformity.
- Drop Cloths/Plastic Sheeting: To protect floors, countertops, and appliances.
- Painter’s Tape: For masking off areas you don’t want painted.
- Screwdriver: To remove hardware.
- Degreaser/All-Purpose Cleaner: For thorough cleaning.
- TSP (Trisodium Phosphate) or a TSP substitute: For deeper cleaning and degreasing.
- Fine-grit Sandpaper (120-220 grit): For light sanding.
- Sanding Sponge: For easily sanding edges and corners.
- Tack Cloths: To remove dust after sanding.
- Gloves: For protection.
- Safety Glasses/Goggles: Essential when spraying.
- Respirator Mask: Crucial for protecting your lungs from paint fumes and particles.
- Clean Rags: For wiping and cleaning.
- Optional: Wood Filler: For repairing any gouges or holes.
Step 2: Preparation – The Foundation of Success
This is where the magic happens, or where it fails if not done diligently. Properly preparing your cabinets is non-negotiable for a lasting, beautiful finish.
Removing Cabinet Doors and Hardware:
- Can you spray paint kitchen cupboards without removing doors? While technically possible to spray paint in situ with extensive masking, it’s highly recommended to remove doors and drawers for the best results. Spray painting kitchen doors separately allows for even coverage on all sides and edges without the risk of drips or missed spots. This is a key difference between amateur and professional results.
- Carefully remove all cabinet doors and drawer fronts. Label them with a number or letter so you can reattach them correctly.
- Remove all hardware (hinges, knobs, pulls). Store them in a safe place, perhaps in labeled bags.
Cleaning and Degreasing:
Kitchen cabinets accumulate grease and grime, especially around the stove and sink.
- Use a degreaser or a TSP substitute to thoroughly clean all surfaces. This removes oils and residues that can prevent paint from adhering properly.
- Wipe down with a damp cloth to remove any cleaner residue, and allow to dry completely.
Light Sanding:
- Sanding creates a surface for the primer and paint to grip. You don’t need to remove the old finish, just scuff it up.
- Use fine-grit sandpaper (120-220 grit) or a sanding sponge.
- Sand all surfaces that will be painted, including the cabinet frames (carcasses) and the inside of the doors if you plan to paint them.
- Pay attention to corners and edges.
Dust Removal:
- After sanding, it’s crucial to remove all dust.
- Use a vacuum with a brush attachment, followed by tack cloths. Tack cloths are designed to pick up fine dust particles.
Repairing Imperfections:
- Fill any holes, gouges, or deep scratches with wood filler.
- Once the filler is dry, sand it smooth and flush with the surrounding surface.
- Wipe away dust with a tack cloth.
Masking:
- This is critical for protecting areas you don’t want to paint.
- Use high-quality painter’s tape to mask off any interior surfaces of the cabinets, countertops, backsplash, appliances, and floor.
- Ensure the tape is pressed down firmly to prevent paint from seeping underneath.
Step 3: Priming for a Flawless Finish
Priming is essential for achieving a smooth, uniform color and ensuring the topcoat adheres well.
Why Prime?
- Adhesion: Primer helps the paint stick to the surface, preventing chipping and peeling.
- Coverage: It creates an even base color, so you’ll need fewer coats of your topcoat, especially if you’re going from dark to light.
- Blocking Stains: If your cabinets are stained wood, primer can block tannins from bleeding through the new paint color.
Applying Primer:
- Use a high-quality spray primer specifically designed for cabinets or furniture.
- If using a paint sprayer, thin the primer according to the manufacturer’s instructions.
- Apply thin, even coats. Avoid heavy application, which can lead to drips.
- Allow each coat to dry completely according to the product’s instructions.
- Lightly sand with 220-grit sandpaper between coats if recommended by the primer manufacturer, and always wipe away dust with a tack cloth.
Step 4: Spray Painting Your Kitchen Cupboards
Now for the main event! This is where the transformation truly begins.
Setting Up Your Spraying Area:
- Ventilation: Ensure the area is well-ventilated. Open windows and use fans to circulate air and direct fumes away from you.
- Protection: Cover everything you don’t want painted with drop cloths and plastic sheeting.
- Lighting: Good lighting is important to see where you’re spraying.
Using a Paint Sprayer (HVLP Recommended):
- Read the Manual: Familiarize yourself with your specific sprayer.
- Thinning the Paint: Most paints need to be thinned to spray properly. Follow the paint and sprayer manufacturer’s recommendations for thinning ratios.
- Test Spray: Before spraying your cabinets, do a test spray on a piece of cardboard or scrap wood to adjust the spray pattern and flow. Aim for a consistent, fine mist.
- Spray Technique:
- Distance: Hold the sprayer about 8-12 inches from the surface.
- Movement: Move the sprayer in a steady, consistent motion, overlapping each pass by about 50%. Start the trigger before the surface and release it after you’ve passed the edge to avoid paint buildup at the start and end of each pass.
- Coats: Apply thin, even coats. It’s better to apply three thin coats than two thick ones.
- Drying Time: Allow adequate drying time between coats as per the paint manufacturer’s instructions. This is crucial for adhesion and preventing runs.
- Cabinet Edges and Corners: Be mindful of how you spray edges and corners to ensure complete coverage without excessive buildup. A slight angle can help.
Using Spray Cans:
- If you’re using spray can cabinet paint, the principles are similar but require more patience.
- Shake the can vigorously for at least one minute before and during use.
- Hold the can upright, about 8-12 inches from the surface.
- Use a steady, sweeping motion, overlapping each spray pass.
- Apply multiple thin coats rather than one thick coat.
- Rotate the can periodically to ensure consistent spray.
Spraying Kitchen Doors:
- Place cabinet doors and drawer fronts on sawhorses or elevated surfaces. You can prop them up slightly with small blocks to allow for spraying the edges.
- Spray one side and the edges first. Let it dry completely, then flip them over and spray the other side. This prevents drips and ensures full coverage.
Step 5: Drying and Curing
This is as important as the application itself.
- Drying: This is the time it takes for the paint to feel dry to the touch. Follow the paint manufacturer’s recommendations for recoat times.
- Curing: This is when the paint reaches its maximum hardness and durability. It can take several days to weeks. During the curing period, be gentle with your cabinets. Avoid harsh cleaning or placing heavy items on them.
Step 6: Reassembly
Once the paint is fully cured (or at least dry to the touch and you’re confident in its durability), it’s time to put everything back together.
- Carefully reattach the hinges, knobs, and pulls.
- Rehang the cabinet doors and reinsert the drawer fronts.
- Clean up your workspace.
How to Spray Paint Cabinets Without Removing Doors: Is it Worth It?
While it’s possible to spray paint cabinets without removing the doors, it’s generally not recommended for a high-quality, durable finish. Here’s why:
- Inconsistent Coverage: It’s extremely difficult to achieve even coverage on all sides and edges of the doors and drawer fronts when they’re attached. You’ll likely end up with drips, runs, and missed spots.
- Overspray Risk: Masking off your entire kitchen to prevent overspray on appliances, countertops, and walls is a time-consuming and often imperfect process.
- Limited Access: You can’t easily spray the insides of cabinet boxes or the edges of doors that meet the frame.
- Professional Look: The smooth, edge-to-edge finish that spray painting provides is much harder to achieve when doors are attached.
If you’re looking for a truly professional result that mimics a factory finish, removing the doors and drawers is a crucial step. If your goal is simply to freshen up the look with minimal effort and you’re willing to accept a slightly less perfect finish, then spraying in place with meticulous masking might be an option, but be prepared for the challenges.
Cabinet Refinishing Ideas Beyond Paint
While painting is a popular choice, there are other cabinet refinishing ideas to consider for your kitchen makeover:
- Staining: If you have good quality wood cabinets, you might opt to strip them down and re-stain them in a different wood tone.
- Glazing: Applying a glaze over a painted or stained finish can add depth and highlight details.
- Distressing: For a rustic or farmhouse look, you can artificially distress the cabinets by sanding certain areas after painting.
- Hardware Update: Simply changing out the knobs and pulls can give your cabinets a fresh look without any painting at all.
- Adding Trim or Moulding: This can add architectural detail and a more custom appearance.
However, for a dramatic change in color and a smooth, modern finish, spray painting remains a top choice for DIYers.
Comparing DIY Cabinet Spray Painting Cost vs. Professional
When considering a kitchen cabinet makeover, the cabinet painting cost is a significant factor.
| Service/Method | Estimated Cost Range (for a standard-sized kitchen) | Pros | Cons |
|---|---|---|---|
| Professional Spray Painting | $2,000 – $7,000+ | High-quality, durable, factory-like finish; saves you time. | Most expensive option; requires trusting professionals with your kitchen. |
| DIY Spray Painting | $300 – $1,000 (for paint, primer, sprayer rental/purchase, supplies) | Significantly cheaper; satisfying DIY accomplishment; full control. | Time-consuming; requires learning skills; risk of errors leading to less-than-perfect results. |
| Professional Brush/Roller Painting | $1,000 – $4,000+ | Can achieve good results; less overspray concern than spraying. | May show brush/roller marks; potentially less durable than sprayed finishes; still costly. |
| DIY Brush/Roller Painting | $200 – $800 (for paint, primer, supplies) | Most budget-friendly; minimal equipment needed. | Time-consuming; difficult to achieve a smooth, uniform finish; prone to brush/roller marks. |
| Replacing Cabinets | $5,000 – $20,000+ | Brand new look; custom options; higher resale value potential. | Extremely expensive; disruptive to your kitchen; requires significant planning and installation. |
As you can see, DIY cabinet spray painting offers a compelling middle ground. You can achieve a professional-level finish at a fraction of the cost of hiring professionals. The main investment is your time and effort.
Frequently Asked Questions About Spray Painting Kitchen Cabinets
Q1: What is the best paint to use for spray painting kitchen cabinets?
The best paint is typically a high-quality acrylic enamel or a lacquer-based paint. Look for paints specifically formulated for cabinets or furniture. They offer durability, adhesion, and a smooth finish.
Q2: Can I spray paint over existing cabinet finishes?
Yes, as long as the existing finish is clean, degreased, lightly sanded, and properly primed, you can spray paint over it. Skipping the cleaning and sanding steps will compromise adhesion.
Q3: How many coats of paint do I need?
Generally, two to three thin coats of paint are recommended for adequate coverage and durability. Always follow the manufacturer’s instructions for drying times between coats.
Q4: Do I need to remove hinges to spray paint cabinets?
Yes, for the best results, you should remove the cabinet doors and drawers, and ideally, the hinges. This allows for complete coverage on all surfaces and edges. Spray painting kitchen doors separately is key.
Q5: Can I spray paint my cabinets a different color than the doors?
Absolutely! Many people choose to paint the cabinet boxes (carcasses) one color and the doors and drawer fronts another. This can create a dynamic and modern look. Ensure you use the same prep and priming process for all components.
Q6: What if I make a mistake while spraying?
Minor mistakes like drips or runs can often be fixed by lightly sanding the area once dry and then reapplying a thin coat of paint. For larger issues, you may need to sand down the affected area and re-prime.
Q7: How long will spray-painted cabinets last?
With proper preparation, priming, and application using quality products, spray-painted cabinets can last for many years, often 7-10 years or more, before needing a touch-up or repaint.
Q8: Is spray can cabinet paint good enough?
Spray can cabinet paint is suitable for smaller projects or touch-ups. For an entire kitchen, investing in a paint sprayer will provide a more consistent, professional finish and can be more economical in the long run than buying dozens of cans.
By following these steps and tips, you can confidently tackle your kitchen cabinet makeover and enjoy a beautifully updated kitchen with a professional-looking spray-painted finish. Happy painting!