
Replacing the water filter in your KitchenAid refrigerator is a straightforward process that ensures you always have fresh, clean water and ice. What is the frequency of KitchenAid refrigerator water filter replacement? Generally, it’s recommended to replace your KitchenAid refrigerator water filter every six months, or sooner if you notice a decrease in water flow or a change in the taste or odor of your water.
This comprehensive guide will walk you through the entire KitchenAid refrigerator water filter change process, from locating the filter to safely installing a new one. We’ll also cover where to buy KitchenAid refrigerator water filters, what the best water filter for your KitchenAid fridge might be, and essential KitchenAid refrigerator water filter maintenance tips.
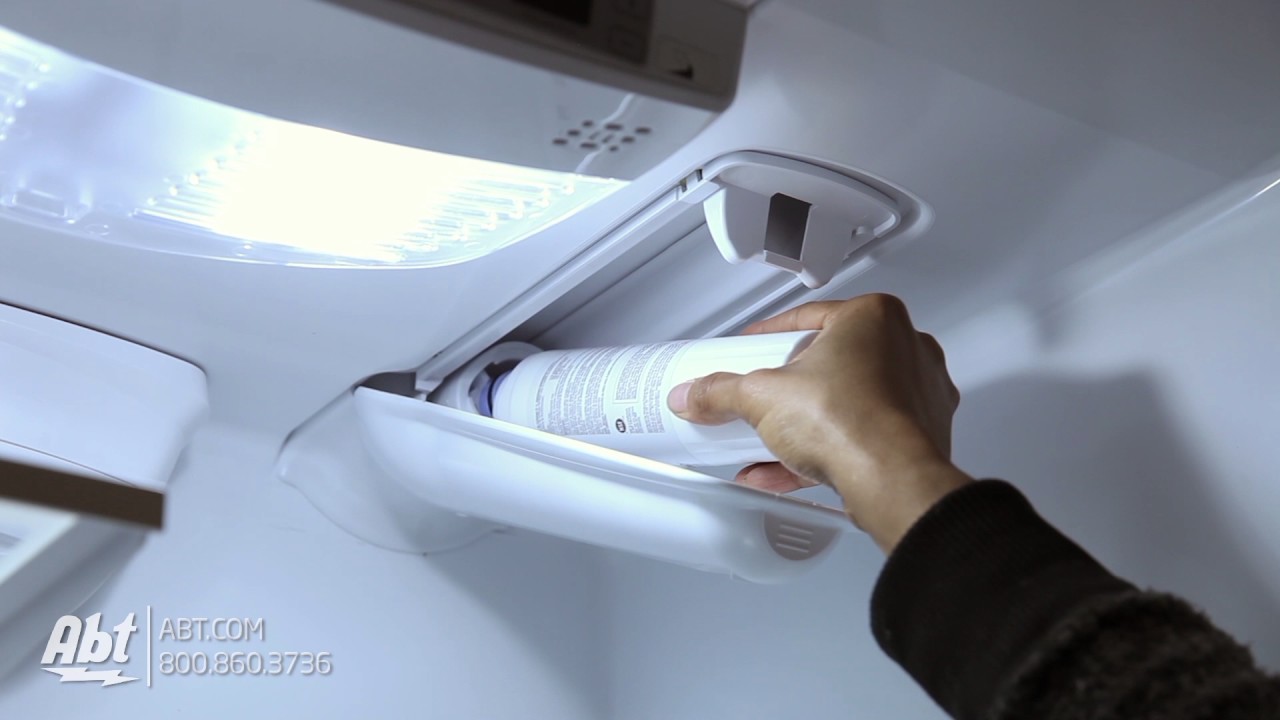
Image Source: i.ytimg.com
Why Replace Your Refrigerator Water Filter?
Your refrigerator’s water filter is a crucial component for your health and the longevity of your appliance. Over time, water filters become clogged with sediment, minerals, and other impurities. This can lead to several issues:
- Reduced Water Flow: A clogged filter restricts water flow, making your dispenser slower.
- Taste and Odor: Impurities can build up in the filter, affecting the taste and smell of your water and ice.
- Health Concerns: While refrigerators remove many contaminants, a saturated filter may not be as effective.
- Appliance Strain: A struggling water system can put unnecessary strain on your refrigerator’s components.
Regular replacement is key to maintaining optimal performance and ensuring the water you drink and use for ice is as pure as possible.
Locating Your KitchenAid Refrigerator Water Filter
The first step in a KitchenAid refrigerator water filter change is finding the filter. KitchenAid refrigerator filter location varies slightly depending on the model. The most common locations are:
-
Inside the Refrigerator Compartment:
- Upper Right Corner: Many models have the filter housed in a compartment at the top right interior of the fridge. You might see a small cap or cover that needs to be opened.
- Lower Grille: Some refrigerators have the filter located behind the base grille at the bottom front of the unit.
-
Behind the Crisper Drawer: Occasionally, you might find the filter behind one of the crisper drawers.
How to identify it: The water filter typically looks like a cylindrical cartridge, often white or blue, with a cap or mechanism to secure it.
Tip: If you’re unsure about your specific model, consult your refrigerator’s owner’s manual. You can usually find a digital version on the KitchenAid website by entering your refrigerator’s model number.
Steps to Change Refrigerator Water Filter: A Detailed Walkthrough
This section provides a step-by-step guide for a typical KitchenAid refrigerator water filter replacement. Remember to adapt these steps slightly based on your specific model’s filter location.
Step 1: Gather Your Supplies
Before you begin, ensure you have everything you need:
- New KitchenAid Refrigerator Water Filter: Make sure you have the correct replacement filter for your model. We’ll discuss choosing the right filter later.
- Towel or Small Bucket: To catch any residual water that might drip out when you remove the old filter.
- Owner’s Manual (Optional but Recommended): For specific instructions tailored to your refrigerator model.
Step 2: Shut Off the Water Supply (Optional but Recommended)
While not always strictly necessary for KitchenAid models, shutting off the water supply to the refrigerator adds an extra layer of caution, especially if you’re concerned about leaks.
- Locate the water shut-off valve. This is usually found behind the refrigerator, under the sink, or in the basement near the water line that feeds the fridge.
- Turn the valve to the “off” position.
If you choose not to shut off the water, be prepared for a small amount of water to leak out.
Step 3: Remove the Old Water Filter
This is where the actual KitchenAid refrigerator water filter change happens.
For Filters Located Inside the Refrigerator:
- Locate the Filter Housing: As mentioned, this is often in the upper right corner of the fresh food compartment.
- Open the Filter Cover: There’s usually a tab or a push-button release. Press the button or pull the tab to open the compartment.
- Twist to Remove: Most filters twist counter-clockwise to unlock. You might need to push the filter inwards slightly before twisting.
- Pull the Filter Out: Once unlocked, gently pull the old filter straight out. Have your towel ready to catch any drips.
For Filters Located Behind the Base Grille:
- Remove the Grille: The base grille usually snaps into place. Gently pull it forward and down to remove it.
- Locate the Filter Housing: The filter will be housed in a compartment behind the grille, often with a twist-off cap or a push-button mechanism.
- Twist to Remove: Similar to the interior filter, twist the filter counter-clockwise to unlock it.
- Pull the Filter Out: Gently pull the old filter straight out.
Step 4: Prepare the New Water Filter
Before installing the new filter, it’s essential to prepare it.
- Remove Packaging: Take the new filter out of its protective packaging.
- Remove the Protective Cap: Most new filters have a plastic cap on the end where the water enters. Remove this cap. Failure to remove it will prevent water from flowing through the filter.
- Soak the New Filter (Optional but Recommended): Some manufacturers recommend soaking the new filter in water for a few minutes to help prime it and remove any air pockets. Check your filter’s instructions.
Step 5: Install the New Water Filter
Now, it’s time to install the new filter. This is how to install a new fridge filter correctly.
For Filters Located Inside the Refrigerator:
- Align the Filter: Line up the new filter with the housing. Ensure the arrows or guides on the filter match the markings on the housing.
- Push and Twist to Lock: Gently push the new filter into the housing until it stops. Then, twist it clockwise until it locks into place. You should feel or hear a click.
- Close the Filter Cover: Close the compartment door or push the cover back into place until it latches securely.
For Filters Located Behind the Base Grille:
- Align the Filter: Line up the new filter with the housing, matching any alignment indicators.
- Push and Twist to Lock: Push the filter into the housing and twist it clockwise until it locks securely.
- Reattach the Grille: Snap the base grille back into place.
Step 6: Turn the Water Supply Back On (If You Shut It Off)
If you turned off the water supply, now is the time to turn it back on.
- Slowly open the water shut-off valve.
- Check for any leaks around the filter housing and connections.
Step 7: Flush the New Filter
This is a crucial step in KitchenAid refrigerator water filter maintenance. Flushing removes any air or loose carbon particles from the new filter.
- Dispense Water: Use the refrigerator’s water dispenser.
- Discard Water: Dispense and discard at least 2-4 gallons of water. You’ll notice that the water initially might appear cloudy or discolored due to carbon fines. This is normal and will clear up after flushing.
- Check Ice Maker: If you have an ice maker, discard the first few batches of ice as well.
Step 8: Reset the Filter Indicator Light
Most KitchenAid refrigerators have a filter indicator light that turns red or amber when it’s time to replace the filter. You’ll need to reset this light after changing the filter. The reset procedure varies by model, but common methods include:
- Pressing and Holding a Button: Look for a button labeled “Filter,” “Water,” or “Reset” on the control panel. Press and hold it for 3-5 seconds.
- Sequence of Button Presses: Some models require a specific sequence of button presses. Refer to your owner’s manual for the exact procedure.
Example Reset Procedure (May Vary):
On many KitchenAid models, you might need to press and hold the “Ice Type” and “Water” buttons simultaneously for about 4 seconds. Consult your manual for the precise steps for your refrigerator.
Choosing the Best Water Filter for Your KitchenAid Fridge
Selecting the correct KitchenAid refrigerator water filter is vital for proper fit and filtration.
Identifying Your Filter Number
Your refrigerator’s model number is the key to finding the right filter. You can usually find this number on a sticker inside the refrigerator compartment, often on a side wall or near the crisper drawers.
Once you have your model number, you can search for compatible filters. Common KitchenAid water filter part numbers include:
- EDR3RXD1 (often referred to as Whirlpool filter W10295370 or filter 3)
- EDR1RXD1 (often referred to as Whirlpool filter W10295370 or filter 1)
- KBFA20ERSS00 (This is a model number, but filters are often referenced by their part numbers, e.g., WRF532SMVW is a model, and its filter might be EDR1RXD1.)
Where to Buy KitchenAid Refrigerator Water Filter:
You have several options for purchasing replacement filters:
- KitchenAid Authorized Parts Retailers: The safest bet for genuine parts.
- Appliance Parts Stores: Local or online stores specializing in appliance parts.
- Online Retailers: Major online marketplaces like Amazon, Wayfair, or specific appliance parts websites.
- Big Box Stores: Some large home improvement or electronics stores may carry compatible filters.
Important Note on Generic Filters:
While generic or third-party filters are often cheaper, it’s generally recommended to stick with genuine KitchenAid filters or those explicitly certified as compatible by a reputable brand. Generic filters may not fit properly, could reduce water flow, or might not offer the same level of filtration. Always check reviews and compatibility information carefully if you opt for a non-OEM filter.
Types of Filtration
KitchenAid refrigerator water filters typically use activated carbon filtration. This method is effective at:
- Reducing chlorine taste and odor.
- Removing sediment, sand, and rust.
- Filtering out lead and mercury.
- Reducing certain pesticides and pharmaceuticals.
When choosing, consider your local water quality. If you have specific concerns, you might look for filters that offer enhanced filtration for those particular contaminants. However, for standard use, the recommended KitchenAid filters are usually sufficient.
KitchenAid Refrigerator Water Filter Maintenance and Troubleshooting
Proper maintenance ensures your filter performs optimally.
When to Replace Your Filter
- Every Six Months: This is the standard recommendation.
- Reduced Water Flow: If your dispenser slows down significantly, it’s a strong indicator the filter is clogged.
- Changes in Taste or Odor: If your water or ice starts to taste or smell off, replace the filter.
- Filter Indicator Light: Follow the reminder from your refrigerator.
Troubleshooting Water Filter Replacement KitchenAid Issues
Here are some common problems and how to fix them:
-
Filter Won’t Twist or Lock:
- Cause: The filter might not be aligned correctly, or the locking mechanism could be obstructed.
- Solution: Remove the filter and re-align it carefully. Ensure there are no obstructions in the housing. Try pushing the filter in slightly before twisting. If it still won’t lock, check your owner’s manual for specific instructions or contact customer support.
-
Water Leaking from the Filter Housing:
- Cause: The O-rings on the filter might be damaged or not seated correctly, or the filter isn’t fully seated.
- Solution: Remove the filter and inspect the O-rings for any damage. Ensure the filter is pushed in all the way and twisted firmly until it clicks. If leaks persist after re-installation, the filter housing itself might be faulty, requiring professional service.
-
Cloudy Water or Black Particles After Replacement:
- Cause: This is usually due to air trapped in the new filter or loose carbon fines.
- Solution: Continue flushing the system by dispensing at least 2-4 gallons of water. Discard the first few batches of ice. The water should clear up. If it doesn’t, try removing and reinstalling the filter, then flush again.
-
Filter Indicator Light Won’t Reset:
- Cause: The reset sequence might not have been performed correctly.
- Solution: Refer to your owner’s manual for the exact reset procedure for your model. Try the sequence again, ensuring you press and hold for the specified duration.
-
New Filter Doesn’t Fit:
- Cause: You may have purchased the wrong filter for your specific refrigerator model.
- Solution: Double-check the filter part number against your refrigerator’s model number. Ensure you are using a filter explicitly designed for your KitchenAid appliance.
KitchenAid Ice Maker Filter Replacement
The water filter also serves your ice maker. When you replace the main water filter, you are also replacing the filter for your ice maker. The steps outlined above for the water filter replacement apply to the ice maker as well. Ensuring the new filter is properly flushed will also clear out any residual air or carbon from the ice maker’s water line. If you have specific issues with ice production or quality after a filter change, focus on thorough flushing.
Frequently Asked Questions (FAQ)
Q1: How often should I really change my KitchenAid refrigerator water filter?
A1: The general recommendation is every six months, but it can vary based on your water usage and water quality. If you notice a decrease in water flow or a change in taste, replace it sooner.
Q2: Can I use a generic brand filter in my KitchenAid refrigerator?
A2: While generic filters might seem like a cost-saving option, it’s generally best to use genuine KitchenAid filters or those explicitly certified for your model. Generic filters may not fit correctly, filter as effectively, or could even damage your system.
Q3: Where can I find the model number of my KitchenAid refrigerator to buy the correct filter?
A3: The model number is typically located on a sticker inside the refrigerator compartment, often on a side wall, the ceiling, or near the crisper drawers. Your owner’s manual will also have this information.
Q4: What is the best water filter for a KitchenAid fridge?
A4: The “best” filter is the one specifically designed for your KitchenAid refrigerator model. Look for genuine KitchenAid filters or reputable third-party filters that explicitly state compatibility with your model number.
Q5: My new filter is leaking. What should I do?
A5: First, ensure the filter is pushed in fully and twisted clockwise until it locks. Check the O-rings on the filter for any damage. If the leak persists, remove the filter and re-seat it, or consider that the filter itself or the housing might be faulty.
Q6: How do I reset the filter indicator light on my KitchenAid refrigerator?
A6: The reset procedure varies by model. Typically, it involves pressing and holding a specific button or a combination of buttons on the control panel for several seconds. Consult your owner’s manual for the exact steps for your refrigerator.
Q7: What does the water filter in my KitchenAid refrigerator do?
A7: The water filter reduces chlorine taste and odor, sediment, rust, lead, mercury, and certain other contaminants, providing you with cleaner, better-tasting water and ice.
By following this guide, you can confidently perform your KitchenAid refrigerator water filter replacement, ensuring a continuous supply of fresh, clean water for you and your family. Regular maintenance is key to the efficient operation and longevity of your KitchenAid refrigerator.