
Yes, you can paint floor tiles in a kitchen, and it’s a fantastic way to refresh your space without the cost and mess of a full replacement. This guide will walk you through everything you need to know about painting kitchen tiles, from choosing the right products to achieving a durable, beautiful finish. If you’re looking for a budget-friendly way of renovating kitchen tiles or simply updating your kitchen floor, painting can be a game-changer.
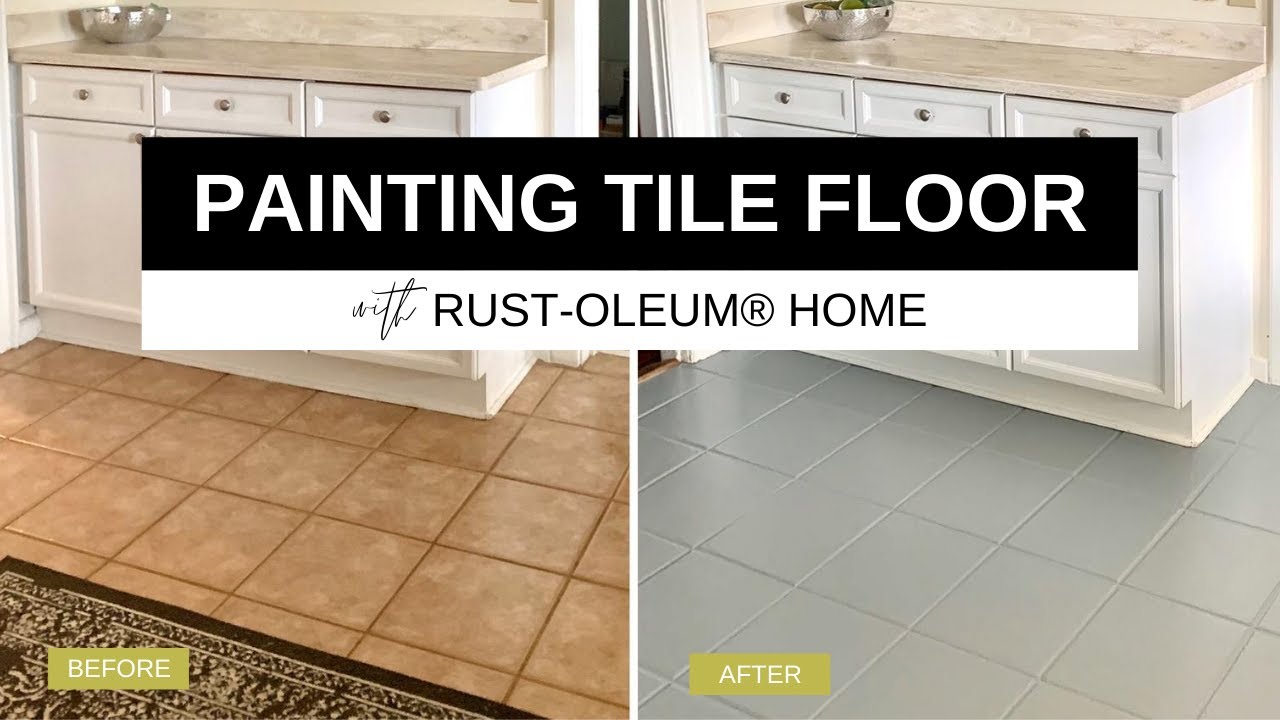
Image Source: i.ytimg.com
Why Consider Painting Your Kitchen Floor Tiles?
There are several compelling reasons to choose tile painting over other flooring options:
- Cost-Effective: Compared to replacing your entire floor, painting is significantly cheaper. You’ll save money on materials and labor.
- Time-Saving: Painting is a much quicker process than ripping out old tiles and installing new ones.
- DIY-Friendly: With the right preparation and materials, this is a project many homeowners can tackle themselves, making it a great DIY kitchen tile paint endeavor.
- Aesthetic Transformation: A fresh coat of paint can completely change the look and feel of your kitchen, giving it a modern update or a completely new style.
- Temporary Solution: If you’re renting or planning a bigger renovation down the line, painted tiles offer a stylish temporary fix.
What Types of Tile Paint Are Best for Kitchen Floors?
Choosing the best paint for kitchen floor tiles is crucial for a long-lasting result. Kitchen floors endure a lot of traffic, moisture, and potential spills, so you need a durable product.
Tile Paint for Kitchens: Key Considerations
- Durability: The paint must withstand foot traffic, scuffs, and everyday wear and tear.
- Adhesion: It needs to stick well to tile surfaces, which can sometimes be slick.
- Water Resistance: Kitchens are prone to spills and cleaning, so the paint must resist moisture.
- Chip Resistance: The paint should not easily chip or peel.
- Finish: Consider whether you want a matte, satin, or gloss finish. Satin and gloss are generally more durable and easier to clean.
Top Paint Options for Kitchen Floor Tiles
Here’s a look at the most recommended types of paint for this project:
1. Epoxy Paint for Floor Tiles
Epoxy paint for floor tiles is often considered the gold standard for high-traffic areas like kitchens. Epoxy is a two-part system that, when mixed, creates a very hard, durable, and chemical-resistant coating.
- Pros:
- Extremely durable and long-lasting.
- Excellent resistance to abrasion, chemicals, and water.
- Can create a beautiful, seamless finish.
- Cons:
- Can be more expensive than other options.
- Requires careful mixing and application; cure times can be longer.
- Fumes can be strong, requiring good ventilation.
- Often comes in limited color options compared to standard paints.
2. Floor Paints (Specifically Formulated for Floors)
Many brands offer paints specifically designed for floors, including garage floors, patios, and yes, kitchen tiles. These are typically acrylic-based or oil-based enamel paints.
- Pros:
- Good durability and wear resistance.
- Easier to apply than epoxy.
- Wider range of colors and finishes available.
- Cons:
- May not be as extremely durable as epoxy.
- Some may require a primer, adding an extra step.
3. Chalk Paint and Mineral Paints
While popular for furniture and walls, chalk paint and mineral paints can be used on floors with proper sealing. They offer a matte, vintage look.
- Pros:
- Beautiful, velvety matte finish.
- Often requires minimal prep (no sanding).
- Can be easily distressed for a vintage look.
- Cons:
- Requires a very durable sealant (like polyurethane) to withstand kitchen traffic.
- Less resistant to moisture and stains without proper sealing.
- Can be more prone to chipping if not sealed correctly.
4. Tile Paint Kits
Some manufacturers offer complete tile painting kits that include primer, paint, and a topcoat specifically formulated for tile. These are designed for ease of use and guaranteed compatibility.
- Pros:
- All-in-one solution, simplifying the process.
- Formulated for optimal adhesion and durability on tiles.
- Often comes with detailed instructions.
- Cons:
- Can be more expensive than buying individual components.
- Limited color and finish choices.
Table 1: Paint Type Comparison for Kitchen Floor Tiles
| Paint Type | Durability | Ease of Application | Cost (Est.) | Best For |
|---|---|---|---|---|
| Epoxy Paint | Very High | Moderate | High | High-traffic, maximum durability |
| Specialty Floor Paint (Acrylic) | High | Easy | Medium | Good all-around performance |
| Chalk/Mineral Paint + Sealant | Medium | Easy | Medium | Aesthetic focus, low-traffic areas |
| Tile Paint Kits | High | Easy | Medium-High | Simplicity, guaranteed compatibility |
How to Paint Floor Tiles: A Step-by-Step Guide
Knowing how to paint floor tiles correctly is the key to a successful and lasting makeover. Proper preparation is non-negotiable.
Step 1: Gather Your Supplies
Before you start, ensure you have everything you need. This will save you time and frustration later.
- Cleaning Supplies:
- Heavy-duty degreaser or TSP (Trisodium Phosphate) alternative
- Sponges, cloths, scrub brushes
- Bucket(s)
- Vacuum cleaner
- Preparation Supplies:
- Painter’s tape
- Drop cloths or old sheets
- Sanding block or electric sander (for some paint types)
- Fine-grit sandpaper (e.g., 120-220 grit)
- Rags for dusting
- Painting Supplies:
- Primer (if recommended for your chosen paint)
- Your chosen tile paint for kitchens
- High-quality paint rollers (short nap for smooth finish)
- Paint tray
- Angled paintbrush (for edges and corners)
- Topcoat or sealant (if required/desired for extra protection)
- Safety Gear:
- Gloves
- Safety glasses
- Mask (especially for epoxy or strong-smelling paints)
Step 2: Prepare the Area
Proper preparation is the most critical step for any floor tile refinishing project.
- Clear the Kitchen: Remove all furniture, appliances, rugs, and anything else from the floor.
- Protect Surroundings: Use painter’s tape to mask off baseboards, cabinets, countertops, and any other areas you don’t want painted. Cover the rest of your kitchen with drop cloths.
- Deep Clean the Tiles:
- Vacuum the floor thoroughly to remove all loose dirt and debris.
- Mix your degreaser or TSP alternative with water according to product instructions.
- Scrub the tiles and grout lines meticulously with a scrub brush or sponge. Pay special attention to any grease build-up or stains.
- Rinse the floor thoroughly with clean water. You may need to rinse multiple times to ensure all cleaning residue is gone.
- Allow the floor to dry completely. This can take 24-48 hours in a humid environment. Ensure good ventilation.
Step 3: Surface Preparation (Sanding)
The need for sanding depends on the type of paint you’re using.
- Epoxy and Specialty Floor Paints: Most of these paints require a slightly roughened surface for optimal adhesion.
- Lightly sand all tile surfaces and grout lines with fine-grit sandpaper (120-220 grit). The goal is to create a dull, slightly scuffed surface, not to remove glaze.
- Use a sanding block for edges and corners. If using an electric sander, be careful not to over-sand.
- After sanding, vacuum up all dust. Then, wipe down the entire floor with a damp cloth or a tack cloth to remove any remaining dust. Allow it to dry completely.
- Chalk Paint/Mineral Paint: If using these, you might not need to sand, but a very light scuff sand can still improve adhesion. Always check the manufacturer’s recommendations.
Step 4: Apply Primer (If Needed)
Some paints, especially lighter colors or if you’re painting over dark tiles, will benefit from or require a primer. Always read your paint’s product instructions.
- Choose the Right Primer: Look for a primer specifically designed for tile or adhesion to glossy surfaces. A bonding primer is usually a good choice.
- Application:
- Stir the primer well.
- Use your angled brush for edges and corners.
- Use a roller for the main tile surfaces. Apply a thin, even coat.
- Avoid puddling or drips.
- Drying Time: Allow the primer to dry completely according to the manufacturer’s instructions. This is usually a few hours.
Step 5: Apply the First Coat of Tile Paint
Now for the exciting part – applying the color!
- Stir the Paint: Thoroughly stir your chosen tile paint for kitchens. If using a two-part epoxy, mix according to the manufacturer’s instructions.
- Start Painting:
- Begin in a corner, furthest from your exit point.
- Use the angled brush to paint the grout lines and around the edges of the tiles.
- Use the roller to paint the main surfaces of the tiles. Work in small sections.
- Apply the paint in thin, even coats. Overworking the paint or applying too thickly can lead to brush strokes or an uneven finish.
- Maintain a Wet Edge: When rolling, try to overlap your previous strokes slightly to maintain a “wet edge” and prevent lap marks.
- Drying Time: Allow the first coat to dry completely. Check the paint can for recommended drying times between coats. This can range from a few hours to 24 hours.
Step 6: Apply Subsequent Coats
Most projects will require at least two coats of paint for full coverage and durability.
- Inspect the First Coat: Once dry, check for any missed spots or thin areas.
- Apply Second Coat: Repeat the painting process as described in Step 5.
- Additional Coats: If needed, apply a third coat. Ensure each coat dries thoroughly before applying the next.
Step 7: Apply a Topcoat or Sealant (Highly Recommended)
For kitchen floors, a topcoat or sealant is crucial for added protection and longevity. This is especially true for chalk paint but also beneficial for other types.
- Choose a Durable Topcoat: Look for a water-based polyurethane or a specialized floor sealant. For epoxy systems, the second part often acts as the sealant.
- Application:
- Ensure the final coat of paint is completely dry (usually at least 24-48 hours after the last coat, check your paint’s instructions).
- Apply the topcoat in thin, even coats using a high-quality roller or brush.
- Avoid applying too thickly, as this can create a gummy or cloudy finish.
- Allow each coat of sealant to dry thoroughly between applications. Most sealants recommend 2-3 coats.
Step 8: Curing Time and Re-entry
This is arguably the hardest part: waiting!
- Drying vs. Curing: “Dry to touch” is not the same as “fully cured.” While the paint might feel dry, it needs time to harden completely.
- Foot Traffic: Avoid walking on the floor for at least 24-72 hours after the final coat of paint or sealant.
- Heavy Items and Furniture: It’s best to wait at least 7 days, or even longer for some epoxy systems, before returning furniture and appliances. The longer you wait, the harder the finish will be, and the less likely it is to scratch or mar.
Maintaining Your Painted Kitchen Tiles
Proper care will extend the life and beauty of your newly painted kitchen floor.
- Cleaning:
- Use a mild, pH-neutral cleaner. Avoid harsh chemicals, ammonia, or abrasive cleaners, as these can break down the paint or sealant over time.
- Use a soft mop or microfiber cloth. Avoid stiff-bristled brushes.
- Wipe up spills immediately to prevent staining.
- Protection:
- Use doormats at exterior entrances to trap dirt and grit that can scratch the floor.
- Place felt pads on the bottom of furniture legs to prevent scratching when moved.
- Consider placing a rug or mat in high-traffic areas or in front of the sink.
- Touch-Ups: Keep a small amount of your paint and sealant on hand for any minor touch-ups that may be needed over time.
Troubleshooting Common Issues
Even with careful preparation, you might encounter a few hiccups.
Issue: Paint Not Adhering or Peeling
- Cause: Inadequate surface preparation (dirt, grease, or not dulling the surface), wrong primer, or moisture in the substrate.
- Solution:
- If peeling is minor, you might be able to scrape it off, re-clean and degrease the area, then re-prime and repaint.
- For widespread peeling, the entire floor may need to be stripped and prepped again from scratch. Ensure thorough cleaning and proper adhesion for subsequent attempts.
Issue: Uneven Finish or Brush Strokes
- Cause: Applying paint too thickly, using the wrong type of roller, or not maintaining a wet edge.
- Solution:
- For minor imperfections, a light sanding with very fine-grit sandpaper (320 grit or higher) followed by a thin recoat might help.
- Ensure you’re using a good quality, short-nap roller designed for smooth surfaces.
- Always apply thin, even coats.
Issue: Scuff Marks or Scratches
- Cause: Insufficient cure time, not using a durable topcoat, or dragging heavy objects across the floor.
- Solution:
- Ensure you’ve allowed the full curing time before putting furniture back.
- Use felt pads on furniture legs.
- Minor scuffs might be buffed out with a soft cloth. For deeper scratches, you may need to lightly sand the area and apply a touch-up of the topcoat.
Issue: Paint is Too Thick to Apply
- Cause: Paint has been left open too long, or it’s a two-part epoxy that wasn’t mixed correctly.
- Solution:
- For standard paints, try stirring very thoroughly. If it’s still too thick and unmanageable, it might be best to discard it and get a fresh can.
- For epoxy, ensure you followed mixing ratios precisely. If mixed incorrectly, it may not cure properly and should be removed.
Is Floor Tile Refinishing the Right Choice for You?
Painting floor tiles is a rewarding project that can dramatically alter your kitchen’s appearance for a fraction of the cost of replacement. It’s a fantastic method for updating your kitchen floor if you’re on a budget or looking for a creative DIY solution.
Consider your lifestyle and expectations. If you have very young children, pets, or a household that’s particularly hard on floors, you’ll need to invest in the most durable paints and topcoats and be diligent with maintenance. For a quick style update or a more moderate traffic area, it’s an excellent option.
The process of renovating kitchen tiles through painting is achievable for most DIYers with patience and attention to detail. By following these steps, choosing the right products like epoxy paint for floor tiles, and dedicating time to preparation, you can transform your kitchen floor into a stunning feature.
Frequently Asked Questions (FAQ)
Q1: How long does painted tile flooring last in a kitchen?
A: When done correctly with durable paints and a good topcoat, painted tile floors can last anywhere from 3 to 10 years or more. This depends heavily on the quality of products used, the amount of foot traffic, and how well the floor is maintained.
Q2: Can I paint over vinyl tiles in the kitchen?
A: Yes, you can paint over vinyl tiles, but the preparation is slightly different. Ensure the vinyl is clean, dry, and well-adhered to the subfloor. You may need a specific primer designed for vinyl before applying your chosen floor paint.
Q3: Will the paint chip or peel in a high-moisture area like near the sink?
A: If you use a high-quality, water-resistant paint and a good sealant, and ensure proper adhesion, it should hold up well. However, it’s always best to wipe up spills immediately to prevent moisture from sitting on the painted surface.
Q4: Can I paint the grout lines too?
A: Absolutely! The grout lines will be painted along with the tiles. Some people prefer to use a smaller brush for the grout lines to ensure a neat finish. You can also find specialized grout paints or sealants if you want to change the grout color specifically.
Q5: What’s the difference between tile paint and regular wall paint for floors?
A: Regular wall paint is not designed to withstand the heavy foot traffic, abrasion, and moisture that a kitchen floor experiences. Tile paints and floor paints are formulated with harder binders and additives to ensure durability, adhesion, and resistance to wear and tear. Always use products specifically intended for floors.