
What are can lights, and are they a good choice for your kitchen? Can lights, also known as recessed kitchen lighting or pot lights, are light fixtures installed into the ceiling. This makes them flush with the surface, giving a clean, modern look. Yes, they are an excellent choice for kitchens. They offer bright, even light without taking up ceiling space. This makes them perfect for tasks, general lighting, and even adding style. They help create a well-lit and welcoming kitchen. This guide will show you how to use them like a pro.
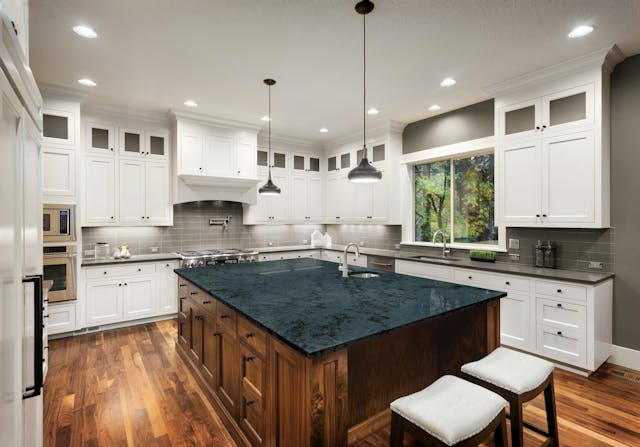
Image Source: img.proremodeler.com
Grasping Can Lighting Basics for Your Kitchen
Can lighting has become a top choice for homes. It is especially popular in kitchens. These lights fit inside your ceiling. They do not hang down. This gives your kitchen a sleek, tidy look.
What Are Can Lights?
Can lights get their name from their shape. They are like a can or a cylinder. This “can” holds the light bulb and other parts. It sits inside a hole cut into your ceiling. Only the trim shows. This makes them almost invisible. They offer light without adding visual clutter. This is why many people choose recessed kitchen lighting. It creates a seamless ceiling.
Types of Can Lights
Not all can lights are the same. They come in different sizes and types.
* New Construction: These are for new homes or big renovations. You put them in before the ceiling is finished.
* Remodel: These are for existing ceilings. You can fit them through a hole in the finished ceiling.
* Air-Tight: These lights stop air from leaking into your attic. This saves energy. They are great for homes in very hot or cold places.
* Insulation Contact (IC) Rated: You can put these lights right next to insulation. Non-IC lights need space around them. Always check this rating for safety.
When thinking about light sources, LED can lights kitchen options are very popular. They use little energy. They last a long time. They give off less heat. This makes them a smart choice for any kitchen. Older homes might still have halogen or incandescent can lights. But LED is the clear winner for new setups.
Why Choose Can Lights for Your Kitchen?
Can lights offer many benefits in a kitchen:
* Clean Look: They hide in the ceiling. This makes your kitchen look bigger and more open.
* Even Light: You can place many lights to spread light evenly. This removes dark spots.
* Versatile: They work well for all kinds of lighting. This includes bright task lighting and soft mood lighting.
* Energy Efficient: When you choose LED can lights kitchen models, you save a lot on electricity.
* Modern Style: They fit well with modern kitchen designs.
Planning Your Kitchen Lighting Layout
A good lighting plan is key to a functional kitchen. You want light where you need it most. You also want a nice overall feel. A smart kitchen lighting layout considers how you use your space. It thinks about different light layers.
The Power of Layered Lighting
Think of your kitchen lighting in layers:
1. Ambient Lighting (General Light): This is your main light source. It lights up the whole room. Can lights are perfect for this. They create a soft, even glow. They make the room feel bright and inviting. This layer provides general visibility. It is a core part of many ambient kitchen lighting ideas.
2. Task Lighting: This light is for specific jobs. Think cutting food, reading recipes, or washing dishes. These areas need bright, focused light. Can lights can work as task lights. You aim them at countertops or the sink. Lights under cabinets are also great for task lighting.
3. Accent Lighting: This layer highlights special features. It could be artwork, shelves, or a textured wall. Accent lights add style and depth. They make your kitchen more interesting. Smaller can lights or strip lights can do this.
Mixing these layers gives you a flexible kitchen. You can change the light for cooking, eating, or entertaining.
Mapping Your Kitchen Zones
Before placing lights, draw your kitchen. Mark out different work zones.
* General Area: The main open space.
* Perimeter Countertops: Where you chop, mix, and prepare food.
* Kitchen Island: Often a prep area, eating space, or both. This area often needs its own task lighting kitchen island strategy.
* Sink Area: Needs good light for washing dishes.
* Stove/Cooktop: Essential for safe cooking.
* Walkways: Paths you use to move around.
For a well-lit kitchen, you need enough light. Too little light makes tasks hard. Too much light can feel harsh. The goal is balanced brightness.
Strategic Placement for Optimal Illumination
Proper kitchen pot light placement makes all the difference. It ensures no dark spots. It also avoids glare.
General Placement Rules
- Spacing: A common rule is to place lights half the ceiling height away from walls. For an 8-foot ceiling, place lights 4 feet from the wall. Then, space them 4 to 6 feet apart from each other. This creates an even wash of light. For a 9-foot ceiling, place them 4.5 feet from the wall. Then space them 5 to 7 feet apart.
- Walls: Do not place lights too close to walls. This can create harsh shadows. It can also make walls look uneven. Aim the light slightly away from the wall. Or, use a “wall washer” trim. This trim directs light more evenly down the wall.
- Obstacles: Watch out for cabinets, shelves, or open doors. Make sure lights do not hit them. Also, avoid placing lights where they will be blocked by a person working.
Lighting the Work Zones
Every task area in your kitchen needs focused light.
- Countertops: Place can lights directly over the front edge of your countertops. This ensures light hits your work surface. It helps avoid casting shadows from your body onto the counter. Aim for one light every 2-3 feet along the counter. This helps with proper kitchen pot light placement for tasks.
- Kitchen Island: This is often a central hub. For task lighting kitchen island areas, you have options. You can use can lights alone. Space them evenly over the island. Make sure they cover the whole surface. Another great option is to use pendant lights over the island. You can then use can lights around the island for general light. If you rely solely on can lights, use lights with a narrower beam for better task focus.
- Sink: Place one can light directly over the center of your kitchen sink. This provides clear visibility for washing.
- Stove/Cooktop: Many range hoods have built-in lights. If yours does not, or if you need more light, place a can light directly above the cooktop. Make sure it is positioned so it does not interfere with the hood fan.
Dealing with Shadows
Shadows can make a kitchen feel dim. They can also make tasks harder.
* Cross Lighting: To reduce shadows, use cross lighting. This means light comes from two or more directions. This fills in shadows.
* Light Layers: Combine can lights with under-cabinet lights. The under-cabinet lights brighten the counters directly. The can lights provide overhead general light. This layering fights shadows.
Choosing the Right Can Lights
Picking the right light source and features is important. It affects your kitchen’s look and how well you can see.
LED Can Lights: The Smart Choice
For any new kitchen downlight installation, LED can lights kitchen models are highly recommended.
* Energy Efficiency: LEDs use 75-80% less energy than old incandescent bulbs. This saves money on your power bill.
* Long Lifespan: LEDs last much longer. They can last 25,000 to 50,000 hours. This means less bulb changing.
* Less Heat: LEDs produce very little heat. This helps keep your kitchen cooler. It also makes them safer near materials.
* Durability: They are more resistant to breakage than glass bulbs.
Brightness (Lumens)
Lumens measure brightness. More lumens mean a brighter light.
* Kitchen Goal: Kitchens need bright light for tasks. Aim for 30-50 lumens per square foot.
* Example: A 100 square foot kitchen needs 3000-5000 lumens. If each can light gives 700 lumens, you would need 4-7 lights. Adjust based on your layout and other light sources.
Color Temperature (Kelvin)
Color temperature changes how light looks. It is measured in Kelvin (K).
* Warm White (2700K-3000K): This is a soft, yellowish light. It feels cozy and inviting. Good for ambient lighting or dining areas.
* Cool White (3500K-4500K): This is a neutral, whiter light. It is good for task areas. It helps with focus. Many kitchens use 3500K for a good balance.
* Daylight (5000K-6500K): This light is very bright and bluish-white. It mimics natural daylight. It is great for tasks but can feel harsh in a home setting.
For kitchens, a mix is often best. Use 3500K for main lights. You can use 2700K for accent lights if you want. Some new LEDs let you change the color temperature. This gives you great flexibility.
Beam Angle
The beam angle is how wide the light spreads.
* Narrow Beam (10-30 degrees): Creates a spotlight effect. Good for highlighting specific areas or art. Less common for general kitchen lighting.
* Medium Beam (30-60 degrees): A good all-around choice. It spreads light well. It is good for general lighting and task areas.
* Wide Beam (60+ degrees): Spreads light broadly. Good for ambient lighting in large spaces. But it might not be strong enough for tasks.
For most kitchens, a medium beam (around 40-50 degrees) works well for general and task lighting.
Trim Styles and Finishes
The trim is the visible part of the can light. It comes in many styles:
* Baffle Trim: This is very common. It has rings inside that absorb extra light. This reduces glare. It is great for kitchens.
* Reflector Trim: This trim has a shiny surface. It bounces light down. This makes the light brighter. Good for task areas.
* Gimbal/Adjustable Trim: You can tilt these lights. They are good for aiming light at specific spots, like artwork or a wall.
* Flush Trim: A very simple, flat trim. It blends almost perfectly with the ceiling.
Choose a trim finish that matches your kitchen hardware. Common finishes include white, brushed nickel, black, or bronze.
Installation Tips and Tricks
Kitchen downlight installation can be a DIY project for some. But it often needs a pro. Working with electricity has risks.
DIY vs. Professional Installation
- DIY: If you are good with basic electrical work, you might install remodel cans. Always turn off power at the circuit breaker first. Use a voltage tester. Read all instructions carefully.
- Professional: For new construction, or if you are not sure, hire a licensed electrician. They ensure safety and proper wiring. They also know local building codes. This is very important.
Tools You Might Need
- Tape measure
- Pencil
- Stud finder
- Hole saw (sized for your cans)
- Drywall saw (for remodel cans)
- Wire strippers
- Screwdriver
- Voltage tester
- Safety glasses
- Gloves
Step-by-Step Basics (Briefly)
- Plan: Mark light locations on the ceiling.
- Safety First: Turn off power to the circuit at the breaker box. Use a voltage tester to double-check.
- Cut Holes: Use a hole saw to cut precise circles in the ceiling.
- Wiring: Pull electrical wires through the holes. Connect them to the can light housing. Follow the wiring diagram.
- Secure: Insert the can light into the hole. Secure it with clips or screws.
- Trim: Install the trim piece.
- Bulb: Insert the light bulb (if not integrated LED).
- Test: Turn power back on. Test your new lights.
Important Considerations
- Wiring Capacity: Make sure your existing wiring can handle the new lights. An electrician will check this.
- Building Codes: Local codes set rules for electrical work. Your electrician knows these rules.
- Insulation: If you have insulation, ensure you use IC-rated cans. Or, make sure there is enough space around non-IC cans.
Advanced Features for Modern Kitchens
Can lights have come a long way. Many now offer smart features. These add comfort and energy savings.
Dimmable Kitchen Recessed Lights
This is a must-have feature for kitchens. Dimmable kitchen recessed lights let you control the light level.
* Flexibility: Brighten lights for cooking. Dim them for dinner parties or late-night snacks.
* Mood: Change the mood of your kitchen instantly.
* Energy Savings: Dimming lights uses less power. It also extends bulb life.
You need special dimmable LED bulbs or integrated LED fixtures. You also need a compatible dimmer switch. Check that the dimmer works with LED lights. Not all dimmers work with LEDs.
Smart Can Lights for Kitchen
Smart lighting brings even more control. Smart can lights for kitchen connect to your home Wi-Fi.
* App Control: Control lights from your phone or tablet.
* Voice Control: Use voice assistants like Alexa or Google Assistant.
* Scheduling: Set lights to turn on or off at certain times.
* Scene Settings: Create custom light “scenes.” For example, a “cooking scene” could be bright and cool. A “dinner scene” could be dim and warm.
* Color Changing (RGBW): Some smart lights can change colors. This adds a fun element.
Smart can lights integrate seamlessly into a smart home system. They add convenience and a high-tech touch to your kitchen.
Enhancing Your Kitchen Ambiance
Can lights are great. But combining them with other lighting fixtures creates the best kitchen. This helps with ambient kitchen lighting ideas and overall style.
Beyond Just Can Lights
Think about different kitchen ceiling lighting options.
* Under-Cabinet Lighting: This is vital for task lighting on countertops. It removes shadows caused by overhead lights. It also adds a nice glow. Strip lights or small puck lights work well.
* Pendant Lights: These hang from the ceiling. They are popular over kitchen islands or peninsulas. They add style and focused light. Use them as accent or task lighting.
* Sconces: Wall-mounted lights can add charm. They work well for accent lighting or in small nooks.
* Toe-Kick Lighting: Lights near the floor can create a soft, inviting glow at night. This is a nice accent.
Creating Mood and Warmth
Use your lighting to make your kitchen feel good.
* Dimmers are Key: As mentioned, dimmers are essential for mood.
* Color Temperature Mix: Using slightly warmer color temperatures (2700K-3000K) for ambient light can make the kitchen feel cozy. Cooler temperatures (3500K-4000K) are better for tasks. Some people prefer a single temperature throughout.
* Layering: The more layers of light you have, the more control you have over the mood.
* Accent Lights: Use accent lighting to highlight special features. This adds character. It makes the kitchen feel more lived-in and stylish.
Common Mistakes to Avoid
Even with good planning, mistakes can happen. Knowing them helps you avoid them.
- Too Few Lights: This leaves dark spots. It makes your kitchen feel dim and unwelcoming. It also makes tasks hard. Always err on the side of slightly more light. You can always dim it.
- Too Many Lights: This can make a kitchen feel like an operating room. It can be too bright and harsh. It also wastes energy. Good spacing prevents this.
- Wrong Placement: Placing lights behind you creates shadows on your work surface. Placing them too close to walls creates hot spots. Follow placement rules.
- Ignoring Dimmers: Not installing dimmers is a missed opportunity. You lose flexibility and mood control. Always make your dimmable kitchen recessed lights a priority.
- Incorrect Beam Angle: Using too wide a beam for task areas means less focused light. Using too narrow a beam for ambient lighting creates uneven spots. Match beam angle to purpose.
- Not Considering Future Needs: Think about how your kitchen might change. Will you add an island? Will you rearrange appliances? Plan for flexibility.
- Forgetting Building Codes: This can lead to safety risks. It can also cause problems with inspections. Always follow local electrical codes.
- Not Mixing Light Types: Relying only on can lights limits your options. Combine them with other fixtures for a truly great kitchen lighting layout.
A Professional’s Checklist for Your Kitchen
Before you start your kitchen downlight installation, use this checklist.
- Measure Your Space: Know your ceiling height and room size.
- Draw a Layout: Sketch your kitchen. Mark all work zones and furniture.
- Plan Light Layers: Decide where you need ambient, task, and accent lighting.
- Mark Light Positions: Carefully measure and mark where each can light will go. Consider kitchen pot light placement for each zone.
- Choose LED: Select LED can lights kitchen for energy savings and longevity.
- Determine Brightness: Calculate lumens needed for each area.
- Pick Color Temperature: Decide on Kelvin ratings (e.g., 3500K for tasks, 2700K for ambiance).
- Select Beam Angle: Choose appropriate angles for general light versus task light.
- Consider Dimmers: Always plan for dimmable kitchen recessed lights.
- Explore Smart Options: Think about adding smart can lights for kitchen for extra control.
- Combine Fixtures: Plan other kitchen ceiling lighting options like pendants or under-cabinet lights.
- Check Electrical Capacity: Ensure your home’s wiring can handle the new lights.
- Consult a Pro: If unsure, always get advice from a qualified electrician.
Frequently Asked Questions (FAQ)
Q: How many can lights do I need in my kitchen?
A: This depends on kitchen size and ceiling height. A good rule is to aim for 30-50 lumens per square foot. Divide total lumens needed by the lumens per light. For spacing, lights are often placed half the ceiling height from walls. Then, space them 4-6 feet apart from each other.
Q: Can I install can lights myself?
A: If you are skilled in basic electrical work, you might install remodel-type cans. Always turn off power first. Use a voltage tester. For new wiring or complex jobs, hiring a licensed electrician is best. This ensures safety and meets codes.
Q: What size can lights are best for a kitchen?
A: 4-inch or 6-inch can lights are most common for kitchens. 6-inch lights provide a wider spread of light. They are good for general illumination. 4-inch lights offer more focused light. They are often used for task areas or in smaller kitchens.
Q: Do can lights use a lot of energy?
A: No, especially if you use LED can lights. LED lights use much less energy than older incandescent or halogen bulbs. This saves money on your electric bill.
Q: How far should recessed lights be from cabinets?
A: Aim to place them far enough from wall cabinets so that the light shines on the countertop, not inside the cabinet. Often, 18-24 inches from the cabinet face is a good starting point. This prevents shadows from your body on the countertop.
Q: Can I put can lights over my kitchen island?
A: Yes, can lights are great for task lighting kitchen island areas. Space them evenly over the island to provide good light. Many people also add pendant lights above the island for style and extra focused light.
Q: What is the best color temperature for kitchen can lights?
A: For kitchens, a neutral white light between 3500K and 4000K is popular. This provides good visibility for tasks. It also feels bright and clean. For a warmer, cozier feel, 2700K-3000K works well for ambient lighting. Dimmable lights offer the most flexibility.
Conclusion
Designing with can lighting in your kitchen is a smart choice. These lights offer a clean, modern look. They provide excellent, even illumination. By carefully planning your kitchen lighting layout, choosing the right LED can lights kitchen models, and considering proper kitchen pot light placement, you can create a kitchen that is both beautiful and highly functional. Remember to layer your lighting. Use dimmable kitchen recessed lights and even smart can lights for kitchen for ultimate control. With these professional tips, your kitchen will shine. It will be a well-lit, inviting space for cooking, eating, and gathering.