
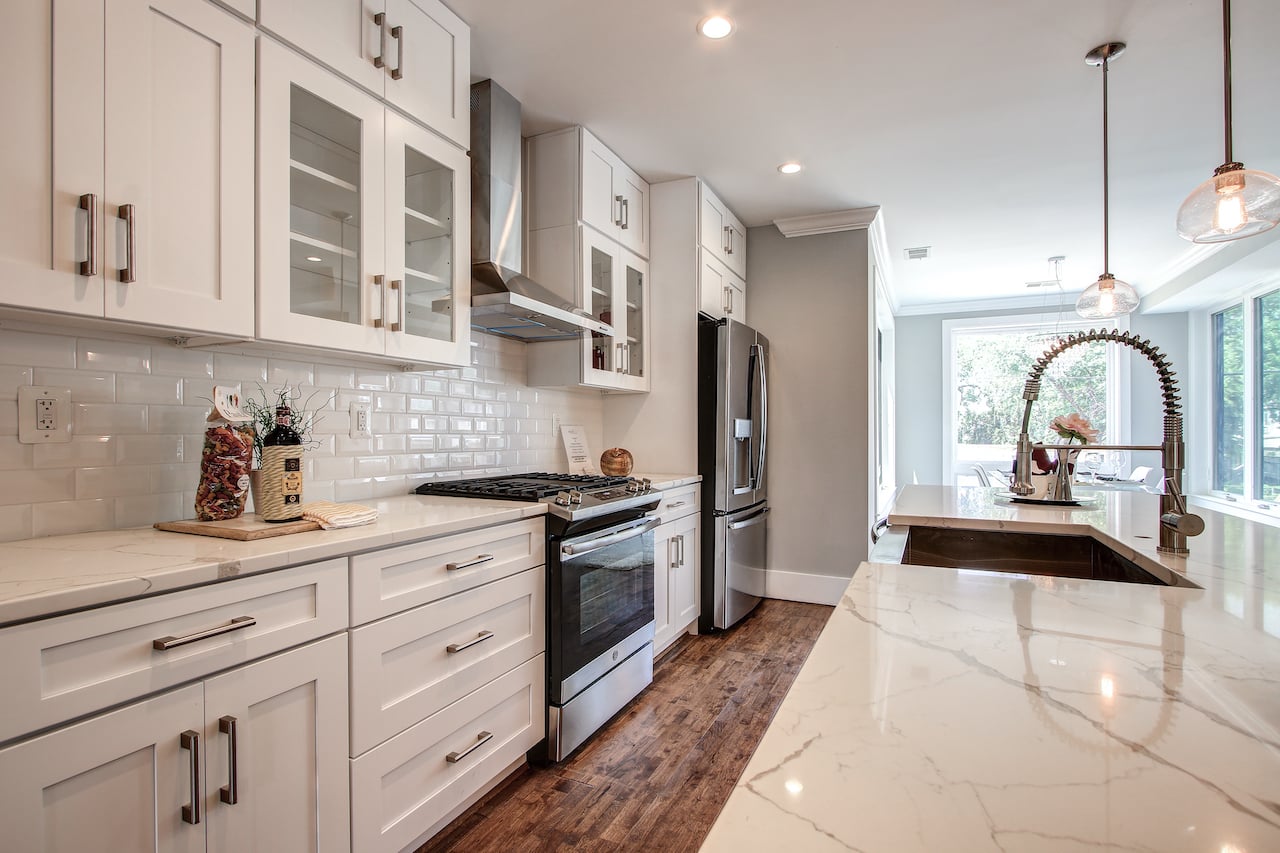
Image Source: kitchenandbathshop.com
Ultimate Guide: How Much For Kitchen Backsplash Costs?
A kitchen backsplash costs between \$600 and \$1,600 on average. This includes both materials and labor. The average cost of kitchen backsplash depends greatly on the size of your kitchen, the type of material you pick, and whether you do it yourself or hire a pro. For those wondering how much does backsplash cost professionally installed, expect to pay more for expert work. You can install a kitchen backsplash yourself if you have some DIY skills, which greatly lowers the total price.
What Makes Backsplash Costs Change?
Many things affect the final bill for your kitchen backsplash. These factors can make the price go up or down a lot. Knowing these things helps you plan your kitchen backsplash remodel budget better.
Wall Space Size Matters
The size of the area you want to cover is a big factor. A small area, like just behind the stove, costs less than covering all walls above the counters. More square feet means more materials and more work. This directly impacts the kitchen backsplash installation cost.
- Small Area: A few square feet behind the sink or stove.
- Medium Area: Covering one main wall in the kitchen.
- Large Area: Wrapping around multiple walls or extending high up.
Always measure your wall space carefully. It helps you get a good idea of how much material you will need.
Material Selection Plays a Big Role
The type of material you choose is often the biggest cost driver. Some materials are cheap, while others are very costly. We will look at specific kitchen backsplash material prices in detail soon. For example, simple ceramic tiles are far cheaper than fancy marble or glass.
Labor: DIY or Hire a Pro?
Your choice to install it yourself or hire a professional greatly changes the total cost. Doing it yourself can save a lot on labor costs. But if you are not handy, paying a pro ensures a good, lasting job. This is where the labor cost to install backsplash comes into play.
- DIY: You buy the materials and tools. You do the work.
- Professional: You pay for materials and an expert to do the job.
Design Complexity Adds to Price
Simple, straight tile patterns are quicker and cheaper to install. Complex designs, like herringbone or mosaic patterns, take more time and skill. This means higher labor costs, even with the same materials. Cutting many small pieces or mixing different tiles also adds to the effort.
Prep Work Needs Attention
Sometimes, the wall needs work before tiles go on. This could mean fixing holes, cleaning the wall, or adding a new layer of drywall. Extra prep work adds time and money to the job. It is part of the overall kitchen backsplash installation cost.
Location Can Change Costs
Prices for labor and materials can vary by city or region. Pros in big cities often charge more than those in smaller towns. Always get a few quotes from local installers to compare.
How Much Do Backsplash Materials Cost?
The materials for your backsplash can range from very cheap to very expensive. Here is a look at common kitchen backsplash material prices. The backsplash tile cost per square foot varies widely for each type.
Ceramic and Porcelain Tiles
- Cost per square foot: \$2 – \$15
- Good points: Very popular, many colors and sizes, strong, easy to clean, holds up well.
- Bad points: Grout lines can get dirty, can chip if hit hard.
- Why they are used: Ceramic and porcelain are top choices. They offer a great mix of cost, looks, and strength. The price to install ceramic backsplash is often lower than other materials because they are easy to cut and set.
Subway Tiles
- Cost per square foot: \$2 – \$15 (usually ceramic/porcelain)
- Good points: Classic look, timeless, goes with many kitchen styles.
- Bad points: Can look plain if not paired with other design elements.
- Why they are used: Subway tiles are usually ceramic or porcelain, but their rectangular shape gives them their own name. They are a very safe and stylish choice.
Glass Tiles
- Cost per square foot: \$7 – \$30
- Good points: Many colors and finishes, brightens a room, easy to clean.
- Bad points: Can be harder to cut without breaking, can show dirt or streaks more easily, can be slick.
- Why they are used: Glass tiles add a modern, sleek look. They catch the light well.
Stone Tiles (Marble, Granite, Travertine)
- Cost per square foot: \$15 – \$60+
- Good points: Natural beauty, unique patterns, very durable, adds high value.
- Bad points: Needs sealing often, can stain easily, heavy, hard to cut, can be very pricey.
- Why they are used: Stone offers a luxurious, high-end feel. Each piece is unique, giving your kitchen a one-of-a-kind look.
Metal Tiles (Copper, Stainless Steel)
- Cost per square foot: \$20 – \$70+
- Good points: Modern look, strong, easy to clean, can be very unique.
- Bad points: Can show fingerprints or dents, can scratch, expensive.
- Why they are used: Metal tiles give a sleek, industrial, or bold look. They are very tough.
Peel and Stick Tiles (Vinyl, Gel)
- Cost per square foot: \$1 – \$10
- Good points: Super easy to install, very low cost, good for renters or quick makeovers.
- Bad points: Not as durable as real tiles, can look less real, not for wet areas, might not last long.
- Why they are used: These are the ultimate cheap kitchen backsplash options. They are great for a fast, budget-friendly change.
Tin Tiles
- Cost per square foot: \$10 – \$30
- Good points: Unique, vintage or farmhouse look, light, easy to install.
- Bad points: Can dent, needs care to clean.
- Why they are used: Tin adds a historic, decorative touch. It can be painted any color.
Butcher Block/Wood
- Cost per square foot: \$5 – \$25
- Good points: Warm, natural, can be stained.
- Bad points: Not good with water, needs sealing often, can burn.
- Why they are used: Wood backsplashes offer a warm, rustic feel. They are less common behind sinks or stoves due to water and heat.
Common Backsplash Material Costs
Here is a table to help you compare backsplash tile cost per square foot for popular materials:
| Material Type | Average Cost Per Square Foot (Materials Only) |
|---|---|
| Ceramic / Porcelain | \$2 – \$15 |
| Subway Tile | \$2 – \$15 |
| Glass Tile | \$7 – \$30 |
| Natural Stone (e.g., Marble, Travertine) | \$15 – \$60 |
| Metal Tile | \$20 – \$70 |
| Peel and Stick (Vinyl, Gel) | \$1 – \$10 |
| Tin Tile | \$10 – \$30 |
| Wood / Butcher Block | \$5 – \$25 |
Note: These are average prices. Actual costs may change based on where you live and the brand.
Getting a Backsplash Done: DIY vs. Pro
One of the biggest choices you will make is whether to do the work yourself or hire a professional. This choice greatly impacts the total kitchen backsplash installation cost.
DIY Kitchen Backsplash Cost
If you do it yourself, your main cost is for materials and a few tools. This means the DIY kitchen backsplash cost is often the lowest option.
- Materials: Tiles, grout, thin-set mortar, caulk.
- Tools: Trowel, tile cutter, spacers, sponge, level, bucket, safety glasses. You might rent a wet saw for stone or glass tiles.
- Time: Your own time. It can take many hours or even days, especially for a first-timer.
Estimated DIY Cost: \$200 – \$800 (for an average kitchen, depending on materials). This is mostly for materials. You save hundreds, even thousands, on labor.
Good for DIY if:
* You are good with your hands.
* You have done home projects before.
* You have time and patience.
* Your project is small or simple.
Things to watch out for:
* Mistakes can be costly. You might waste materials.
* The final look might not be perfect.
* It takes time and effort.
* Some materials, like large format porcelain or natural stone, are harder to cut and install without special tools.
Professional Installation: How Much Does Backsplash Cost Professionally Installed?
Hiring a professional ensures a high-quality, long-lasting finish. They have the right tools, skills, and experience. This is often part of a larger kitchen remodel budget.
The labor cost to install backsplash can vary a lot. Pros might charge by the hour, by the square foot, or a flat fee for the whole job.
- Hourly Rate: \$40 – \$100 per hour.
- Per Square Foot: \$10 – \$30+ per square foot for labor only. Complex patterns or materials cost more.
- Flat Fee: Varies widely based on project size and details.
Total Cost with Professional Installation: \$600 – \$1,600 or more. This includes materials and labor. The average cost of kitchen backsplash when done by a pro is higher, but you get peace of mind.
Example for Price to Install Ceramic Backsplash:
If you choose ceramic tiles (\$\$2-\$15/sq ft material) for a 30 sq ft area:
* Materials: 30 sq ft x \$5/sq ft = \$150
* Labor: 30 sq ft x \$15/sq ft = \$450
* Total: \$600 (This is a low-end estimate. More complex ceramic installs will be higher.)
Good for Professional if:
* You want a perfect finish.
* You don’t have time or skills.
* Your project is large or complex.
* You are installing costly materials like stone or custom glass.
Things to watch out for:
* Higher total cost.
* Finding a good, trusted pro. Ask for references and see their past work.
* Scheduling conflicts.
Typical Backsplash Cost Comparison
Here is a general cost breakdown for an average-sized kitchen backsplash (approx. 30-40 square feet):
| Cost Factor | DIY Cost Estimate | Professional Cost Estimate |
|---|---|---|
| Materials | \$100 – \$600 | \$100 – \$600 |
| Tools | \$50 – \$200 (if buying) | Included in labor |
| Labor | Free (your time) | \$400 – \$1,200+ |
| Total Project | \$200 – \$800 | \$600 – \$1,800+ |
Note: These are estimates. Prices can change based on the material chosen, project size, and local labor rates.
Saving Money: Cheap Kitchen Backsplash Options
You do not need to spend a lot to make a big change in your kitchen. There are many cheap kitchen backsplash options that look great and protect your walls.
Peel and Stick Wonders
As mentioned, peel and stick tiles are the kings of budget-friendly backsplashes. They come in many styles that look like real tiles, stone, or even wood. They are super easy to put up and remove.
- Cost: \$1 – \$10 per square foot.
- Good for: Quick updates, renters, temporary fixes.
- Tip: Clean the wall well before sticking them on for best results.
Paint for a Splash of Color
The cheapest option is often paint. You can use special kitchen and bath paint that handles moisture and splashes. You can paint a solid color, or use stencils for a patterned look.
- Cost: \$20 – \$50 for a can of paint.
- Good for: Very low budget, easy to change color, adds instant brightness.
- Tip: Use semi-gloss or high-gloss paint for easy cleaning.
Beadboard Panels
Beadboard offers a charming, classic look, often found in farmhouse or cottage styles. It comes in large sheets or planks that are easy to cut and install. You can paint it any color.
- Cost: \$1 – \$3 per square foot (material only).
- Good for: Country or traditional kitchens, hiding uneven walls.
- Tip: Use a good sealant for moisture protection, especially near sinks.
Laminate Flooring or Panels
Yes, you can use thin laminate flooring or wall panels as a backsplash. They are designed to be durable and easy to clean. They offer wood or stone looks at a fraction of the cost.
- Cost: \$1 – \$5 per square foot.
- Good for: Modern or rustic looks, easy to wipe down.
- Tip: Make sure edges are sealed well to keep water out.
Wallpaper or Vinyl Decals
Modern wallpaper is far more durable than old types. Look for “washable” or “vinyl” options for kitchen use. Large vinyl decals can also give a tiled look without the mess.
- Cost: \$0.50 – \$5 per square foot.
- Good for: Renters, quick style change, unique patterns.
- Tip: Choose patterns that can be easily cleaned.
Salvaged or Reclaimed Materials
Check local reuse centers, salvage yards, or online marketplaces. You might find old bricks, unique tiles, or wood planks at very low prices. This is great for a unique, eco-friendly look.
- Cost: Very low, sometimes free, plus cleaning and prep.
- Good for: Unique, rustic, or industrial styles.
- Tip: Clean and seal all reclaimed materials well before use.
Planning Your Backsplash Money
Setting a clear kitchen backsplash remodel budget is vital. It helps you stay on track and avoid unexpected costs.
Set a Realistic Budget
Before you start, decide how much you can spend. Be honest about this. Look at your savings and how much you are comfortable paying. This number will guide all your choices, from material type to whether you hire a pro.
Get Multiple Quotes
If you plan to hire help, always get at least three quotes from different installers. This lets you compare prices for the same work. Do not just pick the cheapest. Look at their past work, read reviews, and check if they are licensed and insured.
Factor in All Costs
Do not just think about the tiles. Many other things add up.
- Materials: Tiles, thin-set mortar, grout, caulk.
- Tools: If DIY, consider buying or renting.
- Prep Work: Are your walls ready? Do they need repair or cleaning?
- Removal: Do you need to take off an old backsplash? This costs time or money.
- Unexpected Issues: Always set aside 10-15% of your budget for surprises. Maybe the wall is uneven, or you need more grout than planned.
Consider Future Value
Think about how a new backsplash will affect your home’s value. A good, timeless backsplash can make your kitchen more appealing to future buyers. This is especially true if you are thinking about selling your home soon. It is an investment.
Prioritize Your Wants
Make a list of what you want most.
* Is it a certain look?
* Is it easy cleaning?
* Is it saving money?
* Is it durability?
This helps you choose materials and decide on DIY vs. pro based on what matters most to you.
Getting Started: Steps to Backsplash Work
Whether you DIY or hire help, here are the general steps involved in installing a kitchen backsplash. Knowing these steps helps you better understand the kitchen backsplash installation cost.
1. Measure and Plan
- Measure the area accurately. Get extra tile (10-15%) for cuts and mistakes.
- Draw your layout. Decide on your pattern.
- Pick your materials: tiles, grout color, thin-set.
2. Clear and Prep the Area
- Move all items from counters.
- Turn off power to outlets. Remove outlet covers.
- Clean walls thoroughly. Fill holes or smooth bumps.
- Protect counters and floors with drop cloths.
3. Install Tiles
- Apply thin-set mortar to the wall with a notched trowel.
- Press tiles firmly into the mortar. Use spacers for even gaps.
- Cut tiles as needed using a tile cutter or wet saw.
- Allow mortar to dry fully (usually 24 hours).
4. Grout the Tiles
- Mix grout according to package directions.
- Spread grout over tiles using a rubber float, pressing it into gaps.
- Wipe off excess grout with a damp sponge.
- Let grout dry slightly, then polish tiles.
5. Seal and Caulk
- For porous tiles (like natural stone), apply a sealant to protect against stains.
- Apply caulk where the backsplash meets the counter and cabinets. This seals against water.
6. Final Touches
- Clean the area.
- Reinstall outlet covers.
- Put everything back in place.
Things to Think About Before You Start
Before you buy anything or hire anyone, a few more thoughts can save you trouble and money.
Electrical Outlets
Your backsplash will likely go around electrical outlets.
* You will need to use outlet extenders to bring the outlets flush with the new tile surface. This is a small added cost but very important for safety and a clean look.
* Always turn off power at the circuit breaker before working near outlets.
Lighting
How does your kitchen lighting hit the backsplash?
* Glossy tiles can reflect light, making a kitchen feel brighter.
* Textured tiles can create interesting shadows.
* Think about under-cabinet lighting. It can truly make your backsplash shine and highlight its features. This is part of a larger kitchen backsplash remodel budget if you want to add it.
Cabinets and Countertops
Your backsplash should match or complement your existing cabinets and countertops.
* Bring samples of your chosen tile home. Place them next to your cabinets and counters. See how they look in your kitchen’s light.
* If your countertops have a busy pattern, choose a simpler backsplash. If counters are plain, you can go for a more exciting backsplash.
Long-Term Care
Some materials need more care than others.
* Natural stone needs sealing every year or two.
* Grout needs regular cleaning and sometimes resealing.
* Glass and metal might show fingerprints more easily.
* Think about how much time you want to spend on upkeep.
Waste Management
Tiling projects create waste.
* Plan for how to dispose of old backsplash materials.
* Have a trash bag or bin ready for tile scraps, empty bags of mortar, etc.
Is a Backsplash Worth It?
A kitchen backsplash is more than just a pretty wall covering. It is a very practical and smart addition to any kitchen.
Protection for Your Walls
The main job of a backsplash is to protect your walls from splashes. Cooking often means grease, sauce, or water hitting the wall behind your stove or sink. A backsplash provides a surface that is easy to wipe clean, unlike painted drywall which can stain or get damaged by moisture. This saves you from having to repaint or repair walls often.
Boosts Kitchen Style
A backsplash can be the “jewelry” of your kitchen. It adds color, texture, and pattern. It can tie together your cabinets and countertops. It can also be a focal point that draws the eye and makes your kitchen feel more finished and designed. Even a simple, low-cost option can make a big visual impact.
Increases Home Value
A well-chosen and well-installed backsplash can boost your home’s appeal and value. It shows that the kitchen is updated and cared for. This is especially true when it is part of a larger kitchen backsplash remodel budget that modernizes the space. For potential buyers, a nice backsplash signals a move-in-ready kitchen, which is a big plus.
Easy to Clean
Most backsplash materials, like ceramic, porcelain, or glass, are non-porous and very easy to clean. A quick wipe with a damp cloth is usually enough to remove spills and grime. This makes kitchen cleanup much simpler and faster.
Personal Expression
Your backsplash is a chance to show off your style. With so many materials, colors, and patterns available, you can create a look that is truly unique to you. From classic subway tiles to bold mosaics, the choices are endless.
Final Thoughts
A kitchen backsplash is a valuable update. It protects your walls, makes your kitchen look great, and can even add value to your home. The cost can range from a few hundred dollars for a DIY project with basic materials to several thousand for a large, professionally installed, high-end stone backsplash.
By carefully considering your budget, material choices, and whether to do it yourself or hire a pro, you can choose the perfect backsplash for your kitchen. No matter your choice, a well-planned backsplash will be a rewarding addition to your home.
Frequently Asked Questions (FAQ)
Q1: What is the cheapest backsplash material?
A1: Peel and stick tiles or simply painting the wall are usually the cheapest backsplash options. They cost as little as \$1 to \$10 per square foot for materials.
Q2: How long does it take to install a kitchen backsplash?
A2: For an average-sized kitchen, a DIY project might take one to two full days of work, plus drying time. A professional can often finish the installation in one full day, sometimes two for larger or more complex jobs.
Q3: Do I need a permit to install a backsplash?
A3: In most cases, no. Installing a backsplash is usually considered a cosmetic update and does not require a building permit. However, if you are moving electrical outlets or doing major structural changes, you might need one. Always check with your local building department if you are unsure.
Q4: Can I put a new backsplash over an old one?
A4: It is generally not a good idea. Putting new tile over old tile adds thickness and weight, which can cause problems. It is best to remove the old backsplash first. This ensures a clean, flat surface for the new installation and a better, longer-lasting result.
Q5: What is the best grout for a kitchen backsplash?
A5: For most kitchen backsplashes, a sanded or unsanded grout works well. Unsanded grout is best for very thin grout lines (1/8 inch or less). Sanded grout is stronger for wider lines. Many people choose epoxy grout for kitchens. It costs more but resists stains, cracks, and mildew, making it very durable and easy to clean.