
Image Source: www.woodshopdiaries.com
DIY: How To Build A Kitchen Hood – Complete Blueprint
Can you build your own kitchen hood? Yes, you absolutely can! Building your own kitchen hood is a great project. It saves you money. It lets you get a truly custom kitchen hood design. You can pick your style and size. Is it worth it? Many people say yes. You get exactly what you want. It also adds value to your home. This guide will show you how. We cover everything from initial planning to the final touches. Get ready to create a kitchen exhaust fan installation that works great and looks good.
Getting Started: Initial Planning and Design
Before you cut any wood, you need a plan. Good planning makes building easier. It helps you avoid mistakes. Think about your kitchen and how you cook.
Deciphering Your Needs: Key Considerations
Every kitchen is different. So is every cook. Your hood should fit your needs.
- Kitchen Layout: Where will your hood go?
- Wall-mounted: This is the most common type. It goes against a wall. The ductwork often goes straight up or out a side wall.
- Kitchen Island Hood Build: An island hood hangs from the ceiling. It needs strong ceiling support. The ductwork goes up into the ceiling. This type often costs more to build. It also needs more planning.
- Cooking Style: How much do you cook? What do you cook?
- Light cooking: If you just boil water or make toast, you need less power.
- Heavy cooking: If you fry, sear, or use high heat often, you need more power. You will need a build powerful kitchen hood. This means a fan with high CFM (Cubic Feet per Minute).
- Aesthetics: How do you want your hood to look?
- Wood Kitchen Hood Construction: Wood is popular. It can be painted or stained. It gives a warm, custom look.
- Modern: You might want sleek lines. Metal or smooth finishes work well.
- Traditional: Or you might like a classic design. This often means more trim and details.
- Budget: How much money can you spend?
- DIY saves money. But you still have costs. These include materials and tools. Knowing your budget helps you choose. We will talk about the cost to build kitchen hood later.
Essential Components of a Kitchen Hood
A kitchen hood has several key parts. Each part works together. They make your kitchen fresh and clean.
- Fan/Blower Unit: This is the heart of your hood. It pulls smoke and smells out.
- Inline Fans: These fans sit inside the ductwork. They are quiet. They offer good power.
- Range Hood Inserts: These are special units. They fit inside your custom hood shell. They have the fan, lights, and controls. They are very common for DIY.
- Ductwork: This is the path for air. It takes the smoky air outside.
- Homemade Range Hood Ventilation: Proper ductwork is vital. It needs to be the right size. It needs to be as straight as possible.
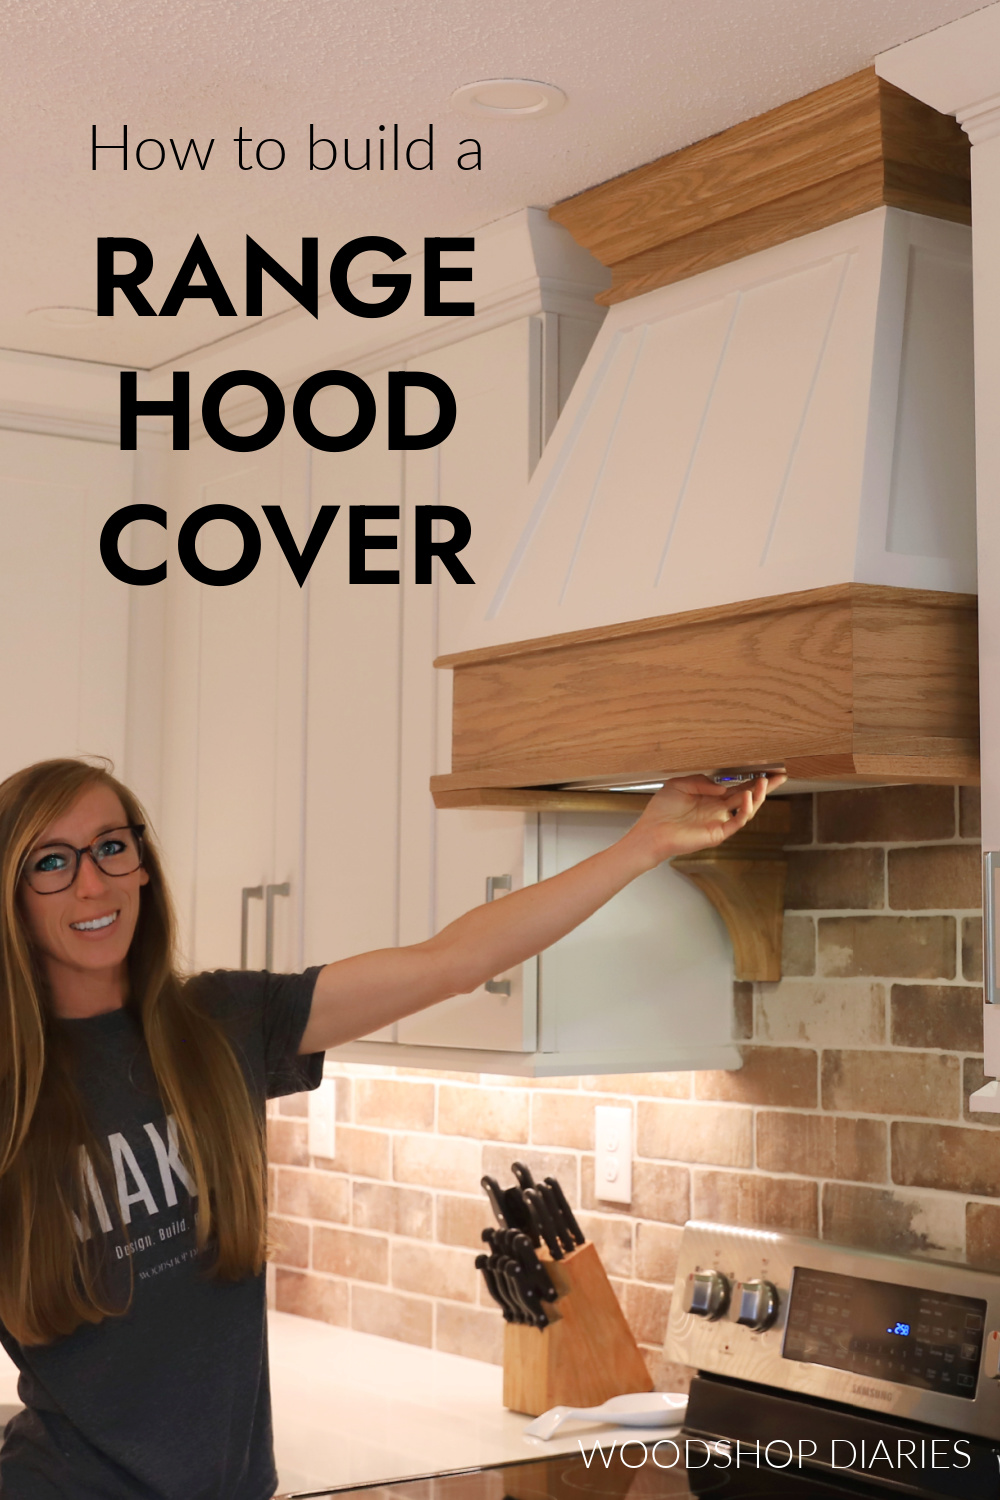
- Hood Body/Enclosure: This is what you see. It hides the fan and ductwork. It gives your hood its look.
- DIY Hood Vent Cover: You will build this part. You can use wood, drywall, or metal.
- Lighting: Lights make cooking easier. They light up your stove. Most fan inserts come with lights.
- Filters: Filters catch grease. They stop grease from getting into the ductwork. They protect your fan. They are usually metal mesh or baffle filters.
Crafting Your DIY Range Hood Plans
Good plans are like a map. They show you where to go. They make sure your project fits.
- Measurements: Measure your space.
- Width: How wide is your stove? Your hood should be at least as wide. It can be wider. This helps catch more fumes.
- Depth: How deep should your hood be? It should cover your cooking surface well.
- Height: How high above your stove? Check local building codes. Most codes say 24-36 inches above electric stoves. For gas stoves, it is often 28-36 inches. Too low, and it gets in the way. Too high, and it does not work well.
- Ceiling Height: This matters for island hoods. It also matters for duct runs.
- CFM Calculation: How much power do you need? CFM means Cubic Feet per Minute. It measures how much air the fan moves.
- For electric stoves: Multiply stove width (in inches) by 10. (e.g., 30-inch stove x 10 = 300 CFM).
- For gas stoves: Multiply stove BTUs by 0.75. (e.g., 60,000 BTU stove x 0.75 = 450 CFM).
- For high-heat cooking: Add extra CFM. Many people choose 600 CFM or more for good power.
- Duct Sizing: The duct must match the fan’s power.
- Common sizes: 6-inch, 8-inch, or 10-inch round ducts.
- Rule: Bigger is better. A too-small duct limits air flow. It makes the fan noisy. It can harm the fan. Always use the size the fan maker recommends.
- Sketches and Blueprints: Draw your hood.
- Draw it from the front, side, and bottom.
- Mark all measurements.
- Show where the fan insert will go.
- Show the duct path.
- This is your DIY range hood plans. These plans guide your build. They ensure everything fits.
Gathering Your Arsenal: Tools and Materials
You need the right tools and materials. This makes the job easier and safer. It also ensures a good finish.
Necessary Tools
Here are the tools you will likely need:
| Tool | Use |
|---|---|
| Tape Measure | For all measurements. |
| Pencil | For marking cuts and holes. |
| Speed Square/Framing | For making straight, square cuts. |
| Level | For ensuring things are straight and plumb. |
| Circular Saw | For cutting large pieces of wood or plywood. |
| Miter Saw | For precise angle cuts on wood (optional, but very helpful). |
| Jigsaw | For cutting curves or openings for the fan. |
| Drill/Driver | For drilling holes and driving screws. |
| Stud Finder | For finding wall studs (important for mounting). |
| Caulk Gun | For sealing gaps and joints. |
| Utility Knife | For cutting drywall, scoring lines. |
| Safety Glasses | Always wear these! Protect your eyes. |
| Dust Mask | Protect your lungs from wood dust or drywall dust. |
| Ear Protection | Protect your ears from loud saws. |
| Respirator | For painting or working with strong chemicals. |
Material Checklist
Your material list depends on your design. This list focuses on a wood kitchen hood construction. You can adjust for other materials.
| Material | Use |
|---|---|
| Range Hood Insert/Liner | The fan, lights, and controls unit. |
| Plywood (3/4-inch) | For the main frame and structural parts. |
| Plywood (1/4-inch) | For covering the frame (DIY hood vent cover). |
| Lumber (2×2 or 2×4) | For internal framing, if needed for extra strength. |
| Ductwork (Rigid Metal) | For the main air path (range hood ductwork installation). |
| Duct Fittings | Elbows, connectors, reducer/expander if needed. |
| Exterior Vent Cap | Covers the outside duct opening. Has a damper. |
| Screws (wood) | For assembling the frame. |
| Drywall Screws | For attaching drywall if using. |
| Wood Glue | For stronger wood joints. |
| Caulk (duct sealant) | To seal duct joints. |
| Electrical Wire | To connect the fan and lights to power. |
| Wire Nuts/Connectors | For safe electrical connections. |
| Electrical Box (if needed) | For housing wire connections. |
| Wood Filler | To fill screw holes and gaps. |
| Sandpaper | For smoothing surfaces. |
| Primer and Paint/Stain | For finishing the exterior. |
| Trim/Molding | For decorative details (optional). |
| Grease Filters | Usually come with the fan insert. Have spares. |
Step-by-Step Construction Guide
Now, let’s build your custom kitchen hood design. We will go step by step.
Step 1: Framing the Structure
This is the skeleton of your hood. It needs to be strong and square.
- Cut Your Wood: Use your plans. Cut the plywood pieces for the top, bottom, and sides.
- For a pyramid or tapered hood, you will cut angles. Use a miter saw for best results.
- For a simple box, straight cuts are fine.
- Assemble the Basic Frame:
- Start with the top and sides. Use wood glue and screws.
- Drill pilot holes first. This stops wood from splitting.
- Use a speed square often. Make sure all joints are at 90 degrees.
- If your hood is large, add internal supports. Use 2×2 or 2×4 lumber. This adds strength.
- Create the Opening for the Fan:
- Your fan insert has a specific size. Mark its opening on the bottom panel.
- Use a jigsaw to cut this opening. Be precise. The fan needs to fit snugly.
Step 2: Preparing for Ventilation
This step is about getting ready for the fan and ductwork.
- Mark the Vent Opening:
- Place your fan insert into its opening.
- Look at the top of the fan. It has an exhaust port. Mark its position on the top panel of your hood frame.
- This is where your ductwork will connect.
- Cut the Vent Hole:
- Use a jigsaw or hole saw. Cut the opening for your duct. It should be the same size as your duct (e.g., 6 inches for a 6-inch duct).
- Mount the Fan Unit (Kitchen Exhaust Fan Installation):
- Place the fan insert into the bottom opening.
- Secure it with screws. Most inserts have mounting holes.
- Make sure it is flush and well-supported.
Step 3: Covering the Frame (DIY Hood Vent Cover)
This step covers your frame. It gives the hood its finished look.
- Choose Your Covering Material:
- Plywood (1/4-inch): Easy to work with. Can be painted or stained. Good for wood kitchen hood construction.
- Drywall: Can be taped and mudded. This makes it blend into painted walls. Good for a seamless look.
- Decorative Panels: For a unique finish.
- Cut and Attach:
- Measure each side of your frame. Cut your chosen material to fit.
- Attach the panels to the frame. Use screws or nails.
- If using plywood, use wood glue for extra strength.
- If using drywall, use drywall screws.
- Create Openings:
- If your fan insert has controls or buttons on the outside, mark and cut openings for them.
- If your lights are separate, cut holes for them.
Step 4: Installing the Ductwork (Range Hood Ductwork Installation)
Proper ductwork is key for good air flow. This is a critical part of homemade range hood ventilation.
- Connect to Fan:
- Connect the first piece of rigid metal duct to the fan insert’s exhaust port.
- Use duct sealant or metal tape. This stops air leaks.
- Run the Duct:
- Wall-Mounted Hood: The duct will go up through the ceiling or straight out the wall.
- Kitchen Island Hood Build: The duct will go straight up into the ceiling. It then runs through the attic or ceiling joists.
- Keep the duct run as short and straight as possible. Every bend reduces airflow. Use 45-degree elbows instead of 90-degree ones if you need turns.
- Seal All Joints:
- Use duct sealant on all connections. This is very important. Leaky ducts mean less airflow and wasted energy. It also means dirty air can get into your walls or attic.
- Install Exterior Vent Cap:
- Cut a hole in your exterior wall or roof. This is where the duct exits.
- Install the exterior vent cap. Make sure it seals well. This stops water and pests from getting in. The cap should have a damper. This closes when the fan is off. It stops drafts.
Step 5: Electrical Work and Lighting
This step connects your hood to power. If you are not sure about electrical work, hire a licensed electrician. Safety is first.
- Turn Off Power: Find your kitchen’s circuit breaker. Turn off the power. Use a voltage tester to make sure the power is off.
- Run Electrical Wire:
- Run electrical wire from your power source to the hood. This might be an existing junction box or a new circuit.
- Follow local electrical codes.
- Wire the Fan:
- Connect the hood insert’s wires to your house’s electrical wires.
- Match black to black (hot), white to white (neutral), and green/bare to green/bare (ground).
- Use wire nuts to make secure connections.
- Install Lights:
- Most inserts come with lights. They are wired internally.
- If you added separate lights, wire them according to their instructions.
- Test: Once all connections are made, turn the power back on. Test the fan and lights. If they work, turn the power off again before moving on.
Step 6: Finishing Touches and Filters
This makes your hood look great and work well.
- Surface Prep:
- Fill all screw holes and gaps with wood filler or spackle.
- Sand the entire surface smooth. Start with rougher sandpaper (like 100-grit). Finish with finer paper (like 220-grit). This makes a smooth finish.
- Prime and Paint/Stain:
- Apply a good primer. This helps the paint stick.
- Then, apply your chosen paint or stain. Follow the product directions. You might need multiple coats.
- If you chose wood kitchen hood construction, staining brings out the wood’s beauty.
- Add Trim/Molding:
- Attach any decorative trim or molding. This adds a custom look. Use wood glue and small nails.
- Install Grease Filters:
- Slide the grease filters into place. They usually snap in.
- These filters catch grease. Clean them often. This keeps your hood working well. It also reduces fire risk.
Specific Builds: Wall-Mount vs. Island Hood
While the steps are similar, these two types have some key differences.
Wall-Mounted Hood Nuances
- Anchoring to Studs:
- Wall-mounted hoods need strong support. They must attach to wall studs.
- Use a stud finder to locate studs.
- Build a strong mounting frame inside your hood. This frame attaches to the studs.
- Use long, strong lag screws.
- Simpler Duct Runs:
- The duct can often go straight up into the attic. Or it can go straight through the exterior wall.
- This usually means shorter, straighter duct runs. This is good for performance.
Kitchen Island Hood Build Details
- Ceiling Support:
- This is the biggest difference. Island hoods hang from the ceiling. They need very strong support.
- You might need to add blocking or a header between ceiling joists. This creates a strong anchor point.
- Consult a structural engineer if you are unsure.
- Longer Duct Runs:
- The duct must go up through the ceiling. Then it often runs horizontally across the attic. Finally, it exits through the roof or a gable wall.
- This can mean more bends and longer runs. This reduces airflow. Plan your duct path carefully.
- Aesthetics from All Sides:
- An island hood is seen from all angles.
- The finish must be perfect on all sides. All seams and screws need to be hidden well.
- This adds to the complexity of the DIY hood vent cover.
Ensuring Performance: Making a Powerful Hood
You want your homemade range hood ventilation to work well. A powerful kitchen hood clears the air fast.
CFM Selection Matters
- Do Not Skimp: Choose a fan with enough CFM. It is better to have too much than too little.
- Match Fan to Needs: Remember the CFM calculation. If you cook a lot, go higher. A strong fan will remove smoke and odors quickly. This keeps your kitchen air clean.
Ductwork Efficiency
This is just as important as CFM. Even a great fan will fail with bad ductwork.
- Short, Straight Runs: This is the golden rule. Each bend equals many feet of straight duct. It adds resistance. It slows air down.
- Smooth Interior Ducts: Use rigid metal ducting. Flexible ducting (the ribbed kind) creates a lot of friction. This greatly reduces airflow.
- Proper Diameter: Always use the duct size recommended by your fan’s maker. If your fan needs an 8-inch duct, use an 8-inch duct. Do not use a smaller one. A smaller duct chokes the fan. It makes it noisy. It can even damage the fan motor over time.
Calculating the Cost: What to Expect
One big reason to DIY is to save money. But what is the cost to build kitchen hood?
Breaking Down the Expenses
Prices can change. This is a general idea.
| Item | Estimated Cost Range (USD) | Notes |
|---|---|---|
| Range Hood Insert/Liner | $200 – $800 | Varies greatly by CFM, brand, features. |
| Plywood | $100 – $300 | Varies by type, thickness, and amount needed. |
| Lumber (2×2, 2×4) | $30 – $100 | For internal framing/support. |
| Ductwork & Fittings | $50 – $200 | Rigid metal duct, elbows, connectors, vent cap. |
| Screws, Wood Glue, Caulk | $20 – $50 | Basic fasteners and sealants. |
| Paint/Stain & Primer | $30 – $80 | Depends on quality and color. |
| Trim/Molding (Optional) | $20 – $100 | Depends on design complexity. |
| Electrical Supplies | $10 – $50 | Wire, wire nuts, box. |
| Total Estimated Cost | $470 – $1760 | Your cost may be higher or lower. |
- Labor Costs: This table does not include labor costs. If you hire someone, it adds to the price. DIY means you save on labor.
- Tool Costs: This also does not include tools. If you need to buy new tools, add that to your budget.
Savings Compared to Store-Bought
- Retail hoods: A good quality, custom-looking hood can cost $1,000 to $3,000 or more. This is just for the hood itself. Installation is extra.
- DIY savings: By building it yourself, you can save hundreds or even thousands of dollars. You also get a truly custom piece. It fits your kitchen perfectly. You get a unique custom kitchen hood design that no store can offer.
Safety First: Crucial Reminders
Building a kitchen hood involves tools, electricity, and structural work. Safety is very important.
- Electrical Safety:
- Always turn off power: Before doing any wiring, turn off the circuit breaker.
- Test for power: Use a voltage tester to be sure.
- Hire a pro: If you are not comfortable with wiring, hire a licensed electrician. It is better to be safe than sorry.
- Structural Integrity:
- Mount securely: Make sure your hood is strongly anchored to wall studs or ceiling joists. It is heavy. It must stay in place.
- Overhead weight: For island hoods, ensure your ceiling can handle the weight.
- Fire Hazards:
- Proper ducting: Use rigid metal ductwork. Plastic or flexible foil ducts can melt or catch fire.
- Seal leaks: Seal all duct joints with metal tape or duct sealant. Leaky ducts can spread grease and fire.
- Clean filters: Clean or replace grease filters regularly. Built-up grease is a major fire risk.
- Follow codes: Check your local building codes. They often have rules for hood installation and ventilation.
Building a DIY kitchen hood is a rewarding project. It takes time and effort. But the result is a beautiful, powerful, and custom addition to your home. Enjoy your clean and fresh kitchen!
Frequently Asked Questions (FAQ)
Q1: How long does it take to build a DIY kitchen hood?
A1: It often takes a few days. Planning can take a day or two. Building the frame, ducting, and wiring might take another 1-2 days. Finishing touches like painting can add another day. It depends on your skill and the design’s complexity.
Q2: Can I use an existing duct for my homemade range hood ventilation?
A2: Maybe. You must check its size and condition. It needs to match your new fan’s duct size. It also needs to be clean, rigid metal, and in good repair. If it’s too small or damaged, replace it.
Q3: What is the best material for wood kitchen hood construction?
A3: Plywood is a common choice. It is strong and stable. You can cover it with thinner plywood, drywall, or decorative panels. Solid wood boards can also be used. But they are often heavier and more expensive.
Q4: Do I need a professional for range hood ductwork installation?
A4: For simple, straight duct runs, you can often do it yourself. But if you have long runs, many bends, or need to go through complex ceiling structures, a professional might be helpful. They can ensure proper airflow and code compliance.
Q5: How often should I clean the grease filters?
A5: Clean them every 1-3 months. It depends on how often you cook. If you cook a lot of greasy foods, clean them more often. Many metal filters can go into a dishwasher. Clean filters help your hood work its best. They also reduce fire risk.