
Image Source: www.ovenclean.com
The Best Way to Clean Your Kitchen Floor
So, what is the best way to clean your kitchen floor? The best way involves understanding your floor’s material and using the right tools and cleaners for a sparkling finish. This guide will walk you through everything you need to know to achieve a spotless kitchen floor, from everyday maintenance to tackling tough grime. We’ll cover how to mop your kitchen floor effectively, how to deep clean it when it’s really dirty, and specific tips for various floor types.
Getting Started: Your Kitchen Floor Cleaning Arsenal
Before you can achieve the “best way” to clean your kitchen floor, you need the right gear. Having the proper tools makes the job easier and more effective.
- Broom or Vacuum: For sweeping or vacuuming up loose dirt and debris. A good quality broom with stiff bristles is excellent for most surfaces. For vacuums, ensure it has a setting suitable for hard floors to avoid scratching.
- Mop: The type of mop depends on your floor.
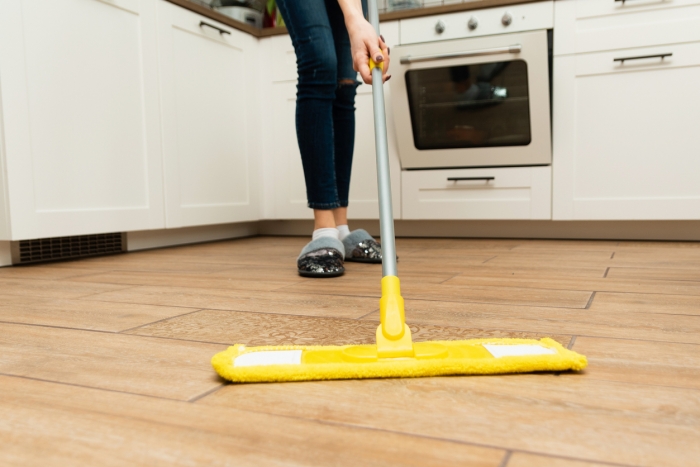
- Microfiber Mops: These are excellent for most surfaces, especially kitchen floor tiles cleaning, laminate, and vinyl. They trap dirt effectively and don’t leave streaks.
- Sponge Mops: Good for quick clean-ups but can push dirt around if not wrung out properly. Be cautious with them on delicate surfaces.
- Steam Mops: Offer a powerful way to deep cleaning kitchen floor areas with sanitizing power. Ensure your floor type is compatible with steam.
- Buckets: At least two are recommended: one for the cleaning solution and one for rinsing the mop. This prevents you from spreading dirty water back onto the floor.
- Cleaning Solutions: This is where floor type really matters. We’ll delve into specific best kitchen floor cleaner options later.
- Gloves: To protect your hands from cleaning chemicals.
- Old Towels or Rags: For spot cleaning, drying, or tackling stubborn spots.
How to Mop Your Kitchen Floor: A Step-by-Step Approach
Mopping is the core of keeping your kitchen floor clean. Here’s how to do it right:
- Clear the Floor: Remove any chairs, rugs, or floor mats. Sweep or vacuum thoroughly to get rid of loose dirt, crumbs, and pet hair. This is crucial for preventing scratches and ensuring your mopping is effective.
- Prepare Your Cleaning Solution:
- Fill one bucket with warm water and your chosen cleaning solution.
- Fill the second bucket with clean, warm water for rinsing your mop.
- Dip and Wring: Dip your mop into the cleaning solution. Wring it out thoroughly. A dripping wet mop can damage some floor types, like unsealed wood, and can leave streaks. The mop should be damp, not soaking.
- Start Mopping: Begin in a corner of the kitchen farthest from the door. Work your way backward towards the exit. This prevents you from walking on the freshly mopped floor.
- Use Overlapping Strokes: Mop in straight, overlapping strokes. This ensures you cover the entire floor evenly.
- Rinse and Repeat: Dip your mop into the clean rinse bucket to remove dirt and grime. Wring it out again before returning to the cleaning solution bucket, or simply refill the rinse bucket as needed. This is a key step in preventing the spread of dirt.
- Tackle Stubborn Spots: For dried-on food or spills, you might need to let the cleaning solution sit for a minute or two. You can also use a soft brush or an old toothbrush for targeted scrubbing.
- Dry if Necessary: Most floors can air dry. If you’re concerned about water pooling, especially on wood or laminate, you can use a clean, dry microfiber cloth to buff the floor dry.
Deep Cleaning Kitchen Floor: When Everyday Mopping Isn’t Enough
Sometimes, your kitchen floor needs more than a regular mop. Deep cleaning kitchen floor tasks tackle built-up grime, sticky spots, and embedded dirt.
Frequency for Deep Cleaning:
* High Traffic Areas: Every 1-2 months.
* Average Use: Every 3-4 months.
* Low Traffic Areas: Every 6 months or as needed.
Deep Cleaning Process:
- Thorough Preparation: Clear the floor completely. Sweep and vacuum with extra attention to corners and edges.
- Pre-Treat Stains: Before mopping, address any visible stains. For tough spots, a paste of baking soda and water left on the stain for a few minutes can work wonders. Rinse the paste off before proceeding.
- Choose the Right Cleaner: This is where knowing your floor type is critical. We’ll cover specific cleaners for different materials below.
- Hot Water is Your Friend: For deep cleaning, warm or hot water generally works better at breaking down grease and grime.
- Scrubbing Power: For really tough spots or grout lines in kitchen floor tiles cleaning, you might need a scrub brush or a toothbrush. Be gentle to avoid damaging your floor.
- Focus on Edges and Corners: These areas often collect the most dirt. Use a damp cloth or a grout brush to clean them thoroughly.
- Rinse Well: After using any cleaning solution, it’s important to rinse your floor with clean water. This removes any residue that could attract dirt or make the floor slippery. You might need to mop with clean water a couple of times.
- Dry Thoroughly: Ensure the floor is completely dry, especially if it’s a material prone to water damage.
Kitchen Floor Tiles Cleaning: Keeping Grout and Glaze Sparkling
Kitchen floor tiles cleaning requires a bit of extra attention, especially for the grout.
Ceramic and Porcelain Tiles:
These are generally durable and easy to clean.
- Everyday Cleaning: A damp microfiber mop with warm water and a drop of pH-neutral dish soap is usually sufficient.
- For Grout Lines: Grout can absorb stains and become discolored.
- DIY Grout Cleaner: Mix baking soda with water to form a paste. Apply it to the grout lines, let it sit for 10-15 minutes, then scrub with a grout brush or an old toothbrush. Rinse thoroughly.
- Commercial Grout Cleaners: Many are available. Always test in an inconspicuous area first.
- Steam Cleaning: A steam mop can be very effective at cleaning grout lines without harsh chemicals. Ensure your grout is sealed if you’re using steam.
- Removing Kitchen Floor Stains: For tough stains on tiles, a paste of baking soda and water or a mild all-purpose cleaner can work. Avoid abrasive scrubbers that can scratch the tile surface.
Natural Stone Tiles (Granite, Marble, Slate):
These are beautiful but more sensitive.
- Best Approach: Use cleaners specifically designed for natural stone. Avoid acidic cleaners (like vinegar or lemon juice) and ammonia, as they can etch the stone.
- Daily Cleaning: A damp mop with water and a pH-neutral stone cleaner is ideal.
- Grout on Stone: Treat grout carefully. A baking soda paste is often safe, but always test first.
Laminate Kitchen Floor Cleaner: Preserving the Surface
Laminate flooring is popular for its look and affordability, but it needs specific care.
- Best Laminate Kitchen Floor Cleaner: Look for cleaners specifically labeled for laminate floors. These are usually pH-neutral and don’t contain harsh chemicals or excess moisture.
- Avoid Excessive Water: Laminate can swell and warp if it gets too wet. Always wring your mop out until it’s barely damp.
- Spot Cleaning: For spills, wipe them up immediately with a soft cloth.
- Stubborn Grime: A laminate floor cleaner sprayed onto a microfiber mop pad can tackle tougher spots.
- No Wax or Polish: Avoid waxing or polishing laminate, as it can make the floor slippery and dull the finish.
- DIY Laminate Cleaner: A mixture of water and a small amount of white vinegar (about 1/4 cup vinegar to a gallon of water) can be used, but use sparingly and ensure the mop is well wrung out. Some manufacturers advise against vinegar, so check your flooring’s care instructions.
Vinyl Kitchen Floor Cleaning: Durable and Easy
Vinyl flooring is known for its durability and water resistance, making vinyl kitchen floor cleaning relatively straightforward.
- Best Vinyl Kitchen Floor Cleaner: Most mild floor cleaners or a solution of warm water and a few drops of dish soap work well. Avoid ammonia-based cleaners, as they can dull the finish over time.
- Mopping Technique: Use a damp mop. Vinyl is water-resistant, but you still don’t want standing water, especially in seams, which can seep underneath.
- Removing Kitchen Floor Stains: For sticky residue or scuff marks, a non-abrasive cleaner or even rubbing alcohol on a cloth can often do the trick. Test in an inconspicuous area first.
- Avoid Abrasives: Do not use abrasive cleaners or scouring pads, as they can scratch the vinyl surface.
Wood Kitchen Floor Cleaner: Protecting the Natural Beauty
Wood kitchen floor cleaner requires a delicate touch to maintain its natural beauty and prevent damage.
- Best Wood Kitchen Floor Cleaner: Use cleaners specifically formulated for hardwood floors. These are typically pH-neutral and designed to clean without stripping the finish or leaving residue.
- Minimize Water: This is the most critical rule for wood floors. Water can seep into the wood, causing swelling, warping, and damage. Use a barely damp mop.
- DIY Wood Cleaner: A common DIY kitchen floor cleaner for wood is one cup of water mixed with a quarter cup of white vinegar. Some recommend adding a tablespoon of olive oil for shine, but this can make the floor slippery if too much is used. Another option is just plain water with a microfiber mop. Always check your manufacturer’s recommendations.
- Mopping Technique: Mop in the direction of the wood grain.
- Immediate Spill Cleanup: Wipe up spills immediately with a soft, dry cloth.
- Avoid Steam Mops: Steam can be very damaging to wood floors.
Natural Kitchen Floor Cleaning: Eco-Friendly Solutions
For those who prefer a greener approach, natural kitchen floor cleaning is highly effective.
- Vinegar and Water:
- Ratio: 1 part white vinegar to 2 parts warm water.
- Uses: Excellent for most hard floors like tile, vinyl, and laminate. For wood, use a much weaker solution (e.g., 1/4 cup vinegar to 1 gallon water) and ensure the mop is very well wrung out.
- Caution: Avoid on natural stone.
- Baking Soda:
- Uses: Great for scrubbing stains and deodorizing. Make a paste with water for tough spots or grout.
- Caution: While generally safe, excessive scrubbing with baking soda on delicate finishes could potentially cause micro-scratches.
- Lemon Juice:
- Uses: Can help cut grease and add a fresh scent. Dilute with water.
- Caution: Its acidity can damage natural stone and sometimes dull finishes on other materials. Use with caution.
- Dish Soap:
- Uses: A few drops in warm water can effectively clean most floors by breaking down grease.
- Caution: Use sparingly, as too much can leave a sticky residue.
DIY Kitchen Floor Cleaner Recipe Example (All-Purpose):
- 1 gallon warm water
- 1/2 cup white vinegar
- 5-10 drops of essential oil (like lemon or tea tree for antibacterial properties, optional)
- (For very greasy floors, add 1-2 drops of mild dish soap)
Remember to test any DIY cleaner in an inconspicuous spot first!
Removing Kitchen Floor Stains: Targeted Treatments
Removing kitchen floor stains requires identifying the stain type and the floor material.
- Grease and Oil Stains:
- Tile/Vinyl: A paste of baking soda and water, let it sit, then gently scrub and wipe. A good degreasing dish soap can also work.
- Wood: Sprinkle cornstarch or baking soda on the fresh stain to absorb it. Let it sit for several hours or overnight. Gently sweep up and then clean with your wood floor cleaner. For old stains, you might need a specialized wood stain remover.
- Food Stains (Berries, Wine, Coffee):
- Tile/Vinyl: Mild all-purpose cleaner or a baking soda paste.
- Wood: Act quickly! Wipe up immediately. For set-in stains, a very diluted bleach solution might be used by professionals on certain finishes, but it’s risky. Consult your floor manufacturer.
- Scuff Marks:
- Most Floors: A pencil eraser or a tennis ball can often lift scuff marks. For stubborn ones, a bit of rubbing alcohol on a cloth can help on vinyl or tile.
- Mud and Dirt:
- All Floors: Sweep or vacuum thoroughly first. Then use your regular mopping solution. For dried mud, a damp cloth can soften it before mopping.
Maintaining a Clean Kitchen Floor
Prevention is key to making cleaning easier.
- Wipe Spills Immediately: Don’t let spills sit.
- Use Doormats: Place mats at all entryways to catch dirt and moisture before it reaches your kitchen floor.
- Sweep or Vacuum Regularly: A quick sweep or vacuum every day or two will prevent dirt buildup.
- Consider a “No Shoes” Rule: Encouraging people to remove shoes at the door significantly reduces the amount of dirt tracked onto your floors.
- Clean Mats and Rugs: Wash or vacuum your kitchen mats and rugs regularly.
Frequently Asked Questions (FAQ)
Q1: Can I use steam on my laminate or wood kitchen floors?
A1: Generally, no. Steam can damage the core of laminate flooring and cause warping and discoloration on wood floors. Always check your flooring manufacturer’s recommendations, but it’s best to avoid steam on these materials.
Q2: What is the best way to clean the grout between my kitchen floor tiles?
A2: For kitchen floor tiles cleaning, grout can be cleaned with a paste of baking soda and water, a stiff grout brush, or a specialized grout cleaner. Steam cleaning is also an effective method for deep cleaning grout.
Q3: Is vinegar safe to use on all kitchen floors?
A3: Vinegar is acidic and can damage certain floor types like natural stone (marble, granite) and potentially dull the finish on some sealed surfaces over time. It’s generally safe for tile, vinyl, and some laminate floors when diluted, but always check your manufacturer’s guidelines.
Q4: How often should I deep clean my kitchen floor?
A4: For a deep cleaning kitchen floor, the frequency depends on usage. High-traffic areas might need it every 1-2 months, while less used areas can go 3-6 months. Regular sweeping and mopping will extend the time between deep cleans.
Q5: I have a sticky residue on my vinyl floor. What’s the best approach?
A5: For vinyl kitchen floor cleaning, a soft cloth with a bit of rubbing alcohol or a mild, non-abrasive cleaner should help remove sticky residue. Wipe the area clean with water afterward.
Q6: What’s the most effective way to remove kitchen floor stains on wood?
A6: Removing kitchen floor stains on wood requires immediate action. For fresh spills, blot them up. For tougher stains, use a wood-specific cleaner or a paste of baking soda and water, but always test in an inconspicuous area first. Avoid excessive water.
Q7: Is a microfiber mop the best kitchen floor cleaner tool?
A7: Microfiber mops are highly recommended for most kitchen floor cleaning tasks due to their ability to trap dirt, absorb spills, and reduce the need for harsh chemicals. They are gentle on most surfaces and leave fewer streaks.
By following these detailed steps and choosing the right methods for your specific flooring, you can ensure your kitchen floor remains clean, hygienic, and beautiful. Happy cleaning!