
Can you cover kitchen countertops? Yes, you absolutely can cover kitchen countertops, and it’s a fantastic way to update your kitchen’s look without breaking the bank. Whether you’re dealing with worn-out surfaces, outdated styles, or just crave a change, there are many budget-friendly options available. This guide will explore various methods for covering old countertops, offering a fresh look and renewed appeal to your kitchen. We’ll delve into kitchen countertop resurfacing, explore creative countertop paint ideas, discuss laminate countertop alternatives, and highlight the ease of DIY countertop covers.
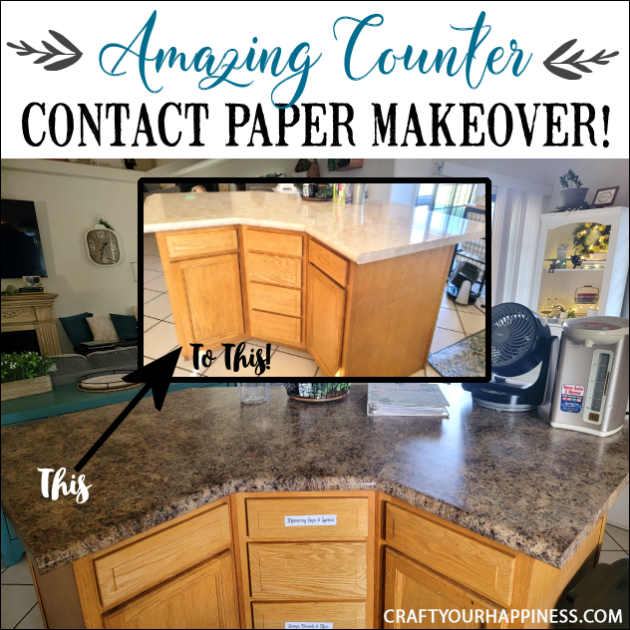
Image Source: craftyourhappiness.com
Revitalizing Your Kitchen Surfaces: Why Cover Your Countertops?
Kitchen countertops take a lot of abuse. They are the workhorses of the kitchen, bearing the brunt of chopping, slicing, spills, and heat. Over time, even the most durable materials can show signs of wear and tear. Stains might set in, chips can appear, and the once-gleaming surface can become dull and lifeless. Refinishing or replacing countertops entirely can be a significant expense, often involving professional installation and substantial material costs.
This is where covering your existing countertops becomes a brilliant solution. It’s a way to:
- Boost Curb Appeal: A fresh countertop can dramatically change the overall look and feel of your kitchen.
- Save Money: Compared to full replacement, covering is significantly cheaper.
- Reduce Waste: By covering, you’re extending the life of your current countertops, which is an eco-friendly choice.
- Achieve a Custom Look: Many covering options allow for a high degree of personalization to match your style.
- DIY Friendly: Many methods are achievable for the average homeowner with basic tools.
Choosing Your Countertop Cover: Top Budget-Friendly Options
When it comes to budget-friendly guide for a fresh look, several materials and techniques stand out. Let’s explore some of the best materials for kitchen counters when you’re looking to cover them, focusing on affordability and ease of use.
1. Countertop Paint: A Splash of Color
Countertop paint ideas are a game-changer for budget renovations. Specialized countertop paints are designed to adhere to various surfaces, offering a durable and attractive finish.
Types of Countertop Paint:
- Epoxy Paints: These are often two-part systems (a resin and a hardener) that create a very hard, durable, and often glossy finish. They are highly resistant to stains and scratches.
- Acrylic-Based Paints: These are typically single-part paints that are easier to apply but may require a good quality sealant for maximum durability.
- Mineral-Based Paints: These offer a more matte, natural look and are eco-friendly, but might require more frequent sealing.
Application Process:
- Preparation is Key: Thoroughly clean your existing countertops. Remove any grease, grime, or old sealant. Sand down any imperfections or glossy surfaces to create a good base for the paint to adhere to.
- Priming: Use a high-quality primer specifically designed for countertops or laminate. This ensures better adhesion and a more even finish.
- Painting: Apply thin, even coats of your chosen countertop paint. Allow each coat to dry completely according to the manufacturer’s instructions. For a marbled or granite look, you can use multiple colors, sponges, or brushes.
- Sealing: Once the paint is fully cured (this can take several days), apply a durable, food-safe sealant or topcoat. This protects the paint from wear and tear and makes it easier to clean.
Pros of Countertop Paint:
- Very Affordable: One of the cheapest options available.
- Wide Range of Colors: Almost limitless color possibilities.
- Customizable Finishes: Can achieve looks from solid colors to faux granite or marble.
- DIY Friendly: Relatively easy application for most people.
Cons of Countertop Paint:
- Durability Varies: Quality of paint and application significantly impacts how long it lasts.
- Requires Careful Prep: Proper cleaning and sanding are crucial.
- Potential for Chipping: Can chip or scratch if heavy items are dropped.
- Curing Time: Needs time to fully harden before heavy use.
2. Laminate Countertop Alternatives: Vinyl Wraps and Contact Paper
Looking for laminate countertop alternatives that are even more temporary and easy to change? Vinyl wraps and decorative contact papers are fantastic DIY countertop covers. They offer a quick refresh with a huge variety of patterns and textures, from wood grain to stone looks.
Application Process:
- Clean and Dry: Ensure your countertops are spotless and completely dry.
- Measure and Cut: Carefully measure your countertop sections and cut the vinyl or contact paper, leaving a little extra for trimming.
- Peel and Stick: Slowly peel back the backing paper while carefully applying the vinyl to the countertop. Use a squeegee or a credit card to smooth out any air bubbles as you go. Work slowly and deliberately.
- Trim Edges: Use a sharp utility knife to trim any excess material around the edges and sink cutouts.
- Seal Edges (Optional but Recommended): For a more professional and durable finish, you can use a clear acrylic sealant around the edges to prevent lifting.
Pros of Vinyl Wraps and Contact Paper:
- Extremely Affordable: One of the lowest-cost options.
- Vast Design Choices: Countless patterns, colors, and textures.
- Easy to Install: Relatively simple DIY project.
- Removable: Can be peeled off if you want a change or when you move.
- Water-Resistant: Good protection against everyday spills.
Cons of Vinyl Wraps and Contact Paper:
- Durability: Not as durable as paint or other more permanent options. Can scratch and tear more easily.
- Heat Sensitivity: May not withstand very hot pots or pans directly placed on them.
- Bubbling: Can be prone to air bubbles if not applied carefully.
- Edge Durability: Edges can lift over time, especially with heavy use.
3. Tile Countertop Installation: A Classic Choice
Tile countertop installation is a popular method for kitchen countertop resurfacing that offers both durability and a wide range of aesthetic possibilities. While it can be more labor-intensive than paint or vinyl, the results can be stunning and long-lasting.
Types of Tiles:
- Ceramic Tiles: Affordable, widely available, and come in many colors and styles. They are relatively easy to cut but can chip if mishandled.
- Porcelain Tiles: Denser and more durable than ceramic, offering better resistance to stains and scratches. They are also very hard, making them harder to cut.
- Glass Tiles: Offer a modern and sleek look, but can be more expensive and brittle.
- Natural Stone Tiles (e.g., Marble, Granite, Slate): Beautiful and durable but typically more expensive and require sealing. For a budget approach, consider smaller mosaic tiles which use less material overall.
Application Process:
- Prepare the Surface: Ensure the existing countertop is clean, level, and stable. You might need to apply a cement board or plywood underlayment for a solid base, especially if you’re covering laminate.
- Layout: Plan your tile layout, starting from a central point or a prominent edge. Use tile spacers to ensure consistent grout lines.
- Adhesive Application: Apply tile adhesive (thin-set mortar) to a small section of the countertop using a notched trowel.
- Tile Placement: Press each tile firmly into the adhesive. Work in small sections to prevent the adhesive from drying out.
- Cutting Tiles: Use a tile saw or a wet saw for precise cuts, especially around sinks and edges.
- Grouting: Once the adhesive is fully cured (usually 24-48 hours), remove the tile spacers and apply grout to the gaps between the tiles using a grout float.
- Cleaning and Sealing: Wipe away excess grout with a damp sponge. Once the grout is cured, seal it to protect it from stains and moisture.
Pros of Tile Countertops:
- Durable and Long-Lasting: Can withstand daily wear and tear.
- Heat Resistant: Generally very good with heat.
- Waterproof (with proper grouting/sealing): Excellent for kitchens.
- Customizable Designs: Endless possibilities with colors, patterns, and tile types.
- Good Value: Can be very cost-effective if you choose affordable tiles and DIY.
Cons of Tile Countertops:
- Labor Intensive: Tile countertop installation requires time, patience, and some skill.
- Grout Lines: Grout can stain and be difficult to clean if not sealed properly.
- Chipping: Tiles can chip if heavy objects are dropped on them.
- Cost of Tools: May require purchasing specialized tools like a tile saw.
4. Epoxy Countertop Kits: A Seamless, Modern Finish
Epoxy countertop kits offer a modern, seamless look that is highly durable and resistant to stains, heat, and scratches. They are a popular choice for kitchen countertop resurfacing for a high-end appearance without the high-end price tag of natural stone.
Application Process:
- Surface Preparation: This is the most critical step for epoxy. Thoroughly clean, degrease, and lightly sand the existing countertops. You might need to fill any chips or holes with a compatible filler.
- Masking: Use painter’s tape to protect surrounding cabinets and walls.
- Mixing Epoxy: Carefully follow the manufacturer’s instructions for mixing the epoxy resin and hardener. This is often a precise ratio that must be adhered to for proper curing.
- Pouring and Spreading: Pour the mixed epoxy onto the countertop. Use a squeegee or spreader to evenly distribute the epoxy across the surface. Work quickly, as epoxy has a limited pot life.
- Creating Effects (Optional): While the epoxy is wet, you can add metallic pigments, mica powders, or even embed objects for unique designs.
- Curing: Allow the epoxy to cure completely according to the manufacturer’s instructions. This can take several days, during which the countertop should not be touched or exposed to moisture.
- Sanding and Sealing (Optional): For a perfectly smooth finish, you might need to lightly sand and apply a clear topcoat of epoxy or a compatible sealant.
Pros of Epoxy Countertops:
- Highly Durable: Very resistant to scratches, heat, and stains.
- Seamless Finish: Creates a smooth, non-porous surface.
- Modern Aesthetic: Offers a sleek, contemporary look.
- Customizable: Infinite possibilities for color and design with pigments and layering.
- Good for Resurfacing: Can cover imperfections well.
Cons of Epoxy Countertops:
- Meticulous Preparation: Surface prep is paramount for adhesion and a good finish.
- Pot Life: You must work quickly once the epoxy is mixed.
- VOCs: Some epoxy kits contain volatile organic compounds, so good ventilation is essential.
- Potential for UV Yellowing: Some epoxies can yellow over time with prolonged sun exposure.
- Cost: Can be slightly more expensive than basic paint or vinyl.
5. Granite Overlay Kits: The Look of Luxury, Simplified
For those dreaming of granite but not the price tag or the heavy installation, granite overlay kits offer a compelling solution. These kits typically use a resin or acrylic base mixed with granite-like particles or flecks to mimic the appearance of real granite.
Application Process:
- Surface Preparation: Similar to epoxy, thorough cleaning and sanding of the existing countertop are essential. Ensure the surface is smooth and free of any imperfections.
- Priming: Apply a specialized primer included in the kit or a high-adhesion primer recommended by the manufacturer.
- Applying the Base Coat: Mix and apply the base coat color according to the kit’s instructions. This might involve rolling or squeegeeing.
- Applying Granite Flakes/Particles: While the base coat is still wet, broadcast the granite flakes evenly across the surface. Adjust the density to achieve your desired look.
- Applying the Topcoat: Once the base coat with flakes is cured, apply a clear, durable topcoat (often a high-gloss polyurethane or epoxy) to seal in the flakes and create a smooth, protective finish.
Pros of Granite Overlay Kits:
- Realistic Granite Look: Mimics the aesthetics of real granite at a fraction of the cost.
- Durable Finish: The topcoat provides good resistance to scratches and stains.
- DIY Friendly: Designed for home installation.
- Covers Imperfections: The layered system can hide minor surface flaws.
Cons of Granite Overlay Kits:
- Can Look “Painted On”: If not applied skillfully, the imitation can be noticeable.
- Durability of Flakes: The flakes themselves aren’t as inherently durable as real stone.
- Topcoat Wear: The longevity depends heavily on the quality and application of the topcoat.
- Cost: Generally more expensive than paint or vinyl.
6. Butcher Block Countertop Options: Natural Warmth and Durability
Adding butcher block countertop options is another way to cover existing surfaces, bringing natural warmth and a classic look to your kitchen. This typically involves laying a new butcher block slab on top of your existing countertops, often with some structural adjustments.
Considerations for Butcher Block:
- Thickness: Standard butcher block slabs are usually 1.5 to 3 inches thick. This adds a substantial profile to your existing countertops, so ensure your cabinets can support the weight and that sink cutouts will align correctly.
- Material: Hardwoods like maple, oak, cherry, and walnut are common choices, each offering different colors and grain patterns.
- Edge Treatment: You can have the edges of the butcher block finished in various ways, such as a straight edge, a bullnose, or a decorative bevel.
Application Process (Over Existing Countertops):
- Measure and Cut: Precisely measure your existing countertops. Order butcher block slabs to size, or be prepared to cut them yourself using a circular saw and guide.
- Sink Cutouts: If you have an undermount sink, you’ll need to cut a precise hole in the butcher block. This requires careful measurement and routing. Overmount sinks are easier to accommodate.
- Finishing: Sand the butcher block thoroughly to achieve a smooth surface. Apply several coats of a food-safe mineral oil and beeswax finish, or a waterproof sealant like polyurethane or spar urethane, depending on your desired look and maintenance level.
- Installation: Secure the butcher block to your existing countertops or cabinets using wood screws or specialized adhesive. Ensure it’s level.
Pros of Butcher Block Countertops:
- Natural Beauty: Warm, inviting aesthetic.
- Durable (with care): Can withstand chopping and wear, developing a patina over time.
- Renewable: Can be sanded down and refinished if damaged.
- Relatively Affordable: Often cheaper than granite or quartz, especially if you DIY.
Cons of Butcher Block Countertops:
- Requires Regular Maintenance: Needs oiling or sealing to prevent drying, cracking, and staining.
- Susceptible to Water Damage: Standing water can cause warping and damage, especially around sinks.
- Heat Sensitivity: Hot pans can scorch or damage the wood.
- Can Scratch and Dent: Prone to dents and scratches from dropped items.
Popular Countertop Cover Choices: A Comparative Look
Deciding which method is best often comes down to budget, desired look, and your DIY comfort level. Here’s a quick comparison to help you weigh your options.
| Feature | Countertop Paint | Vinyl Wrap/Contact Paper | Tile Countertops | Epoxy Kits | Granite Overlay Kits | Butcher Block Options |
|---|---|---|---|---|---|---|
| Cost | Very Low | Very Low | Low to Medium | Medium | Medium | Medium |
| DIY Ease | High | Very High | Medium | Medium | Medium | Medium to Hard |
| Durability | Medium | Low | High | Very High | High | High (with care) |
| Heat Resist | Low to Medium | Low | High | High | High | Medium |
| Water Resist | Medium | High | High | Very High | High | Medium (needs sealing) |
| Look | Versatile | Endless Patterns | Classic/Custom | Modern/Seamless | Granite Mimic | Natural/Warm |
| Maintenance | Low | Very Low | Medium (grout) | Very Low | Low | High (oiling/sealing) |
Tips for a Successful Countertop Covering Project
No matter which method you choose, a little planning and attention to detail go a long way.
Preparation is Paramount
- Cleanliness: This cannot be stressed enough. Any grease, dust, or residue will prevent adhesion and lead to a failed project.
- Smoothness: Fill any holes, chips, or cracks. Sand down any high spots or uneven surfaces.
- Masking: Protect your cabinets, backsplash, and flooring with painter’s tape.
Choose the Right Materials
- Quality Matters: Invest in high-quality paints, sealants, adhesives, or kits. Cheaper materials often lead to poor results and premature failure.
- Read Reviews: See what other DIYers say about specific products.
- Manufacturer Instructions: Always follow the product’s specific application guidelines.
Technique and Patience
- Thin Coats: For paints and epoxies, multiple thin coats are almost always better than one thick coat.
- Smooth Application: Work slowly and deliberately to avoid bubbles, wrinkles, or uneven coverage, especially with vinyl and epoxy.
- Allow for Curing: Don’t rush the curing process. Countertops need time to harden fully before being subjected to daily use.
Safety First
- Ventilation: Ensure good airflow, especially when working with paints, epoxies, or adhesives that emit fumes. Open windows and use fans.
- Protective Gear: Wear gloves, eye protection, and a mask if recommended by the product manufacturer.
Frequently Asked Questions About Covering Kitchen Countertops
Can I cover laminate countertops with something other than laminate?
Yes! Laminate countertops are excellent candidates for covering with paint, vinyl wraps, contact paper, tile, or epoxy. Their smooth, non-porous surface is usually a good base for most covering methods, provided it’s properly cleaned and prepped.
What is the most durable way to cover old countertops on a budget?
While “most durable” is subjective and depends on installation, kitchen countertop resurfacing with a high-quality epoxy kit or careful tile countertop installation using durable tiles and properly sealed grout are generally considered the most long-lasting budget-friendly options. Countertop paint can be durable if a good quality product and sealant are used, but it’s generally less resistant to heavy abuse than epoxy or tile.
How do I make sure my DIY countertop cover looks professional?
- Meticulous Preparation: Clean, sand, and fill any imperfections.
- Even Application: Apply materials smoothly and evenly, avoiding drips, bubbles, or streaks.
- Neat Edges: Pay close attention to edges, corners, and cutouts. Use a sharp blade for trimming and consider edge sealing.
- Quality Materials: Use good quality products.
- Patience: Don’t rush the process, especially curing times.
Can I put butcher block directly over my existing countertops?
Generally, yes, but it depends on the existing countertops and the butcher block thickness. You may need to reinforce your cabinets to support the added weight. Ensure your sink cutouts will align correctly, especially for undermount sinks. Always check the manufacturer’s recommendations for the butcher block and your existing countertop structure.
What are some creative countertop paint ideas?
Beyond solid colors, you can achieve a faux granite or marble look by layering different colors and using sponges, brushes, or marbling techniques. Metallic epoxy paints can create dramatic, modern finishes. Stencils can also be used to add patterns. Always test your techniques on scrap material first.
Is granite overlay kits a good alternative to real granite?
Granite overlay kits can be a very good budget-friendly alternative if you’re looking for the aesthetic of granite without the expense and installation complexity of real granite. The durability and longevity will depend on the quality of the kit and the skill of the application, but they can offer a significant visual upgrade.
Conclusion: Your Kitchen’s Fresh Start Awaits
Covering your kitchen countertops is an accessible and rewarding project. With a little research, planning, and elbow grease, you can transform your kitchen’s look and feel without a hefty price tag. Whether you opt for the vibrant possibilities of countertop paint ideas, the ease of DIY countertop covers like vinyl wraps, the timeless appeal of tile countertop installation, the sleek finish of epoxy countertop kits, the realistic imitation of granite overlay kits, or the natural charm of butcher block countertop options, you’re on your way to a refreshed and revitalized kitchen space. Remember that proper preparation and patience are your best tools for achieving a beautiful, durable result.