
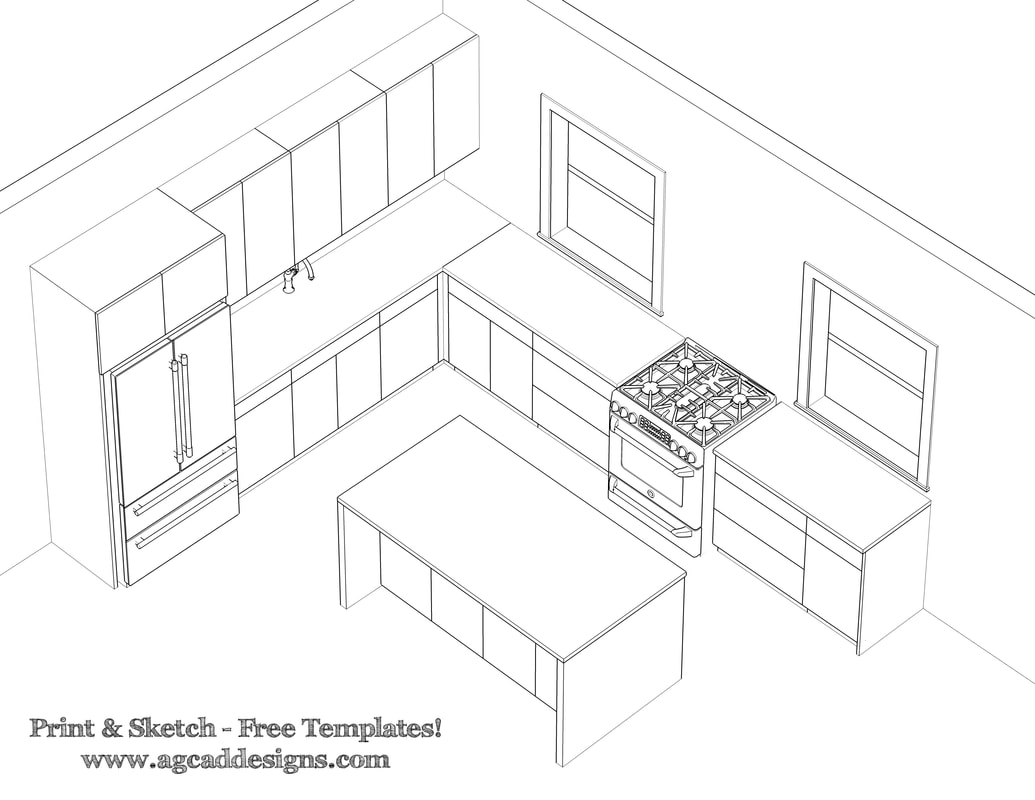
Image Source: www.agcaddesigns.com
Step-by-Step: How To Draw A Kitchen Layout Easily
Drawing a kitchen layout might seem hard. But it is really not! You can do it step-by-step. This guide makes it simple. We will show you how to plan your dream kitchen space. A good kitchen floor plan helps you see everything clearly. It makes sure your kitchen works well for you. Let’s start sketching your ideal cooking area.
Why a Good Kitchen Layout Matters
Your kitchen is the heart of your home. It is where you cook meals. It is where you gather with family. A good layout makes cooking easy. It saves you steps. It saves you time. It also makes your kitchen look nice. A bad layout can make cooking a chore. It can make your kitchen feel small. It can make it feel messy. So, taking time to plan is key.
A well-drawn layout helps you avoid mistakes. It helps you see problems before they happen. For example, maybe a fridge door hits a wall. You can fix this on paper. You can change your plan. This saves money in the long run. It helps you get the most out of your space. It makes sure your kitchen is both pretty and useful. It makes cooking and living more enjoyable.
Getting Ready: Before You Draw
Before you draw, you need to gather some facts. This helps you plan well. Think about how you use your kitchen now. What do you like about it? What do you want to change? Do you need more counter space? Do you need more storage? Write these ideas down.
Measure Your Space Carefully
This is the first big step. You need exact numbers. Grab a tape measure. Also, get paper and a pencil. Maybe use some graph paper.
- Measure Each Wall: Go around the room. Measure the length of each wall. Start from a corner. Go all the way to the next corner. Write down each number.
- Measure Wall Sections: Measure wall parts between windows. Measure parts between doors. Write these down too.
- Measure Windows: Find their width. Measure their height from the floor. Also, measure their height from the ceiling. This helps you know where cabinets can go.
- Measure Doors: Find their width. Measure their height. See which way they swing open. Mark this swing on your paper. This is important. It stops things from blocking the door.
- Mark Utilities: Find where plugs are. Mark where light switches are. Locate water pipes for the sink. Note gas lines for the stove. Mark where vents are. These are fixed points. Your layout must work around them.
- Record Everything: Write down all these numbers clearly. This is your kitchen dimensions guide. It is very important. It is like a map of your kitchen space.
List What You Need and Want
Think about your kitchen dreams. What items must be in your kitchen? What items would you love to have?
- Cooking Habits: Do you cook a lot? Do you make big meals? Or do you mostly warm up food?
- Guests: Do you have friends over often? Do you need space for them to sit?
- Family Needs: Do you need space for kids to do homework? Or for them to eat a quick snack?
- Storage: How much storage do you need? Do you have many small appliances? Do you have lots of dishes?
- Big Appliances: What big appliances do you have now? What new ones do you want? (Fridge, stove, dishwasher, microwave). Think about their size.
- Extra Features: Do you want an island? A pantry? A coffee bar? A specific spot for your pet’s food?
- Make a List: Write down all your wishes. Make a list of “must-haves.” Also, make a list of “nice-to-haves.” This helps you decide what is most important.
Step-by-Step Drawing Your Kitchen Layout
Now it’s time to put pencil to paper. Or use a computer! This is where your ideas come to life.
Step 1: Draw the Room’s Shape
Start with a simple outline of your kitchen.
- Use Graph Paper: Graph paper is best. Each small square can mean 6 inches or 1 foot. This makes things easy. It helps you keep sizes correct.
- Draw the Walls: Draw the exact shape of your room. Include all walls. Make sure the corners are square.
- Add Doors and Windows: Mark where doors are. Mark where windows are. Show which way doors open. Draw the window sills. This helps you plan cabinets around them.
- Add Measurements: Label all the measurements you took earlier. Put them right on your drawing. This way, you do not forget them.
- This is your basic kitchen floor plan. It is the starting point for your design. It gives you the empty box to fill.
Step 2: Add Big Appliances
Now, place your main appliances. Think about what makes sense. Place them where they will be most useful.
- Refrigerator: It needs space for its door to open fully. Think about how you load groceries. Place it near an entry. This makes putting groceries away easy. Make sure its door does not block walkways.
- Stove/Oven: This needs a vent above it. Keep it away from high-traffic paths. Do not put it right next to the fridge. The heat from the oven can make the fridge work harder. Give it some counter space on both sides. This is for hot pots and pans.
- Sink: This needs water lines. It is often placed under a window if possible. This offers a nice view while you wash dishes. Think about having a double sink or a single sink.
- Dishwasher: Always put it right next to the sink. This makes loading dirty dishes easy. Make sure its door does not block the sink or walkways when open.
- Microwave: It can go in many spots. It can be on a counter. It can go above the stove. It can be built into a cabinet or an island. Think about who will use it most.
- This is the appliance placement kitchen step. It sets up your main work areas. Get these right first. Other things will fall into place.
Step 3: Map Out the Work Triangle
The “work triangle” is a very important kitchen design rule. It helps make your kitchen efficient. It connects your fridge, sink, and stove. These are your three main work areas.
- Connect the Dots: Imagine lines drawn between these three points.
- Check Length: The total length of these lines should be between 12 and 26 feet. Each side of the triangle should be 4 to 9 feet long. If it’s too long, you walk too much. If it’s too short, it feels crowded.
- Keep It Clear: No major obstacles should block the triangle. This means no island or cabinet should be in the way. A clear path makes cooking flow smoothly. It saves you steps. This is the heart of your work triangle kitchen planning. A good work triangle makes your kitchen a joy to use.
Step 4: Plan Your Cabinets and Counters
Now, fill in the rest of the space. Think about storage and prep areas. This is where most of your kitchen items will live.
- Counter Space: You need counter space next to your sink. You need it next to your stove. You also need it next to your fridge. This is for preparing food. It is for putting down grocery bags. Aim for at least 15 inches of counter on one side of the sink. Aim for 18 inches on the other side. You also need landing space next to the oven.
- Cabinets: Decide on upper and lower cabinets.
- Lower Cabinets: These hold heavy items. They hold pots and pans. They hold small appliances.
- Upper Cabinets: These hold dishes. They hold glasses. They hold dry food items.
- Pantry: Do you need a separate pantry? This is great for food storage.
- Drawers vs. Shelves: Think about drawers versus shelves. Drawers are often easier to use. You can pull them out to see everything inside. Shelves can hold more in some cases.
- Special Cabinets: Consider pull-out spice racks. Think about a trash can cabinet. Maybe a cutting board slot.
- Tools for Planning: Use a cabinet layout planner tool if you have one. Or sketch them in by hand. Mark them as base (lower) or wall (upper) cabinets. Write down their approximate sizes.
Step 5: Add Islands or Peninsulas (If Space Allows)
An island or peninsula can add a lot to your kitchen. It can add counter space. It can add storage. It can also be a place for eating.
- Check Space: Make sure there is enough space around it. This is very important. You need at least 36-48 inches of clear path around the island. This allows people to move freely. It allows appliance doors to open fully. It allows two people to pass by each other.
- Purpose: What will the island be used for? Just prep? Eating? A second sink? A stovetop?
- Utilities: Consider if it needs power outlets. If it has a sink or stove, it will need plumbing or gas lines.
- Draw It: Draw it to scale on your plan. Make sure it fits well.
Step 6: Think About Lighting and Outlets
Don’t forget these important details. They make your kitchen work well.
- Lighting: Where will you need lights? Over the sink? Over the island? General ceiling lights to brighten the whole room? Under-cabinet lights can light up your counter space.
- Outlets: Where will you plug in small appliances? Toasters, coffee makers, mixers? You need outlets along the counters. Think about where you will use your phone charger.
- Mark Them: Mark these on your drawing. This helps the electrician later.
Popular Kitchen Layout Types
Different room shapes work best with different kitchen layouts. Knowing these types helps you pick the right one for your home.
The Galley Kitchen Design
- What it is: A galley kitchen has two rows of cabinets and appliances. These rows face each other. There is a walkway in between them. Think of it like a ship’s galley.
- Good for: This design is very good for small, narrow spaces. It is very efficient. All items are close by. You take very few steps to move between the sink, stove, and fridge. This makes cooking fast.
- Tips: Make sure the walkway is wide enough. It should be at least 3 feet (about 36 inches). This allows two people to pass by if needed. It also lets you open oven doors or dishwasher doors easily. This is a classic galley kitchen design for function.
| Feature | Pro | Con |
|---|---|---|
| Efficiency | Very efficient, everything is close | Can feel enclosed, less open |
| Space | Good for small, narrow rooms | Only one cook usually, not much space for others |
| Traffic Flow | Direct path through kitchen | Can be a pass-through area, creating traffic |
The L-Shaped Kitchen Layout
- What it is: Cabinets and appliances are on two walls. These walls meet at a corner. This forms an “L” shape.
- Good for: This layout works well for many kitchen sizes. It offers lots of counter space. It is good for open-plan homes. It allows for a dining table or an island in the middle.
- Tips: A corner can be tricky for storage. You might use a lazy Susan. Or you can use special corner drawers. These help you use all the space. This is a very popular L-shaped kitchen layout. It is flexible and inviting.
| Feature | Pro | Con |
|---|---|---|
| Space | Good counter space, open feel | Corner storage can be tricky |
| Traffic Flow | Limits traffic through work area | Work triangle can be long in large L-shapes |
| Versatility | Works well with islands or dining tables |
The U-Shaped Kitchen Layout
- What it is: Cabinets and appliances are on three walls. They form a “U” shape.
- Good for: This layout is best for medium to large kitchens. It offers the most counter space. It also gives you the most storage space. The “U” shape creates a very efficient work triangle. Everything is just a few steps away.
- Tips: In smaller rooms, this layout can feel closed off. Make sure the opening of the “U” is wide enough. You need enough space for people to move in and out.
The Single-Wall Kitchen Layout
- What it is: All kitchen items are placed on one wall. This includes the sink, stove, and fridge. All cabinets are on this one wall too.
- Good for: This layout is perfect for very small spaces. It works in studio apartments. It is also good for open-concept homes where the kitchen blends into the living area.
- Tips: This layout has less counter space than others. The work triangle becomes a straight line. This means you move back and forth along the wall. Try to place the sink in the middle. Put the fridge and stove on either side.
The Kitchen with an Island
- What it is: This is any layout type (L-shaped, U-shaped) that adds a freestanding island in the middle.
- Good for: Islands are great for adding extra counter space. They can add storage. They can also be a place for eating breakfast or doing homework. They work best in larger kitchens.
- Tips: Ensure enough clearance around the island. This means enough space to walk. Enough space for appliance doors to open. An island can also include a sink or a stovetop. This can change your work triangle.
Special Kitchen Layout Considerations
Every kitchen is unique. Here are some extra tips to help with specific situations.
Designing a Small Kitchen Layout
Small kitchens can be tricky. But they can also be very efficient. You just need to be smart about using every bit of space.
- Go Vertical: Use tall cabinets. Extend them all the way to the ceiling. This gives you more storage without taking up floor space.
- Pull-Out Storage: Use pull-out pantries. Use pull-out shelves. Use pull-out trash cans. These make it easy to get to things. They save space.
- Light Colors: Use light colors for walls. Use light colors for cabinets. This makes the room feel bigger and brighter.
- Smart Appliances: Choose smaller appliances if needed. A narrower fridge might fit better. A smaller dishwasher might work.
- Multifunction Items: An island could be a prep space. It could be a dining table. It could also have storage underneath. A cutting board can slide over the sink.
- These are key small kitchen layout ideas. Your goal is to make every inch count. Make sure the kitchen feels open and easy to use.
Planning a Kitchen Remodeling Layout
Changing an existing kitchen is exciting. But it needs extra thought. You are not starting from scratch. You have existing walls and pipes.
- Keep What Works: Do you like where the current plumbing is? Do you like the gas lines? Keeping them in the same spot can save a lot of money. Moving these things adds a lot to the cost.
- New Needs: Has your family size changed? Has your cooking style changed? Think about what you need now. Maybe you need more space for baking. Or space for a bigger fridge.
- Budget: Remodeling costs add up fast. A clear layout plan helps control costs. It helps you decide what you can afford to change.
- Talk to Experts: Share your kitchen remodeling layout with a builder. Share it with a kitchen designer. They can spot problems you might not see. They can give you advice on what is possible. They know local building rules.
- Moving walls or major lines (like water or gas) costs more. Plan carefully before you change anything big. Get estimates for different choices.
Tools to Help You Draw Your Kitchen Layout
You can draw your kitchen plan by hand. Or you can use digital tools. Both ways can work well.
Pencil, Paper, and Tape Measure
This is the most basic way. It is cheap and easy. Many people start here. You just need a few simple items:
- Graph paper: This helps you keep things to scale. Each square can be a set size, like 6 inches.
- Pencil and eraser: For drawing and making changes.
- Ruler: To draw straight lines and measure on your paper.
- Measuring tape: To measure your actual kitchen space.
Drawing by hand lets you sketch ideas quickly. You can try many different things.
Kitchen Design Software and Online Tools
Many tools can help you draw a kitchen plan. Some are free. Some you pay for. These tools make it easy to move things around. They can show you how your kitchen will look.
- Online Planners: Many home improvement stores offer free online planners. You can drag and drop items into your room. You can place cabinets, appliances, and islands. Examples include IKEA Kitchen Planner. Also, Lowe’s Virtual Kitchen Designer or Home Depot’s design tool are useful. These are great for basic planning. They often have real products you can choose.
- Dedicated Software: For more detailed plans, there is professional kitchen design software. These are used by kitchen designers. They offer 3D views. They have more features. Examples include SketchUp. Or Planner 5D. There are also specific kitchen design programs. These can help with complex designs.
- Benefits of Software: These tools help you visualize your kitchen. They can give you a 3D view. This helps you really see how it will look. They help you try different options easily. You can change a cabinet or move an appliance with a click. They can also check if sizes fit. They can make sure you have enough space.
Review and Refine Your Kitchen Layout
Once you have a drawing, check it carefully. Do not rush this step. It is very important.
- Walk Through It: Imagine yourself cooking in your new kitchen. Go through all the steps.
- Can you open the fridge door fully? Does it hit anything?
- Is there enough counter space next to the stove for chopping vegetables?
- Can two people work in the kitchen without bumping into each other?
- Where do you put hot pans from the oven? Is there a clear spot?
- Where do dirty dishes go before the dishwasher?
- Get Feedback: Show your plan to family or friends. They might spot things you missed. They might have good ideas. A fresh pair of eyes helps a lot.
- Make Changes: It is much easier to change a drawing than a real kitchen. Tweak your plan until it feels just right. Do not be afraid to erase and redraw.
- Think About Flow: How do people move through the kitchen? Is it easy to get from the fridge to the sink to the stove? Is there a clear path to the dining area? Is there space for guests to stand without being in the way? A good flow makes the kitchen easy and pleasant to use.
Frequently Asked Questions About Kitchen Layouts
How much space do I need around an island?
You need at least 36 to 48 inches of clear space. This means open floor area. This space should be around all sides of the island. This allows people to walk by easily. It also lets cabinet doors and appliance doors open fully. If your kitchen is a high-traffic area, aim for closer to 48 inches.
What is the most popular kitchen layout?
The L-shaped kitchen is very popular. It is used in many homes. It offers good counter space. It works in kitchens of different sizes. It also provides an open feel. This makes it a great choice for many families.
Can I draw my kitchen layout by hand?
Yes, absolutely! You can draw a good kitchen layout with just graph paper and a pencil. Many people start this way. It is a great first step. Then, if you want to see 3D views or more details, you can move to kitchen design software.
How do I choose the right cabinet sizes?
First, measure your walls accurately. Then, look at standard cabinet sizes. Kitchen cabinets come in set widths and heights. Base cabinets (lower) are usually 24 inches deep. Upper cabinets (wall) are often 12 to 18 inches deep. They come in many widths, like 12, 15, 18, 24, 30, 36 inches, and so on. A cabinet layout planner can help you fit them together like puzzle pieces. You can also talk to a cabinet supplier or a kitchen designer for advice. They can help you pick the best sizes for your space.
Conclusion
Drawing your kitchen layout is an exciting step. It helps you create a kitchen that works for you. It makes your daily life easier. By measuring carefully, planning your needs, and following these steps, you can do it easily. Use your new kitchen floor plan to make your dream kitchen a reality. It will be a space you love. Happy planning!