
Image Source: i.ytimg.com
How to Fix a Kitchen Faucet with Sprayer: Pro Tips
Can I fix a kitchen faucet sprayer myself? Yes, you can often fix a kitchen faucet with a sprayer yourself with a few basic tools and clear instructions. Many common sprayer issues, like leaks or low water pressure, can be resolved through simple repairs or replacement of small parts.
A sputtering sprayer, a persistent drip from the nozzle, or a hose that’s become detached can be frustrating. Fortunately, most kitchen faucet sprayer repair tasks are well within the reach of a DIY enthusiast. This guide will walk you through the common problems and their solutions, offering pro tips to get your sprayer working like new again. We’ll cover everything from leaky faucet sprayer woes to replacing faucet sprayer hose and troubleshooting a kitchen sink sprayer not working.
Common Kitchen Faucet Sprayer Issues and Their Fixes
Many issues with your kitchen faucet sprayer stem from a few key areas: the sprayer head, the hose, the connection points, or the internal valve system. Let’s delve into how to address each.
Troubleshooting a Detached Kitchen Faucet Sprayer
A detached kitchen faucet sprayer is a common problem. This usually happens because the connection between the hose and the sprayer head has come loose or the retaining nut has fallen off.
Steps to Reattach:
- Turn off the water supply: Locate the shut-off valves under the sink. Turn them clockwise until they are fully closed.
- Release pressure: Turn the faucet handle to the “on” position to drain any remaining water from the lines.
- Inspect the connection: Pull the sprayer hose down. You should see where it attaches to either the faucet body or a dedicated diverter. There’s typically a threaded connection or a clip-on fitting.
- Clean and re-thread: If it’s a threaded connection, check for any debris on the threads of both the hose and the faucet outlet. Clean them carefully with a damp cloth.
- Reconnect: Screw the hose back onto the faucet outlet. Make sure it’s snug but don’t overtighten, as this can damage the threads. If there’s a clip, ensure it snaps securely into place.
- Test the connection: Turn the water supply back on slowly. Check for leaks at the connection point. If it’s secure and leak-free, you’ve fixed the detached sprayer.
Fixing a Leaky Faucet Sprayer Nozzle
A leaky faucet sprayer nozzle is often caused by mineral buildup, a worn-out washer, or a damaged internal cartridge within the sprayer head itself.
How to Fix Faucet Sprayer Nozzle Leaks:
- Gather supplies: You’ll need a basin wrench (optional, but helpful), a flathead screwdriver, a Phillips head screwdriver, pliers, penetrating oil (like WD-40), replacement O-rings or washers, and plumber’s tape.
- Turn off water and relieve pressure: As always, shut off the water supply under the sink and open the faucet to drain residual water.
- Remove the sprayer head: Most sprayer heads have a threaded connection. You might need to unscrew a decorative cap to access the connection. Gently pull the sprayer hose and unscrew the head. Some newer models may have a quick-connect fitting.
- Disassemble the sprayer head: Look for a small set screw or a retaining ring on the sprayer head. Use the appropriate screwdriver to remove these. Once removed, you should be able to twist and pull the sprayer head apart.
- Inspect and replace O-rings/washers: Inside the sprayer head, you’ll find O-rings and possibly a small diaphragm or washer. These are the usual culprits for leaks. Carefully remove the old ones. Clean the internal parts.
- O-Rings: These are usually found around the threaded connection or within the sprayer body. Match the size of the old O-rings precisely and replace them. Lubricate the new O-rings with a bit of plumber’s grease or petroleum jelly before installing.
- Washers/Diaphragms: If your sprayer has a specific washer or diaphragm controlling the spray pattern or shut-off, examine it for cracks or wear. Replace it with an identical part.
- Reassemble the sprayer head: Put the sprayer head back together, ensuring all parts are seated correctly.
- Reattach to the hose: Screw the repaired sprayer head back onto the hose.
- Turn on water and test: Slowly turn on the water supply and check for leaks.
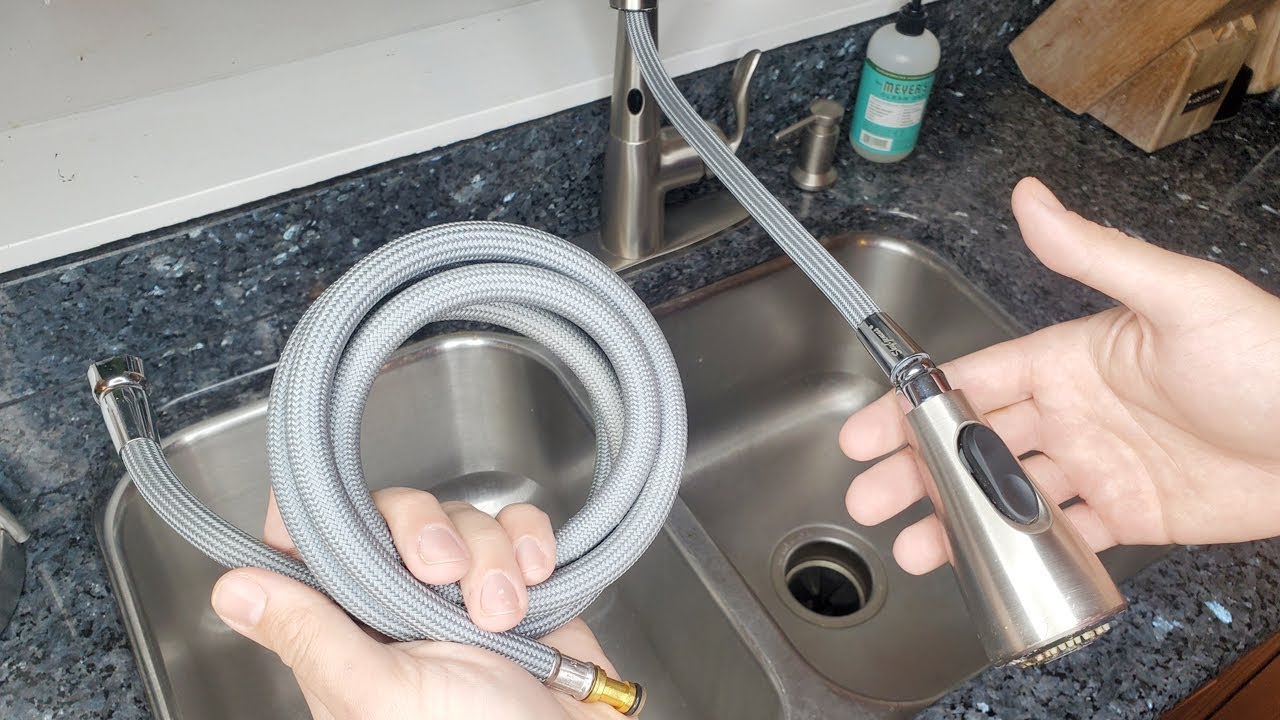
Replacing Faucet Sprayer Hose
When the hose becomes cracked, kinked, or develops leaks itself, it’s time for a replacing faucet sprayer hose job. This is a very common kitchen faucet sprayer repair.
Steps for Hose Replacement:
- Turn off water and relieve pressure: Shut off the hot and cold water supply valves under the sink. Open the faucet to drain remaining water.
- Locate the hose connections: The sprayer hose connects at two points: to the sprayer head itself and to the faucet body or diverter valve under the sink.
- Disconnect the sprayer head end: Unscrew the old hose from the sprayer head. You might need pliers for a stubborn connection.
- Disconnect the under-sink end: This connection can be trickier. It usually screws onto a fitting that comes down from the faucet body. Use a basin wrench if access is tight. Some have a quick-connect fitting that you squeeze and pull.
- Remove the old hose: Once both ends are disconnected, pull the old hose out from under the sink and through the faucet body.
- Prepare the new hose: Many new hoses come with new washers or O-rings already installed. If not, ensure you have the correct ones.
- Connect the new hose to the sprayer head: Screw the new hose onto the sprayer head. Ensure a tight seal, but don’t overtighten.
- Feed the new hose under the sink: Guide the other end of the hose up through the faucet body and under the sink.
- Connect the new hose under the sink: Attach the hose to the faucet outlet or diverter. Use plumber’s tape on threaded connections for a better seal.
- Turn on water and test: Slowly turn the water supply back on and check both connections for leaks. Turn on the faucet and test the sprayer.
Fixing a Kitchen Sink Sprayer Not Working
If your kitchen sink sprayer not working at all, or only weakly, it could be a blockage in the sprayer head, a problem with the diverter valve, or a kinked hose.
Troubleshooting a Non-Functional Sprayer:
- Check the diverter valve: The diverter valve is what switches water flow between the main faucet spout and the sprayer. It’s usually located inside the faucet body or as a separate mechanism connected to the hose.
- How it works: When you pull the sprayer handle, it typically activates a lever or plunger that redirects water to the sprayer.
- Common issues: The diverter can get clogged with mineral deposits or its internal mechanism can wear out.
- Fixing it: You might need to remove the main faucet handle and then the diverter assembly. Clean any debris and inspect for damage. If it’s a cartridge-style diverter, you may need to replace the entire unit. Consult your faucet’s manual for specific instructions on accessing and replacing the diverter.
- Clear blockages in the sprayer head: Mineral deposits are notorious for clogging the small holes in the sprayer nozzle.
- Soaking method: Remove the sprayer head (as described in the “Leaky Faucet Sprayer Nozzle” section). Submerge it in a bowl filled with white vinegar overnight. The vinegar will help dissolve mineral buildup.
- Brushing: After soaking, use an old toothbrush or a small brush to gently scrub the nozzle holes. Rinse thoroughly.
- Pinprick method: For stubborn clogs, you can carefully use a toothpick or a straightened paperclip to poke through the nozzle holes. Be gentle to avoid enlarging the holes.
- Inspect for kinks in the hose: Sometimes, the hose can get twisted or kinked under the sink, restricting water flow. Reach under the sink and straighten out any kinks.
- Check for low water pressure to the sprayer: If both the main spout and the sprayer have low pressure, the issue might be with your home’s main water supply or shut-off valves. Ensure the main shut-off valves under the sink are fully open.
Faucet Sprayer Leak Troubleshooting
When you’re dealing with faucet sprayer leak troubleshooting, it’s important to identify the source of the leak. Leaks can occur at the sprayer head, the hose connections, or even within the faucet body itself.
Table: Common Leak Sources and Fixes
| Leak Location | Possible Cause | Solution |
|---|---|---|
| Sprayer Head | Worn O-rings, cracked nozzle, loose internal parts | Disassemble sprayer head, replace O-rings, clean nozzle, reassemble. |
| Hose to Sprayer Head | Loose connection, worn O-ring at connection | Tighten connection, replace O-ring. |
| Hose to Faucet Body | Loose connection, worn seal, damaged fitting | Tighten connection, replace hose, use plumber’s tape. |
| Faucet Body | Internal valve issue, worn seals within faucet | May require replacing the entire faucet or a specific cartridge if your faucet model allows for replacement. |
Replacing Kitchen Faucet Sprayer Head
Sometimes, the sprayer head itself is beyond repair. If the plastic is cracked, the spray pattern is permanently distorted, or the internal mechanism is faulty, replacing kitchen faucet sprayer head is the most efficient solution.
Steps for Sprayer Head Replacement:
- Turn off water and relieve pressure.
- Disconnect the old sprayer head: Unscrew the old sprayer head from the hose.
- Identify the connector type: Note how the old head connects to the hose. Most are standard threaded connections, but some might have unique fittings.
- Purchase a replacement: Take the old sprayer head to a hardware store or plumbing supply shop to ensure you get a compatible replacement. You can also look up your faucet model number online to find the exact part.
- Prepare the new sprayer head: Some new heads come with a new washer or O-ring pre-installed. If not, ensure you have the correct replacement to fit the hose connection.
- Connect the new sprayer head: Screw the new sprayer head onto the hose. Tighten it snugly by hand, then use pliers if needed, but be careful not to overtighten.
- Turn on water and test: Slowly turn the water supply back on and check for leaks at the connection. Test the sprayer function.
Pro Tips for Success
- Always turn off the water: This is the golden rule of faucet repair. You don’t want to deal with a geyser in your kitchen.
- Protect your sink: Place a towel or bucket under the sink to catch drips and protect the sink basin from dropped tools.
- Use the right tools: Having the correct tools, such as a basin wrench, plumber’s tape, and a variety of screwdrivers, will make the job much easier and prevent damage.
- Take pictures: Before you disassemble anything, take pictures with your phone. This can be incredibly helpful when it’s time to put things back together.
- Keep parts organized: Lay out all the parts you remove in a specific order. A magnetic tray can be helpful for small screws and O-rings.
- Match replacement parts precisely: When replacing O-rings, washers, or hoses, ensure they are the exact same size and type as the originals.
- Don’t force anything: If a part is stuck, use penetrating oil and gentle persuasion rather than brute force. Forcing parts can lead to breakage and more expensive repairs.
- Plumber’s tape is your friend: For threaded connections (except those with rubber O-rings), wrap plumber’s tape (PTFE tape) around the threads clockwise before screwing them together. This creates a watertight seal.
- When in doubt, consult your faucet manual: Most manufacturers provide detailed manuals or diagrams for their faucets online. These can be invaluable for identifying parts and understanding disassembly.
- Consider a universal repair kit: For older faucets, a universal sprayer repair kit might contain a variety of O-rings and washers that could fit your needs.
Understanding Faucet Sprayer Components
While we’ve touched on them, let’s clarify the key parts involved in faucet sprayer repair:
- Sprayer Head: The part you hold that sprays water. It contains the nozzle and often a trigger or button to activate the spray.
- Sprayer Hose: A flexible hose connecting the sprayer head to the faucet body.
- Diverter Valve: A mechanism within the faucet that redirects water flow from the main spout to the sprayer.
- O-rings and Washers: Rubber seals that prevent water from leaking out at various connection points and within the faucet’s internal mechanisms.
- Connection Fittings/Nuts: Threaded components that secure the hose to the sprayer head and the faucet body.
Fixing Low Water Pressure Sprayer
If you’re experiencing fixing low water pressure sprayer, it generally points to a blockage or a flow restriction somewhere in the system.
Steps to Address Low Pressure:
- Check the Aerator: If the main faucet spout also has low pressure, the aerator at the end of the spout could be clogged. Unscrew it, clean it, and screw it back on.
- Clean the Sprayer Nozzle: As mentioned earlier, mineral deposits are the prime suspect. Soak the sprayer head in vinegar and clean the nozzles.
- Inspect the Hose: Ensure the hose isn’t kinked or crushed. If it’s an old hose, it might be deteriorating internally, causing blockages. Replacing faucet sprayer hose might be necessary if you suspect internal damage.
- Examine the Diverter Valve: A partially stuck diverter valve can reduce water flow to the sprayer. Cleaning or replacing the diverter may be required.
- Check Water Supply Valves: Make sure the shut-off valves under the sink are fully open. Sometimes, these valves don’t open completely, restricting water flow.
When to Call a Professional
While most kitchen faucet sprayer repair jobs are DIY-friendly, there are times when it’s best to call a plumber:
- If you’ve attempted repairs and the problem persists or worsens.
- If you’re uncomfortable working with plumbing or are unsure about any step.
- If the faucet body itself appears damaged or corroded.
- If the issue is with the main water supply to the faucet.
- If your faucet is particularly old or complex, and you’re concerned about causing further damage.
Frequently Asked Questions (FAQ)
Q1: How often should I replace my kitchen faucet sprayer hose?
A1: Faucet sprayer hoses don’t have a set replacement schedule. They should be replaced when they show signs of wear, such as cracks, leaks, kinks, or if the internal lining starts to degrade, affecting water flow.
Q2: My kitchen sink sprayer is spraying erratically. What could be wrong?
A2: Erratic spraying is usually due to clogged nozzle holes or a faulty diverter valve. Clean the nozzle thoroughly by soaking it in vinegar. If that doesn’t help, inspect the diverter valve for mineral buildup or damage.
Q3: Can I use Teflon tape on all faucet connections?
A3: Teflon tape (plumber’s tape) is best used on threaded connections that don’t have rubber O-rings or seals. For connections with rubber seals, the seal itself is designed to create watertightness, and tape can sometimes interfere with it or cause over-tightening.
Q4: What is the best way to clean mineral deposits from a faucet sprayer nozzle?
A4: The most effective method is to soak the sprayer head in white vinegar for several hours or overnight. Afterwards, use a small brush (like an old toothbrush) to gently scrub away any loosened residue from the nozzle holes.
Q5: My new faucet sprayer head is leaking at the hose connection. What did I do wrong?
A5: Double-check that you’ve installed the correct washer or O-ring inside the connection. Ensure the hose is screwed on tightly, but not excessively so. If it continues to leak, try a new washer or a small amount of plumber’s grease on the O-ring.
By following these detailed steps and pro tips, you can effectively tackle many common kitchen faucet sprayer repair issues, ensuring your kitchen sink remains fully functional and leak-free.