
Can you make your own kitchen cabinet drawers? Yes, you absolutely can! Making your own kitchen cabinet drawers is a rewarding woodworking project that can save you money and allow you to customize your kitchen storage precisely to your needs. This comprehensive guide will walk you through the entire process, from planning to the final installation.
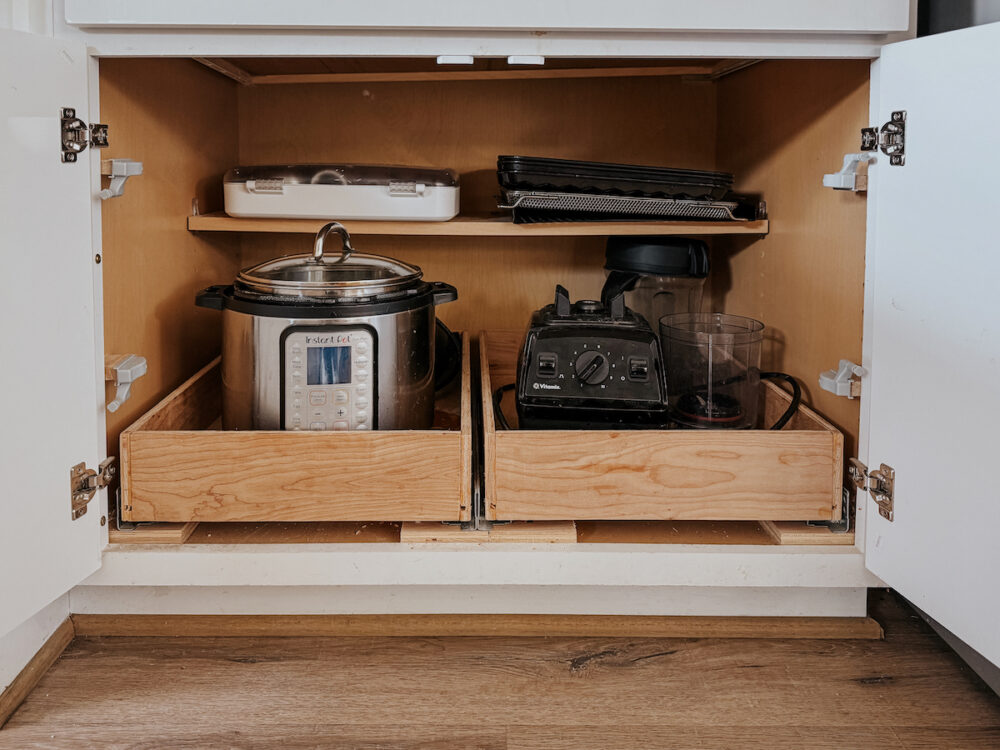
Image Source: www.loveandrenovations.com
Planning Your Kitchen Drawer Project
Before you pick up a saw, good planning is key. This ensures your new drawers fit perfectly and function smoothly within your existing cabinets. Think about what you’ll store in each drawer. This will help determine the size and depth. Do you need shallow drawers for utensils, or deep ones for pots and pans?
Creating Kitchen Drawer Plans
Developing accurate kitchen drawer plans is your first crucial step. Measure the interior dimensions of your existing cabinet openings precisely. You’ll need to record the width, height, and depth of each opening.
- Width: Measure the narrowest point between the cabinet walls.
- Height: Measure from the cabinet floor to the underside of the shelf or drawer above, or the cabinet top.
- Depth: Measure from the back of the cabinet to the inside of the cabinet door or drawer front.
When creating your plans, remember that cabinet modifications might be necessary, especially if you’re replacing old, worn-out drawers or adding new ones where none existed. This might involve adjusting shelf heights or reinforcing cabinet interiors.
Consider the type of drawer hardware you want to use. The choice of drawer slides significantly impacts the drawer’s dimensions. Standard wood-on-wood runners have different clearance requirements than modern ball-bearing or undermount slides.
Building Drawer Boxes: The Core of the Project
Cabinet drawer construction centers around building sturdy, well-made drawer boxes. These boxes are the workhorses that hold your belongings. The material you choose for your drawer boxes is important for durability and weight.
Choosing Your Materials
- Plywood: ¾-inch (19mm) birch or maple plywood is a popular and durable choice for drawer sides, fronts, and backs. It’s strong and resists warping.
- Solid Wood: Pine or poplar are good, cost-effective options for drawer sides. Hardwoods like oak or maple are more durable but also more expensive.
- Drawer Bottoms: ¼-inch (6mm) plywood or hardboard is typically used for drawer bottoms. They should fit into grooves cut into the drawer sides.
Drawer Joinery Techniques
The strength of your drawer box relies on effective drawer joinery techniques. Here are some common and reliable methods:
-
Dovetail Joints: These are the strongest and most aesthetically pleasing joinery methods. They are ideal for high-quality drawers, especially those carrying heavier loads. While they require precision, they offer unparalleled durability.
- Through Dovetails: Visible on both sides of the joint.
- Half-Blind Dovetails: Visible only on one side, often used for the front of drawers.
- Secret Mitred Dovetails: Hide all end grain for a clean look.
-
Box Joints (Finger Joints): These are easier to make than dovetails, especially with a router and jig. They are very strong and provide a good amount of glue surface area.
-
Dado and Rabbet Joints: These are simpler techniques. A dado is a groove cut across the grain, while a rabbet is a groove cut along the edge.
- Rabbeted Corners: The sides of the drawer meet at the corners with a rabbet joint. The drawer bottom can then slide into a groove (dado) cut into the sides and front. This is a common and reasonably strong method.
-
Butt Joints with Screws/Nails and Glue: While the simplest, this is the weakest method and generally not recommended for kitchen drawers that will see heavy use. If you use this, reinforce it with screws or nails and plenty of glue.
Cutting Your Drawer Parts
Once you have your plans and chosen your joinery, it’s time to cut the wood. Precision is paramount here.
Table 1: Typical Drawer Box Components and Their Functions
| Component | Material | Function |
|---|---|---|
| Drawer Sides | ¾” Plywood/Solid Wood | Forms the long walls of the drawer, housing the drawer bottom. |
| Drawer Front | ¾” Plywood/Solid Wood | The visible face of the drawer; attaches to drawer box and drawer slides. |
| Drawer Back | ¾” Plywood/Solid Wood | Closes the back of the drawer box. |
| Drawer Bottom | ¼” Plywood/Hardboard | Slides into grooves to form the base of the drawer. |
When cutting, ensure all your pieces are square and cut to the exact dimensions specified in your plans. Small errors here can lead to drawers that bind or don’t close properly.
Assembling the Drawer Box: Step-by-Step
Drawer assembly involves bringing all the cut pieces together. The method will depend on your chosen joinery.
- Prepare the Sides: If using dadoes for the drawer bottom, cut these grooves into the side pieces now. The groove should be the thickness of your drawer bottom material and deep enough to securely hold it.
- Dry Fit: Before applying glue, assemble the drawer box without it. Check that all joints fit snugly and that the box is square. Use a carpenter’s square to ensure 90-degree angles.
- Apply Glue: Apply a good quality wood glue to all mating surfaces of your chosen joinery.
- Assemble the Box: Bring the pieces together. If using screws or nails for reinforcement, pre-drill pilot holes to prevent splitting the wood.
- Clamp and Square: Clamp the drawer box securely. Use pipe clamps, band clamps, or bar clamps. Re-check for squareness while clamping. Wipe away any excess glue that squeezes out with a damp cloth.
- Install the Bottom: If your bottom slides into a groove, ensure it’s fully seated before the glue on the sides dries. Some designs use a groove on the front and back pieces as well, with the sides resting on top of the bottom. If the bottom is inset and nailed or screwed on, do this after the box is glued and clamped.
- Allow Glue to Dry: Let the glue cure completely according to the manufacturer’s instructions.
Installing Drawer Slides: Crucial for Smooth Operation
Choosing and correctly installing DIY drawer slides is perhaps the most critical part of ensuring your drawers function well. There are several types of slides available, each with its own installation requirements.
Types of Drawer Slides
- Wood-on-Wood Runners: The simplest and oldest method. This involves a strip of hardwood attached to the side of the drawer box that slides against a matching strip inside the cabinet. Requires careful fitting and often wax or soap for lubrication.
-
Metal Drawer Slides (Ball-Bearing): These are very popular and offer smooth, reliable operation. They come in pairs, with one part attaching to the drawer and the other to the cabinet.
- Over-Travel Slides: Allow the drawer to extend beyond the cabinet face for full access.
- Concealed Slides (Undermount): These are hidden beneath the drawer box, offering a clean, minimalist look. They are often more complex to install but provide excellent aesthetics and performance.
- Side-Mount Slides: Attach to the sides of the drawer box and cabinet.
Measuring and Marking for Slide Installation
Accurate marking is essential for DIY drawer slides.
- Cabinet Preparation: Ensure the inside of your cabinets are clean and free from debris. If you are adding slides to existing cabinets without drawers, you might need to add support rails or adjust shelf placement.
- Slide Placement: Refer to the manufacturer’s instructions for the specific slide you are using. Typically, the cabinet member of the slide is mounted to the side wall of the cabinet. Measure carefully from the front edge of the cabinet to ensure the slide is mounted the correct distance from the face frame or cabinet front. Use a level to ensure the slide is perfectly horizontal.
- Drawer Member Placement: Similarly, the drawer member of the slide attaches to the side of the drawer box. Again, follow the manufacturer’s guidelines for positioning. Ensure the drawer member is parallel to the cabinet member and at the correct height.
Attaching the Slides
- Pilot Holes: Always drill pilot holes for your screws. This prevents the wood from splitting, especially in plywood.
- Screws: Use the screws recommended by the slide manufacturer. These are typically self-tapping and the correct length for the material.
- Leveling: Use a level throughout the process. Even a slight misalignment can cause the drawer to bind or not close properly.
Drawer Front Installation: The Finishing Touch
The drawer front installation gives your DIY drawers their professional look. This is where you attach the decorative front panel.
Attaching the Drawer Front
There are several ways to attach a drawer front to the assembled drawer box:
-
Screws from the Inside: This is a common and robust method. Drill pilot holes through the front of the drawer box and into the back of the drawer front. Use screws that are long enough to get a good purchase in the drawer front but not so long that they poke through the front. Countersink the screw heads so they can be hidden with wood filler or plugs.
-
Drawer Slides with Integrated Mounting: Some modern drawer slides have specific mounting hardware that allows the drawer front to be attached directly to the slide mechanism. This is common with undermount slides.
-
Pocket Holes: You can use pocket hole joinery to attach the drawer front from the inside. This is a quick and strong method.
Aligning and Securing
- Positioning: Place the drawer box into the cabinet opening. Position the drawer front against the box. Ensure it is centered horizontally and plumb vertically. Use shims if necessary to achieve perfect alignment.
- Temporary Fasteners: You can use painter’s tape to hold the drawer front in place while you work.
- Permanent Fastening: Once you are happy with the alignment, secure the drawer front using your chosen method.
Drawer Hardware and Accessories
Beyond the slides, there are other drawer hardware components that enhance functionality and aesthetics.
- Drawer Pulls/Knobs: Choose these to match your kitchen’s style. They attach through pre-drilled holes in the drawer front.
- Drawer Organizers: Consider adding dividers or inserts to keep the contents of your drawers tidy.
- Soft-Close Mechanisms: Many modern drawer slides incorporate soft-close features, which prevent drawers from slamming shut. If your chosen slides don’t have this, it can often be added as a separate accessory.
Troubleshooting Common Issues
Even with careful planning, you might encounter minor problems.
-
Drawer Binding: This is usually due to:
- The drawer box not being square.
- Drawer slides being misaligned or not parallel.
- The drawer bottom rubbing against the cabinet interior.
- Excess glue or debris hindering movement.
- Solution: Check for squareness, re-align slides, ensure adequate clearance, and clean any obstructions. Sometimes, a bit of wax or a specialized lubricant on the slides can help.
-
Drawer Not Closing Fully:
- Obstructions inside the cabinet or drawer.
- Drawer slides not fully extended when closing.
- Drawer box dimensions slightly off.
- Solution: Clear obstructions, ensure slides are properly engaged, and check the drawer box dimensions against the opening.
-
Drawer Front Misalignment:
- Uneven attachment of the drawer front to the box.
- Uneven cabinet interior.
- Solution: Loosen screws, re-align the front, and re-tighten. Shims in the cabinet can help correct an uneven interior.
Maintaining Your DIY Drawers
With proper construction and the right hardware, your DIY kitchen cabinet drawers should last for years. Periodically check that screws remain tight and that the slides operate smoothly. A light application of silicone spray or paraffin wax on metal slides, or beeswax on wood runners, can help maintain their performance.
Frequently Asked Questions (FAQ)
Q1: What is the best wood to use for DIY kitchen cabinet drawers?
A1: For drawer sides, ¾-inch birch or maple plywood is excellent due to its strength and stability. For drawer fronts, you can use the same plywood or a solid hardwood like maple, oak, or cherry for a more premium look. Pine is a more budget-friendly option for drawer sides if weight isn’t a major concern.
Q2: Can I use my existing drawer slides if they are worn out?
A2: If your existing slides are worn, rusted, or damaged, it’s generally best to replace them. Modern DIY drawer slides (like ball-bearing or undermount slides) offer significantly better performance and longevity than older types. You’ll need to remove the old ones carefully and measure for new ones.
Q3: How much clearance do I need for drawer slides?
A3: The required clearance depends on the type of slide. For side-mount ball-bearing slides, you typically need about ½ inch (12-13mm) total clearance – ¼ inch (6mm) on each side of the drawer box. Always check the specific manufacturer’s installation manual for precise measurements, as this can vary. Undermount slides have different clearance requirements.
Q4: What are the easiest drawer joinery techniques for beginners?
A4: For beginners, rabbeted corners combined with dadoes for the drawer bottom are relatively straightforward. Pocket holes are also a good option for connecting the drawer sides, front, and back, and they create a strong bond. Dovetail and box joints require more practice and specialized jigs but offer superior strength and aesthetics.
Q5: How do I make my DIY drawers slide smoother?
A5: Ensure your DIY drawer slides are installed perfectly level and parallel. Check that the drawer box itself is square and not warped. For wood-on-wood runners, apply a lubricant like beeswax, paraffin wax, or a dry lubricant spray. For metal slides, ensure they are clean and properly lubricated as per the manufacturer’s recommendations. If you are experiencing binding, it’s usually an installation issue rather than a lubrication problem.
Q6: Can I add drawers to existing cabinets that don’t have them?
A6: Yes, you can add drawers to existing cabinets, but it often involves cabinet modifications. You might need to remove fixed shelves and potentially add new support rails or dividers to create the framework for the drawer slides. This can be a more involved process than simply replacing drawers.
Q7: What is the best way to attach a drawer front to the drawer box?
A7: A very common and reliable method is to drive screws from the inside of the drawer box through the front panel and into the back of the drawer front. Pre-drilling pilot holes and countersinking the screw heads is important. Pocket holes from the inside are another excellent and strong method. Ensure the drawer front is perfectly aligned before fastening.