
Can you regrout kitchen counter tile yourself? Absolutely! With the right tools and a bit of patience, you can transform your kitchen counters by replacing old, worn-out grout. This guide will walk you through the entire process, from removing the old grout to applying a fresh new layer and sealing it for lasting beauty. You’ll learn how to tackle kitchen tile grout repair effectively, making your countertops look like new again.
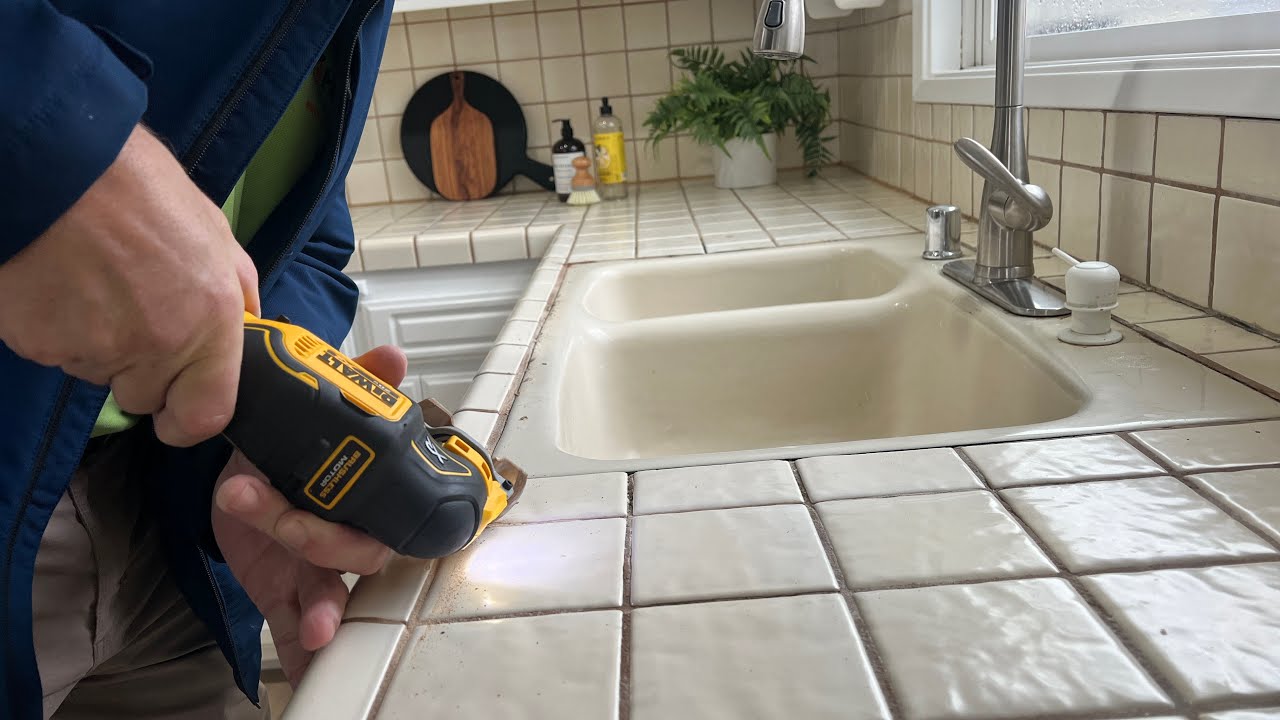
Image Source: i.ytimg.com
Why Regrout Your Kitchen Counter Tiles?
Over time, the grout between your kitchen counter tiles can become stained, cracked, moldy, or simply lose its original appeal. This not only detracts from the overall look of your kitchen but can also harbor bacteria, making it unhygienic. Replacing kitchen counter grout is a cost-effective way to refresh your kitchen’s appearance and improve its cleanliness. It’s a rewarding DIY project that can significantly boost your kitchen’s aesthetic and functional value.
Getting Started: Essential Tools and Materials
Before you begin DIY kitchen counter regrouting, gather all the necessary supplies. Having everything on hand will make the process smoother and more efficient.
Tools You’ll Need:
- Safety Gear: Safety glasses, gloves, and a dust mask are crucial. When removing old grout, dust and small particles will be released.
- Grout Removal Tool: This can be a specialized electric grout removal tool, a utility knife with a fresh blade, a grout saw, or even a small oscillating multi-tool with a grout removal attachment.
- Scrapers: A putty knife or a grout scraper can help remove stubborn grout remnants.
- Wire Brush: For cleaning out grout lines and preparing the surface.
- Vacuum Cleaner: A shop vac is ideal for cleaning up grout dust and debris.
- Sponge: For cleaning the tile surface.
- Buckets: Two buckets are recommended – one for clean water and one for rinsing the sponge.
- Grout Float: A specialized tool for applying new grout.
- Squeegee or Damp Cloth: For wiping away excess grout.
- Caulking Gun and Caulk: For sealing around the edges where the counter meets the backsplash or cabinets.
- Painter’s Tape: To protect surrounding surfaces and create clean edges.
Materials You’ll Need:
- New Grout: Choose a high-quality grout suitable for kitchen countertops. Consider best grout for kitchen counters like epoxy grout for its durability and stain resistance, or a high-performance sanded or unsanded cementitious grout.
- Grout Sealer: Crucial for protecting the new grout from stains and moisture. Look for a good quality grout sealant for kitchen applications.
- Clean Rags or Microfiber Cloths: For wiping and polishing.
- Water: For mixing grout and cleaning.
Step-by-Step Guide to Regrouting Kitchen Counter Tiles
This comprehensive guide will detail each step of how to regrout kitchen counter tile.
Step 1: Preparation and Protection
Proper preparation is key to a successful DIY project.
- Clear the Countertops: Remove all items from the countertop surface. This includes appliances, utensils, decorative items, and anything else that might be in your way.
- Protect Surrounding Areas: Use painter’s tape to mask off the edges of the tiles, the backsplash, the sink area, and any cabinets or walls adjacent to the countertop. This will prevent grout and dust from getting on surfaces you don’t want to clean later. Cover the floor beneath the counter with drop cloths or old newspapers.
- Ventilate the Area: Open windows or turn on exhaust fans to ensure good ventilation, especially if using power tools or if the grout you’re using has strong fumes.
Step 2: Removing Old Grout
This is often the most labor-intensive part of the process, but it’s essential for a good finish. The goal is to remove old grout kitchen surfaces without damaging the tiles themselves.
- Using a Grout Removal Tool:
- If using an electric grout removal tool, follow the manufacturer’s instructions. These tools are designed to vibrate or oscillate, cutting through grout with specialized blades. Start at a low speed and move steadily along the grout lines. Be careful not to let the tool slip and scratch the tile.
- For manual grout saws or utility knives, hold the tool at an angle and carefully saw back and forth along the grout line. Apply steady pressure. You may need to go over the same line multiple times to remove most of the old grout.
- Using a Utility Knife: A sharp utility knife can work for smaller areas or as a follow-up tool to scrape out remaining bits. Make multiple shallow passes rather than trying to force it too deep in one go.
- Using an Oscillating Multi-Tool: If you have access to one, an oscillating multi-tool with a grout removal blade can make this process much faster. Again, exercise caution to avoid damaging the tiles.
Important Considerations for Grout Removal:
- Depth: Aim to remove about 90% of the old grout, leaving a clean channel about 1/8 inch to 1/4 inch deep. You don’t need to remove every last speck, but the new grout needs space to adhere properly.
- Tile Safety: Be extremely careful not to gouge or chip your tiles. If you’re working with delicate tiles (like natural stone), a manual approach might be safer.
- Dust Management: Wear your dust mask and safety glasses. If using power tools, a vacuum attachment can help capture some of the dust as you work.
Step 3: Cleaning the Grout Lines
Once the bulk of the old grout is removed, you need to clean out the remaining dust and debris.
- Scrape and Brush: Use a putty knife or a grout scraper to loosen any stubborn bits of grout. Then, use a wire brush to scrub the inside of the grout lines, removing fine dust and particles.
- Vacuum Thoroughly: Vacuum the entire countertop surface, paying close attention to the grout lines. A shop vac with a crevice tool is excellent for this.
- Wipe Down: Dampen a sponge (not wet) and wipe down all the grout lines and tiles. Rinse the sponge frequently in a bucket of clean water. This step removes any remaining fine dust that the vacuum missed. Let the surface dry completely before proceeding.
Step 4: Mixing the New Grout
Follow the manufacturer’s instructions precisely for mixing your chosen grout. The consistency should be like smooth peanut butter or toothpaste.
- Measure: Measure the grout powder and water according to the package directions. It’s best to mix small batches at a time, as grout can set quickly.
- Mix Gradually: Add the water to the grout powder gradually, mixing with a trowel or a clean mixing stick.
- Achieve Consistency: Mix until the grout is smooth and lump-free. Avoid overmixing, as this can weaken the grout. If it’s too thick, add a tiny bit more water; if it’s too thin, add a little more grout powder.
- Rest (if recommended): Some grouts require a brief “slaking” or resting period (typically 5-10 minutes) after mixing. This allows the chemicals to fully react. After resting, give it another quick stir.
Step 5: Applying the New Grout
This is where your kitchen tile grout repair starts to show.
- Load the Grout Float: Scoop a generous amount of mixed grout onto your grout float.
- Spread the Grout: Hold the float at a 45-degree angle to the tiles. Spread the grout across the tiles, pressing it firmly into the grout lines. Work in small sections.
- Work Diagonally: Move the grout float diagonally across the grout lines. This helps to pack the grout into the joints and avoid pulling it out.
- Fill All Lines: Ensure all the grout lines are completely filled. Overfill slightly, as some grout will be removed in the next step.
Step 6: Removing Excess Grout
This step is critical for a clean finish.
- Initial Wipe: Hold the grout float at a steeper angle (around 90 degrees) and scrape off the excess grout from the tile surfaces. Again, work diagonally across the tiles.
- First Sponge Cleaning: Dampen your sponge in a bucket of clean water and wring it out thoroughly so it’s barely damp. Gently wipe the tile surfaces in a circular motion to remove the remaining grout haze. Rinse the sponge frequently in the clean water bucket, wringing it out well each time. Avoid using too much water, as this can weaken the grout.
- Second Sponge Cleaning (after a few minutes): After about 5-10 minutes (or as recommended by the grout manufacturer), the grout will start to set slightly. Dampen your sponge again and wipe the tiles with lighter strokes, this time focusing on removing any grout residue that may have started to haze over.
Step 7: Final Cleaning and Haze Removal
As the grout dries, a haze will likely appear on the tiles.
- Buffing: Once the grout has set for at least an hour (or as directed), use a clean, dry microfiber cloth or a soft cotton rag to buff the tiles. This will remove any remaining haze and bring out the shine of the tiles.
- Stubborn Haze: If you notice any stubborn haze, you can use a slightly damp cloth and then buff again with a dry one. Avoid using harsh cleaners at this stage.
Step 8: Curing Time
Allow the grout to cure completely according to the manufacturer’s instructions. This can take anywhere from 24 to 72 hours, and sometimes longer, depending on the type of grout and environmental conditions. During this time, avoid getting the grout wet or placing heavy items on the countertop.
Step 9: Sealing the Grout
Sealing is a vital step to protect your newly regrouted kitchen counter tiles.
- Check for Dryness: Ensure the grout is fully cured and completely dry before applying the sealer.
- Apply Sealer: Using a small brush, applicator bottle, or a clean cloth, apply a thin, even coat of grout sealer to all the grout lines. Work in small sections.
- Wipe Off Excess: Wipe any excess sealer off the tiles immediately with a clean, lint-free cloth. Sealer can stain porous tiles if left to dry on the surface.
- Second Coat (Optional): Some sealers recommend a second coat after a specific drying time. Check the product instructions.
- Curing Time for Sealer: Allow the sealer to cure as per the manufacturer’s instructions. Again, avoid water and use on the countertop during this period.
Step 10: Caulking (Optional but Recommended)
For a professional and water-tight finish, caulk the edges of your countertop where it meets the backsplash, cabinets, or sink.
- Remove Old Caulk: Use a utility knife or a caulk removal tool to carefully cut and peel away any old caulk.
- Clean the Area: Clean the gap with a mild cleaner and ensure it’s dry.
- Apply New Caulk: Cut the tip of the caulk tube at a 45-degree angle. Load it into the caulk gun. Run a steady bead of caulk along the joint.
- Smooth the Bead: Dip your finger in water or use a caulk smoothing tool to create a neat, uniform bead. Wipe away any excess caulk with a damp cloth.
Choosing the Right Grout and Sealant
Selecting the correct grout and sealant can make a significant difference in the longevity and maintenance of your kitchen counters.
Best Grout for Kitchen Counters
- Epoxy Grout: This is generally considered the most durable and stain-resistant option for kitchen countertops. It’s non-porous, making it highly resistant to spills, grease, and harsh cleaning agents. However, it’s also more expensive and can be more challenging to work with for DIYers.
- High-Performance Cementitious Grout (Sanded or Unsanded):
- Sanded Grout: Contains fine sand aggregate, making it stronger and more resistant to cracking. It’s suitable for grout lines 1/8 inch wide or larger.
- Unsanded Grout: Contains no sand and is used for very narrow grout lines (less than 1/8 inch). It’s less prone to scratching delicate tiles.
- Additives: Many modern cementitious grouts come with additives that improve stain resistance and flexibility.
When regrouting ceramic tile kitchen surfaces, consider the tile type and grout line width.
Grout Color for Kitchen Tiles
The grout color for kitchen tiles can dramatically impact the final look.
- Light Grout: Can make tiles appear larger and brighter, but it shows stains more easily and requires more frequent sealing and cleaning.
- Dark Grout: Hides dirt and stains better, offering a more forgiving option for busy kitchens. It can also create a bold contrast that highlights the tile pattern.
- Medium Grout: Offers a balance between showing dirt and providing contrast. Neutral tones like grey or beige are popular choices.
Consider the color of your tiles and the overall kitchen aesthetic when making your selection.
Grout Sealant for Kitchen
A quality grout sealant for kitchen countertops is essential to prevent staining and moisture absorption.
- Impregnating Sealers: These penetrate the grout pores and form a barrier. They are breathable and don’t significantly alter the grout’s appearance. This is the most common and recommended type for kitchen use.
- Topical Sealers: These form a protective film on the surface of the grout. They can offer a glossy finish but may wear away faster with heavy use and cleaning.
Reapply sealant every 1-2 years, or as recommended by the manufacturer, to maintain protection.
Common Issues and Troubleshooting
Even with careful planning, you might encounter a few hiccups.
Problem: Grout is too wet or too dry when mixing.
- Solution: Always follow the manufacturer’s ratio. If too dry, add water very slowly, a teaspoon at a time. If too wet, add grout powder very slowly. Mix thoroughly after each addition.
Problem: Grout is hardening too quickly.
- Solution: Mix smaller batches. Work in a cooler environment if possible.
Problem: Tiles are being scratched during grout removal.
- Solution: Use a gentler tool or go slower. Consider a grout removal tool with a diamond-coated blade for tougher grout, but use it with extreme caution. For delicate tiles, stick to manual removal.
Problem: Grout haze is difficult to remove.
- Solution: Wait for the grout to set a bit more before the first sponge cleaning. Use a slightly damp sponge for the second pass and buff vigorously with a dry cloth. If haze persists after drying, a specialized grout haze remover might be needed, but test it on an inconspicuous area first.
Problem: Grout cracks after drying.
- Solution: This often happens if the grout was mixed too wet, or if there was significant movement in the countertop. For minor cracks, you might be able to fill them with a small amount of grout. For larger issues, you may need to remove and reapply that section.
Regrouting vs. Grout Repair
While this guide focuses on regrouting ceramic tile kitchen surfaces, sometimes a full regrout isn’t necessary. If your grout is only lightly stained or has minor cracks, kitchen tile grout repair might suffice. This can involve cleaning with a specialized grout cleaner, using a grout pen to recolor, or filling small cracks with a grout patching compound. However, if the grout is heavily damaged, discolored throughout, or crumbling, a full regrout is the best solution.
When to Consider Regrouting Floor Tile Kitchen
The principles for regrouting floor tile kitchen are very similar to countertops, with a few key differences. Floor grout experiences much more wear and tear. Therefore, using a highly durable grout like epoxy or a high-performance cementitious grout is even more critical. Sealing is also paramount for floor tiles to prevent staining from spills and foot traffic.
FAQs about Regrouting Kitchen Counter Tiles
Q1: How long does it take to regrout kitchen counter tiles?
A1: The time can vary significantly based on the size of your counter, the condition of the old grout, and your experience level. Expect to spend at least half a day to a full day for a standard kitchen counter, not including drying and curing times.
Q2: Can I regrout over existing grout?
A2: It is strongly discouraged to regrout over old grout. For a durable and long-lasting result, all old grout must be removed, and the grout lines cleaned thoroughly.
Q3: What is the best way to clean grout?
A3: For regular cleaning, a mild soap and water solution with a soft brush or sponge is best. For tougher stains, you can use a commercial grout cleaner, a paste of baking soda and water, or a diluted hydrogen peroxide solution. Always test any cleaner on an inconspicuous area first.
Q4: How often should I seal my kitchen counter grout?
A4: Typically, you should reseal your grout every 1-2 years, depending on usage and the type of sealant used. You’ll know it’s time when water no longer beads up on the grout surface.
Q5: What are the different types of grout?
A5: The main types are cementitious grout (sanded and unsanded), epoxy grout, and furan grout (rarely used in residential settings). For kitchen counters, cementitious and epoxy are the most common choices.
Conclusion
Regrouting your kitchen counter tiles is a rewarding DIY project that can dramatically improve the look and hygiene of your kitchen. By following these detailed steps, gathering the right tools, and choosing appropriate materials, you can successfully tackle this task and enjoy beautiful, refreshed countertops. Remember to prioritize safety, work methodically, and allow adequate drying and curing times for the best results.