
Removing backsplash tiles from your kitchen wall is a job you can do yourself. It takes some planning and the right tools. You can make your kitchen look fresh and new with a little effort. This guide will show you how to do it step by step. We will cover safety, tools, and how to fix any wall damage.
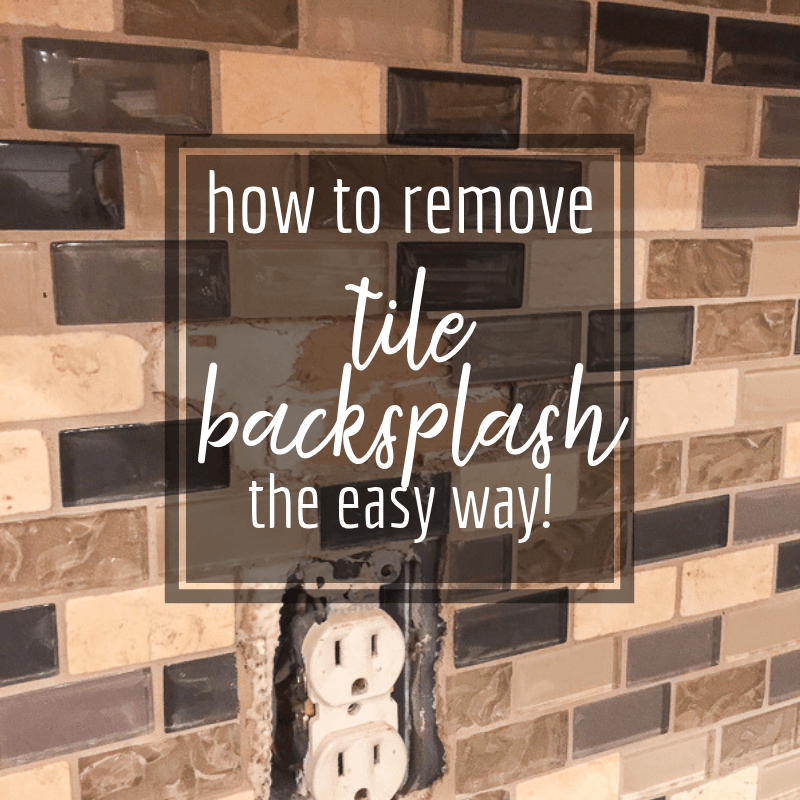
Image Source: www.twelveonmain.com
Why Change Your Kitchen Backsplash?
Your kitchen backsplash gets a lot of use. It protects your walls from spills. Over time, backsplashes can look old. Styles change. You might want a new look for your kitchen. Maybe some tiles are broken. Or, you just bought a new home and hate the old backsplash. Changing it can give your kitchen a whole new feel. It is a big change for a small space. This guide gives you expert steps for kitchen backsplash demolition.
Readying Your Work Area
Before you start, get your kitchen ready. This keeps things safe and clean. It also protects your cabinets and counters. Take your time with these first steps. They are very important.
Gathering Your Tools and Gear
Having the right tools makes the job easier. It also makes it safer. Here is a list of what you will need. Think of these as your must-have items.
- Safety Gear:
- Safety glasses or goggles (essential for eye protection)
- Thick work gloves (to protect hands from sharp edges)
- Dust mask or respirator (to avoid breathing in dust)
- Long sleeves and pants (to protect skin)
- Demolition Tools:
- Utility knife or grout saw (for cutting grout lines)
- Hammer (for tapping chisels)
- Pry bar or small crowbar (for leverage)
- Tile removal chisel (a flat, wide chisel is best)
- Putty knife or scraping tool (for adhesive removal)
- Wire brush (for stubborn adhesive)
- Bucket or trash bags (for debris)
- Shop vacuum (for dust and small pieces)
- Protection for Your Kitchen:
- Drop cloths or old towels (to cover counters and floors)
- Painter’s tape (to secure drop cloths)
- Plastic sheeting (to protect cabinets)
This list covers most kitchen backsplash demolition needs. Some jobs might need more tools. But these are a great start.
Protecting Your Kitchen Space
You will make a mess. Dust and small bits of tile will fly. Protect your kitchen first. This saves you a lot of cleanup later.
- Clear the Counters: Remove everything from your counters. Take out toasters, coffee makers, and anything else. You want a clear workspace.
- Cover Surfaces: Lay down drop cloths over your counters. Use old towels if you do not have drop cloths. Tape them down with painter’s tape. This stops dust and debris from getting everywhere. Extend them to the floor too.
- Protect Cabinets: Cover your lower and upper cabinets with plastic sheeting. Tape it in place. This protects them from dust and any accidental hits.
- Turn Off Power: If your backsplash is near outlets or light switches, turn off the power. Go to your home’s breaker box. Find the right breaker for your kitchen outlets. Flip it to the “off” position. This is very important for safety. Test outlets with a voltage tester to be sure.
Taking these steps helps prevent wall damage backsplash problems. It also keeps your kitchen cleaner.
The Removal Process: Step-by-Step
Now, you are ready to remove the tiles. This part needs care and patience. Do not rush. Follow these steps for the best results.
Step 1: Taking Out the Grout
The grout holds the tiles together. You need to remove some of it first. This makes the tiles easier to pry off. It also helps prevent wall damage backsplash problems.
- Choose Your Tool: You can use a grout saw or a utility knife. A grout saw has a thin, rough blade. It cuts grout well. A utility knife can work for soft grout. Grout removal tools come in different kinds. Pick one that feels right in your hand.
- Score the Grout Lines: Carefully cut along the grout lines. Go around each tile. Apply steady pressure. You do not need to remove all the grout. Just loosen it. This helps separate the tiles from each other. Focus on the grout right around the tiles you plan to remove first.
- Be Gentle: Do not press too hard. You do not want to cut into the wall behind the tiles. The goal is to weaken the bond, not destroy the wall. This is a key old backsplash removal tip.
Step 2: Pry Off the Tiles
This is where the actual tile removal begins. You will need your hammer, chisel, and pry bar. Take your time. Work in small sections.
- Start at the Edges: Find a loose tile or a corner piece. These are often easier to start with. If not, pick a tile and start at its top edge.
- Use a Chisel: Place the edge of your tile removal chisel against the top of a tile. Angle it slightly down and behind the tile. You want to get the chisel under the tile.
- Tap with a Hammer: Gently tap the end of the chisel with your hammer. Do not hit it too hard. You are trying to break the bond between the tile and the wall. Listen for a dull thud. This means the tile might be coming loose.
- How to Pry Off Tiles: Once the chisel is under the tile, gently pry it up. You can use a small pry bar for more leverage. Wiggle the tile. If it does not move easily, reposition your chisel. Try a new spot. Sometimes, tiles come off in pieces. That is normal.
- Work Slowly: Continue around the backsplash. Remove one tile at a time. Put the removed tiles directly into your bucket or trash bag. This keeps your workspace clean.
- Protect the Wall: Always try to keep the chisel flat against the wall. This helps prevent wall damage backsplash problems. If you angle it too steeply, you might dig into the drywall. This is a crucial step for old backsplash removal tips.
Table: Tile Removal Tools and Their Use
| Tool Type | Main Use | Tip for Use |
|---|---|---|
| Grout Saw/Knife | Scoring grout lines | Use firm, steady strokes; clean blade often. |
| Hammer | Tapping chisel; breaking tile bonds | Use controlled, gentle taps, not hard swings. |
| Tile Removal Chisel | Getting under tiles; prying them off | Keep chisel flat to wall; find the right angle. |
| Pry Bar/Crowbar | Extra leverage for stubborn tiles | Use a wide base to spread pressure; protect wall with scrap wood. |
Step 3: Removing Tile Adhesive and Thinset
Once the tiles are off, you will see old adhesive or thinset on the wall. This must come off. A clean wall is ready for new tiles. This is important for tile adhesive removal. It is also how to remove thinset from wall.
- Scrape Off Large Chunks: Use a stiff putty knife or a wide scraping tool. Scrape off any big, loose pieces of adhesive or thinset. Work carefully. You want to take off the old material, not the drywall.
- Soften Stubborn Areas: If the adhesive is very hard, you might need to soften it. Some people spray water on it. Let it sit for a few minutes. This can make it easier to scrape. For tougher thinset, you might need a grinder with a special cup wheel. But be very careful with power tools. Always wear full safety gear.
- Use a Wire Brush: After scraping, use a wire brush. Scrub the wall to remove smaller bits. This also smooths the surface a bit.
- Check the Surface: Run your hand over the wall. It should feel mostly smooth. Any bumps will make new tiles lay unevenly. If you have deep gouges, you might need to fix them. We will talk about drywall repair after tile removal next.
Fixing the Wall After Removal
It is rare to remove a backsplash without some wall damage. Bits of drywall might come off. Or, you might have gouges. Do not worry. This is normal. You can fix it. This is a key part of drywall repair after tile removal.
Assessing the Damage
First, look at the wall.
- Minor Scrapes: Small scrapes or leftover adhesive spots are easy to fix.
- Paper Tears: If the paper layer of the drywall has torn, it needs more care.
- Deep Gouges or Holes: If big chunks of drywall came out, you might need to fill them.
Repairing the Drywall
You will need joint compound (also called drywall mud).
- Clean the Area: Make sure the wall is clean and dust-free.
- Prime Torn Paper (Optional but Recommended): If you have torn paper on the drywall, it can bubble when wet joint compound touches it. Apply a coat of primer (like a PVA drywall primer) over these spots. Let it dry completely. This stops bubbling.
- Apply Joint Compound: Use a putty knife or trowel. Spread a thin layer of joint compound over any damaged areas. Fill in scrapes and gouges. Make it smooth. Do not apply too much at once.
- First Coat: Let the first coat dry. This usually takes a few hours. Check the product label for drying times.
- Sand Lightly: Once dry, lightly sand the area. Use fine-grit sandpaper (120-150 grit). You want it smooth.
- Second Coat (If Needed): Apply another thin coat of joint compound if needed. This makes the surface perfectly smooth. Let it dry. Sand again.
- Clean Up Dust: After sanding, wipe the wall clean. Use a damp cloth to get rid of all dust. The wall must be clean for new tile adhesive to stick.
- Prime the Repaired Area: Apply a coat of primer over all repaired areas. This makes sure your new tile adhesive sticks well. It also creates a uniform surface.
Taking these steps ensures a strong base for your new backsplash. This is vital for replacing kitchen backsplash tiles.
Tips for a Smooth Removal
Some advice can make your job easier. These are good old backsplash removal tips.
Prevent Wall Damage
- Work Slowly: Rushing causes mistakes. It leads to more wall damage.
- Use a Wide Pry Tool: When prying, use a wide flat tool or even a piece of scrap wood under your pry bar. This spreads the pressure. It stops the pry bar from digging into the wall. This is key to prevent wall damage backsplash.
- Protect Edges: If you are keeping parts of the wall or cabinets, tape them off. Use plastic sheeting or cardboard.
- Start Gentle: Always start with gentle taps. Increase force only if needed. Sometimes, old adhesive is weak. Tiles might pop off easily.
Dealing with Difficult Situations
- Stubborn Tiles: Some tiles might be very hard to remove. Try applying heat from a hair dryer. This can soften some adhesives. Or, try different angles with your chisel.
- Tough Thinset: If the thinset is very hard, you might need a chipping hammer with a chisel bit. These are power tools. They make the job faster but need great care. Rent one if you only need it for this job. Always wear full safety gear.
- Outlet Obstacles: Be extra careful around electrical outlets. Always turn off power first. Remove outlet covers. Work slowly around the boxes.
Cleaning Up After the Demolition
After the tiles are off and the wall is repaired, clean up.
- Vacuum Thoroughly: Use a shop vacuum to suck up all dust and debris. Go over the counters, floors, and wall.
- Wipe Down Surfaces: Wipe down all surfaces. Use a damp cloth to get rid of fine dust. This includes cabinets and counters.
- Dispose of Debris: Put all old tiles and dust into strong trash bags. Get them out of your kitchen.
A clean workspace is safer. It is also ready for the next step: replacing kitchen backsplash tiles.
Replacing Your Kitchen Backsplash
After all the hard work, your wall is ready. Now comes the fun part: putting up new tiles. Replacing kitchen backsplash can greatly change your kitchen’s look.
- Plan Your Design: Think about tile size, color, and pattern.
- Measure Carefully: Measure your wall space. Buy enough tiles plus extra for cuts and mistakes (usually 10-15% more).
- Gather New Materials: You will need new thinset mortar, grout, spacers, a tile cutter, and a notched trowel.
- Follow Installation Steps:
- Layout: Plan your tile layout on the wall. Use a level to draw guide lines.
- Apply Thinset: Use a notched trowel to spread thinset onto the wall. Do small sections at a time.
- Place Tiles: Press tiles firmly into the thinset. Use spacers to keep gaps even.
- Cut Tiles: Use a tile cutter for edge pieces or around outlets.
- Dry Time: Let the thinset dry completely. This can take 24-48 hours.
- Grout: Mix and apply grout into the tile gaps.
- Clean Grout: Wipe off excess grout with a damp sponge.
- Seal Grout: After the grout dries (days later), apply a grout sealer. This protects it from stains.
This brief overview shows the next steps. Each part of replacing kitchen backsplash needs care.
Concluding Thoughts
Removing your old kitchen backsplash is a big job. But it is very doable for most homeowners. You save money by doing it yourself. You also get the satisfaction of a job well done. Remember to put safety first. Use the right tools. Take your time. Plan each step.
With these expert steps, you can confidently remove your old backsplash. You will make your kitchen ready for a fresh new look. Enjoy your updated space!
Frequently Asked Questions (FAQ)
Q1: How long does it take to remove kitchen backsplash tiles?
A1: The time it takes varies. It depends on the size of your backsplash. It also depends on how hard the old adhesive is. For a typical kitchen, it might take a few hours. For a larger area, it could take a full day. This includes cleanup.
Q2: What is the biggest challenge when removing backsplash tiles?
A2: The biggest challenge is often removing old, strong adhesive or thinset without damaging the wall too much. Very old backsplashes can have very strong bonds. This is why good tile adhesive removal is key. Fixing drywall after removal can also be tricky.
Q3: Can I reuse the old tiles?
A3: It is usually very hard to reuse old tiles. Most tiles break during removal. Even if they do not break, it is difficult to clean all the old adhesive off them. It is best to plan for new tiles.
Q4: How much mess should I expect?
A4: Expect a good amount of dust and debris. Tile dust is fine and gets everywhere. This is why covering everything well is very important. A shop vacuum is a must-have for cleanup.
Q5: What if I hit a pipe or electrical wire?
A5: This is why turning off power is crucial. Also, always be careful when prying. If you think you might hit a pipe or wire, stop. Consult a professional. You can often see outlet boxes or switch boxes. Work extra gently around these areas.
Q6: Do I need special tools for grout removal?
A6: Yes, grout removal tools make the job much easier. A manual grout saw is common. For larger jobs or harder grout, an oscillating tool with a grout removal blade can speed things up.
Q7: Can I just tile over the old backsplash?
A7: In most cases, no. Tiling over an old backsplash is not recommended. It adds too much thickness. It can also make the new tiles uneven. The bond might not be strong. It is always best to remove thinset from wall and the old tiles first. This creates a clean, flat surface for your new installation.