
Image Source: i.ytimg.com
Step-by-Step: How to Take a Moen Kitchen Faucet Apart for Easy Repair
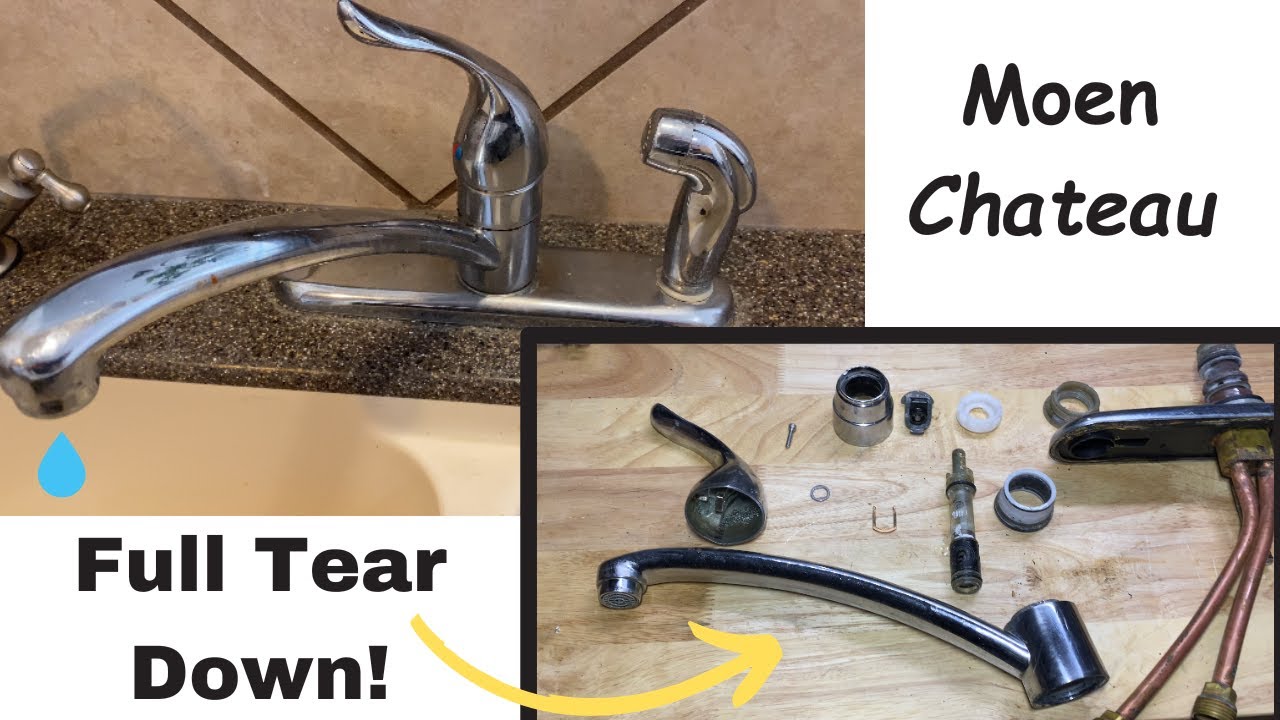
Can I take my Moen kitchen faucet apart? Yes, you absolutely can! Taking your Moen kitchen faucet apart is often the first step to fixing common problems like leaks or a stiff handle. This guide will walk you through the process, making Moen faucet repair accessible even for beginners. We’ll cover everything from Moen faucet disassembly to replacing worn-out Moen faucet parts and performing essential Moen kitchen faucet maintenance.
Repairing your faucet yourself can save you time and money. You won’t need to call a plumber for most issues. This guide will help you with Moen faucet troubleshooting and give you the confidence to tackle various repairs. Let’s get started with Moen faucet disassembly.
Preparing for Disassembly
Before you begin taking your Moen faucet apart, it’s crucial to gather the right tools and prepare your workspace. This will ensure a smooth and efficient repair process.
Essential Tools for Moen Faucet Disassembly
Having the correct tools at hand makes the job much easier. Here’s a list of what you’ll likely need for Moen faucet disassembly:
- Adjustable Wrench: For loosening and tightening various nuts and fittings.
- Phillips Head Screwdriver: Most Moen faucets use Phillips head screws.
- Flathead Screwdriver: Useful for prying off decorative caps.
- Allen Wrench Set (Hex Keys): Many Moen faucets use small set screws that require Allen wrenches. Your faucet might come with a specific size, or you might need a set.
- Pliers: Needle-nose pliers are great for gripping small parts.
- Bucket or Towel: To catch any residual water in the pipes.
- Plumber’s Grease or Silicone Grease: For lubricating O-rings and cartridges.
- Distilled White Vinegar and a Soft Cloth: For cleaning mineral deposits.
- Replacement Moen Faucet Parts: If you know what needs replacing, have the new parts ready.
Securing Your Workspace
Safety and cleanliness are key. Here’s how to prepare your workspace:
- Turn Off the Water Supply: This is the most critical step. Look under your sink for two shut-off valves, one for hot and one for cold water. Turn them clockwise until they are snug. If you can’t find or turn these valves, you’ll need to shut off the main water supply to your house.
- Drain Residual Water: Open the faucet handles to release any water still in the lines. Let it run until no more water comes out. Place a bucket or towel under the faucet to catch drips.
- Clear the Area: Remove any items from under and around the sink to give yourself plenty of room to work.
- Protect Your Sink: Place a towel in the sink basin to prevent dropped tools or parts from scratching the surface or falling down the drain.
Decoding Moen Faucet Handle Removal
The first major step in taking apart your Moen faucet is often Moen faucet handle removal. The method for this can vary slightly depending on the model, but the general principle is the same.
Identifying Handle Types
Moen faucets typically have two main types of handle attachments:
- Decorative Cap with Set Screw: Many modern Moen faucets have a decorative cap on top or front of the handle. Underneath this cap, you’ll find a set screw.
- Screw Under a Plug: Older models might have a screw directly visible on the handle, often covered by a small plastic plug or button.
The Process of Removing the Handle
Here’s a step-by-step guide for typical Moen faucet handle removal:
-
Locate the Set Screw or Plug:
- For Decorative Caps: Gently pry off the decorative cap. You can usually do this with a small flathead screwdriver or even your fingernail. Be careful not to scratch the finish.
- For Plugs: If there’s a small plastic plug (often marked with blue for cold and red for hot), carefully pry it out with a small flathead screwdriver. This will reveal the screw underneath.
-
Loosen the Set Screw:
- Once you’ve exposed the set screw (usually an Allen or hex screw), use the appropriate-sized Allen wrench to loosen it. Turn the wrench counter-clockwise. You don’t need to remove the screw completely; just loosen it enough so the handle can lift off.
- If it’s a regular Phillips screw, use your screwdriver.
-
Lift Off the Handle:
- With the set screw loosened, gently wiggle and pull the handle straight up. It should slide off the valve stem. If it’s stuck, try wiggling it more firmly or tapping lightly with the handle of your screwdriver. Avoid excessive force, as you could damage the handle or valve stem.
Accessing the Cartridge: The Heart of Moen Faucet Repair
Once the handle is off, you’ll see the inner workings of your faucet. The next critical step is accessing the cartridge, which is the component responsible for controlling water flow and temperature. Moen faucet cartridge replacement is one of the most common Moen faucet repair tasks.
Identifying and Removing the Cartridge Retainer
The Moen cartridge is typically held in place by a retaining clip or a threaded retaining nut.
-
Locate the Retaining Clip/Nut:
- Look for a small metal clip that encircles the cartridge stem, often brass or plastic.
- Alternatively, you might see a large, threaded metal nut that screws down over the cartridge.
-
Removing the Retaining Clip:
- For Clips: Use needle-nose pliers to grip the ends of the clip and pull it straight up and out. Sometimes these clips can be a bit stubborn. You might need to gently work them back and forth.
- For Retaining Nuts: Use your adjustable wrench to loosen the retaining nut by turning it counter-clockwise. Once it’s loose, you can unscrew it by hand.
Extracting the Moen Faucet Cartridge
With the retainer removed, you can now pull out the cartridge.
-
Grasping the Cartridge:
- Moen cartridges usually have a plastic or metal nub or tab on top that you can grip.
- If the cartridge is stuck, you might need a Moen cartridge puller tool. These specialized tools are designed to grip the cartridge securely and provide leverage for removal. They are highly recommended for stubborn cartridges. You can purchase them at most hardware stores.
-
Pulling Out the Cartridge:
- Once you have a good grip (or the puller tool is attached), pull the cartridge straight up and out of the faucet body.
- Be prepared for a small amount of residual water to drain into your bucket.
Replacing the Moen Faucet Cartridge
A faulty cartridge is a common cause of leaks and erratic water temperature. Moen faucet cartridge replacement is a straightforward process once the old one is out.
Selecting the Correct Moen Faucet Parts
- Identify Your Faucet Model: The most crucial step is to know the specific model of your Moen faucet. This information can often be found on the faucet itself, in your home’s paperwork, or by searching Moen’s website.
- Purchase the Right Cartridge: Take the old cartridge to a hardware store or consult your faucet’s manual to find the correct replacement cartridge. Moen uses several types of cartridges (e.g., 1200 series, 1225 series, 1234 series), and using the wrong one will not solve your problem.
Installing the New Cartridge
- Prepare the New Cartridge: Apply a thin layer of plumber’s grease to the rubber O-rings on the new cartridge. This helps it slide in easily and creates a better seal.
- Align the Cartridge: Look at the new cartridge and the faucet body. There are usually notches or flat spots that need to align perfectly. This ensures the handle operates correctly.
- Insert the New Cartridge: Carefully push the new cartridge straight down into the faucet body. It should seat snugly.
- Reinstall the Retainer:
- If you had a clip, reinsert it into the groove around the cartridge stem.
- If you had a retaining nut, screw it back on by hand, then tighten it gently with the adjustable wrench. Don’t overtighten.
Deep Cleaning Your Moen Faucet Components
While your faucet is disassembled, it’s an excellent opportunity for Moen faucet deep cleaning. This can help prevent future issues and ensure your faucet operates smoothly.
Cleaning Internal Parts
- The Cartridge: If you removed the cartridge for cleaning rather than replacement, soak it in distilled white vinegar for a few hours to dissolve mineral deposits. Rinse it thoroughly and dry it.
- The Faucet Body: Use a soft cloth dampened with vinegar to wipe down the inside of the faucet body where the cartridge sits. A small brush (like an old toothbrush) can help clean any stubborn buildup.
Cleaning External Components
- Handles and Trim: Use a soft cloth with mild soap and water or vinegar to clean the handles, spout, and any decorative trim. Avoid abrasive cleaners, as they can damage the finish.
- Aerator: Unscrew the aerator at the tip of the spout. Disassemble it if possible (it usually unscrews into a few parts). Soak these parts in vinegar to remove any mineral deposits. Rinse and reassemble.
Reassembling Your Moen Faucet
Putting your faucet back together is the reverse of disassembly.
- Replace the Handle: Slide the handle back onto the cartridge stem, ensuring it’s aligned correctly.
- Secure the Handle: Tighten the set screw with the Allen wrench or screwdriver. Replace the decorative cap or plug.
- Turn Water Back On: Slowly turn the shut-off valves under the sink counter-clockwise to restore the water supply.
- Test for Leaks: Turn on the faucet and check for any leaks around the handle or spout. If you see any, ensure the retaining nut or clip is snug and the cartridge is properly seated.
Common Moen Faucet Troubleshooting Scenarios
Even after reassembly, you might encounter issues. Here are some common Moen faucet troubleshooting tips:
Leaky Faucets
- Drip from Spout: Usually a faulty cartridge or worn O-rings. Moen faucet cartridge replacement is the most common solution.
- Leak Around Handle: The O-rings on the cartridge might be damaged or the retaining nut/clip isn’t tight enough.
Stiff or Hard-to-Turn Handles
- Mineral Buildup: This can happen inside the faucet body or on the cartridge. A deep clean or cartridge replacement can fix this.
- Lack of Lubrication: Applying plumber’s grease to the cartridge O-rings during reassembly can help.
Water Temperature Issues
- Improper Cartridge Installation: Ensure the cartridge is aligned correctly with the hot and cold indicators.
- Faulty Cartridge: The internal mechanisms of the cartridge might be damaged, preventing proper temperature mixing.
Moen Faucet Installation Considerations
If you’re not just repairing but performing a full Moen faucet installation or replacing an entire faucet, there are specific steps to follow. While this guide focuses on disassembly, it’s worth noting that a proper installation is key to preventing future Moen faucet leak repair needs. Always follow the manufacturer’s instructions for your specific model.
Understanding Moen Faucet Parts
Moen uses a variety of Moen faucet parts, with the cartridge being the most commonly replaced. Other parts that might wear out include O-rings, springs, and seals. Knowing the specific parts for your faucet model is essential for successful repairs.
Key Moen Faucet Parts
- Cartridge: Controls water flow and temperature. (e.g., Moen 1225 cartridge)
- O-rings: Small rubber seals that prevent leaks.
- Handles: The parts you use to turn the water on and off.
- Spout: The part from which water flows.
- Aerator: A screen at the end of the spout that mixes air with water for a smoother flow and prevents splashing.
- Retaining Clip/Nut: Secures the cartridge in place.
Frequently Asked Questions (FAQ)
Q1: How often should I perform Moen kitchen faucet maintenance?
A1: Regular visual checks and cleaning of the aerator every 6-12 months are recommended. If you notice leaks or stiffness, address them promptly to prevent further damage.
Q2: Can I use WD-40 to loosen a stuck Moen faucet handle?
A2: While WD-40 can help loosen some parts, it’s not ideal for faucet components as it can degrade rubber seals over time. It’s better to use a penetrating oil specifically designed for plumbing or gently tap the handle.
Q3: My Moen faucet is dripping, but it’s a new faucet. What should I do?
A3: If it’s a new faucet, check if it was installed correctly. Ensure all connections are tight. If the drip persists, the cartridge might be faulty, and you should contact Moen for warranty service or replace the cartridge following the steps above.
Q4: What if I can’t find my specific Moen faucet model number?
A4: You can often find the model number etched on the faucet body itself (sometimes on the underside or back of the spout). If not, take clear photos of your faucet to a hardware store or Moen’s customer service, and they can help you identify it.
Q5: Is it difficult to replace a Moen faucet cartridge?
A5: For most people, replacing a Moen faucet cartridge is a manageable DIY task with the right tools and instructions, like those provided in this guide. The most challenging part can be removing a very old or corroded cartridge, where a specialized tool might be necessary.
By following these step-by-step instructions for Moen faucet disassembly, you can confidently tackle common Moen faucet repair tasks, ensuring your kitchen faucet continues to function smoothly and efficiently. Remember to always prioritize turning off the water supply before you begin any work.