
Can I install a Moen kitchen faucet with a sprayer myself? Yes, absolutely! With a few common tools and this step-by-step guide, you can successfully install your new Moen kitchen faucet with a sprayer as a DIY project. This guide will walk you through the entire process, from turning off the water to testing for leaks, making DIY faucet installation a breeze. We’ll cover all the plumbing basics you need to know to confidently tackle a kitchen faucet replacement.
Replacing an old, leaky, or outdated faucet is a rewarding home improvement task that can significantly enhance your kitchen’s functionality and aesthetic. Moen is a trusted brand known for its durable and stylish faucets, and their models with integrated sprayers offer added convenience. This comprehensive Moen faucet installation guide is designed for homeowners looking to save money and gain satisfaction from a successful DIY project.
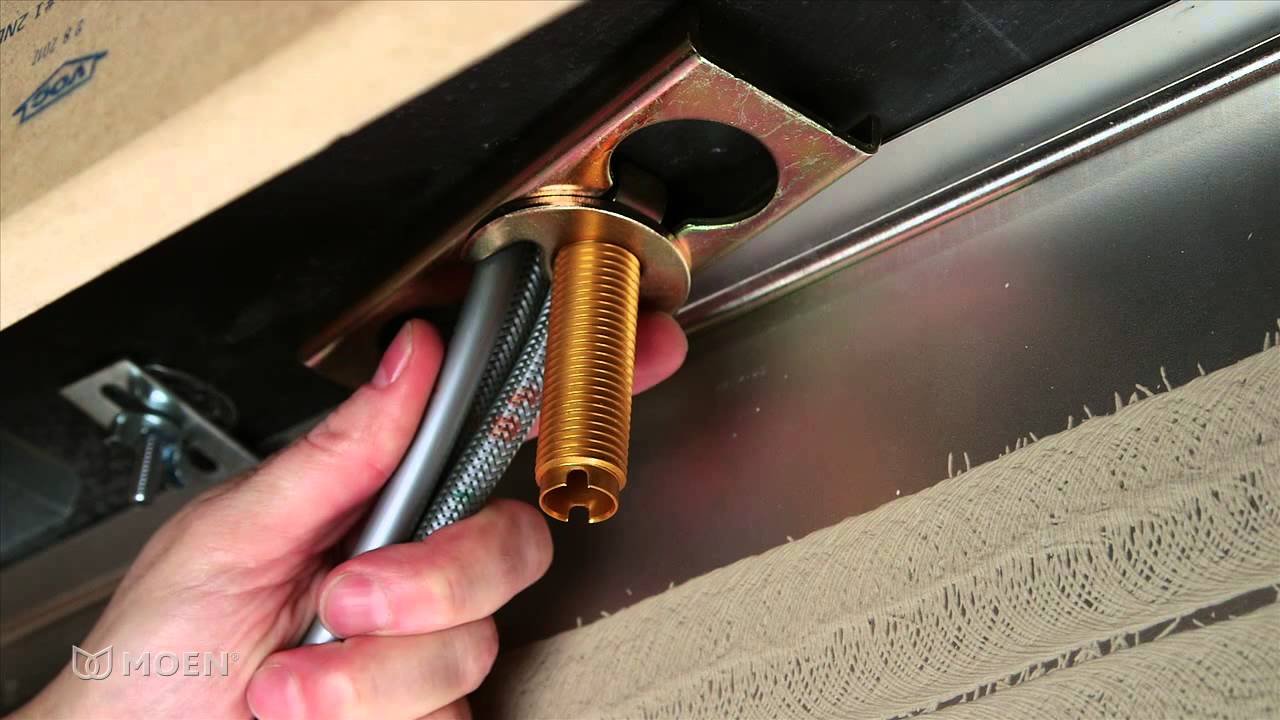
Image Source: i.ytimg.com
Tools and Materials You’ll Need
Before you begin, gather all the necessary tools and materials. Having everything on hand will make the installation process smoother and more efficient.
Essential Tools:
- Adjustable Wrench: For tightening and loosening nuts and fittings.
- Basin Wrench: This specialized tool is crucial for reaching nuts in tight spaces under the sink.
- Phillips Head Screwdriver: For any screws that might be present on the old faucet or new mounting hardware.
- Flathead Screwdriver: Also for any screws or prying.
- Bucket: To catch any residual water when disconnecting old lines.
- Old Towels or Rags: To absorb spills and keep the work area dry.
- Safety Glasses: To protect your eyes from debris or dripping water.
- Work Gloves: For a better grip and to protect your hands.
- Flashlight or Headlamp: To see clearly under the sink.
- Plumber’s Putty or Silicone Sealant: For sealing around the faucet base to prevent leaks.
- Thread Seal Tape (Teflon Tape): To ensure watertight seals on threaded connections.
Materials:
- Your new Moen kitchen faucet with sprayer.
- Replacement supply lines (if your old ones are worn or not compatible with the new faucet).
Step-by-Step Installation Process
Let’s get started with the actual installation. Follow these steps carefully for a successful Moen faucet installation.
Step 1: Turn Off the Water Supply
This is the most critical first step. Locate the shut-off valves under your sink. Typically, there will be two valves: one for hot water and one for cold water.
- Locate Valves: Look for the pipes coming from the wall to the faucet supply lines. You should see two oval or round handles.
- Turn Off: Turn both handles clockwise until they are firmly shut.
- Verify: Turn on your old faucet to release any remaining pressure and confirm that the water flow has stopped. Let the water drain completely.
Step 2: Disconnect the Old Faucet
Now it’s time to remove the old faucet.
Removing the Supply Lines
- Place your bucket and towels under the water connections to catch drips.
- Use your adjustable wrench to loosen the nuts connecting the supply lines to the shut-off valves. Remember: “righty-tighty, lefty-loosey.”
- Once loose, carefully unscrew them by hand.
Disconnecting the Sprayer Hose (If Applicable)
- Some older sprayers have a separate hose connection. If yours does, locate this connection under the sink and disconnect it using your adjustable wrench.
Removing the Faucet Mounting Hardware
- Under the sink, you’ll see a mounting nut or nuts holding the faucet body in place.
- This is where your basin wrench becomes invaluable. Fit the basin wrench onto the nut and turn it counter-clockwise to loosen and remove it.
- If your faucet has a separate sprayer, you might have another mounting nut for that assembly.
- Once all mounting hardware is removed, the old faucet should lift easily from the top of the sink.
Cleaning the Sink Surface
- After removing the old faucet, clean the area around the faucet holes on your sink. Remove any old plumber’s putty, sealant, or grime. A putty knife or scraper can help with stubborn residue. A clean surface is vital for a good seal with the new faucet.
Step 3: Prepare the New Moen Faucet
Unpack your new Moen faucet and identify all its parts. Read the specific instructions that came with your faucet model, as there can be slight variations.
- Assemble Components: Many Moen faucets come with some assembly already done, but you might need to attach handles or other parts.
- Apply Sealant: For most Moen faucets, you’ll apply plumber’s putty or silicone sealant to the underside of the faucet base or escutcheon plate that sits against the sink. Roll the putty into a rope about 1/4 inch thick and press it firmly around the base. This creates a watertight seal. Some newer faucets may come with a rubber gasket that eliminates the need for putty. Check your faucet’s manual.
Step 4: Mount the Faucet Body
This is where you’ll begin to mount faucet body in its new home.
- Carefully insert the faucet spout and handles (if separate) through the designated holes in your sink.
- Ensure the faucet is properly aligned.
- From underneath the sink, slide any included gaskets or washers onto the faucet shanks.
- Thread the mounting nuts onto the faucet shanks. Hand-tighten them first.
- Use your basin wrench to tighten the mounting nuts securely. Make sure the faucet remains straight as you tighten. Do not overtighten, as this can damage the sink or the faucet.
Step 5: Connect the Water Supply Lines
Now it’s time to connect water lines to your new faucet.
- Attach Supply Lines to Faucet: If your faucet didn’t come with integrated supply lines, attach the new ones to the faucet shanks. Hand-tighten them first, then use an adjustable wrench to snug them up.
- Attach Supply Lines to Shut-Off Valves: Apply thread seal tape (Teflon tape) to the threads of the shut-off valves. Wrap it clockwise about 2-3 times.
- Connect: Carefully thread the supply lines onto the corresponding hot and cold shut-off valves. Hand-tighten them first to avoid cross-threading.
- Tighten Connections: Use your adjustable wrench to tighten the connections. Again, snug is usually sufficient; avoid excessive force.
Step 6: Attach the Sprayer Hose
This step is for connecting the sprayer.
- Locate Sprayer Hose Connection: Under the sink, find the port where the sprayer hose attaches to the faucet body.
- Connect Hose: Most Moen sprayers use a quick-connect system or a threaded fitting.
- Quick-Connect: Align the end of the sprayer hose with the fitting and push firmly until it clicks into place. Give it a gentle tug to ensure it’s secure.
- Threaded Fitting: If it’s a threaded fitting, screw the hose onto the port. Hand-tighten it, then use your adjustable wrench to give it a final quarter-turn.
- Attach Sprayer Weight: Some Moen faucets have a weight that clips onto the sprayer hose to help retract the sprayer head. Attach this according to your faucet’s specific instructions.
Step 7: Install Faucet Handles (If Separate)
If your faucet came with separate handles, you’ll need to install faucet handles.
- Slide the handle onto the valve stem.
- Insert the handle screw (usually a set screw) into the small hole at the bottom or back of the handle.
- Use a Phillips head screwdriver or an Allen wrench (depending on the screw type) to tighten the screw and secure the handle.
- Place the decorative caps or covers onto the handles.
Step 8: Final Tightening and Checks
Before turning the water back on, do a final check.
- Ensure all connections are snug. Use your adjustable wrench to tighten connections an additional quarter turn if anything feels loose, but again, don’t overtighten.
- Make sure the faucet is straight and secure.
- Check that the sprayer hose is properly connected and the weight is attached correctly.
Step 9: Turn the Water Back On and Test for Leaks
This is the moment of truth to test for leaks.
- Slowly turn the hot and cold water shut-off valves back on by turning the handles counter-clockwise.
- Observe all connections under the sink for any drips or leaks. Pay close attention to where the supply lines connect to the valves and to the faucet.
- Turn on the faucet. Let the water run for a minute or two to flush out any air or debris.
- Check the hot and cold water flow. Operate the sprayer to ensure it works correctly and retracts smoothly.
- With the water running, inspect all connections again for leaks.
- Turn off the faucet and check under the sink one last time.
If you find any leaks, turn off the water supply immediately and re-tighten the offending connection. If the leak persists, you may need to reapply thread seal tape or check if the washer or gasket is seated correctly.
Troubleshooting Common Issues
Even with careful work, you might encounter minor issues. Here are a few common ones and how to fix them.
- Dripping Faucet After Installation: This is often due to debris in the valve or improper seating of internal parts. For Moen faucets, this might mean the cartridge needs to be reseated or replaced, though this is rare with a new faucet. Ensure the handle is fully tightened and the valve is completely off.
- Low Water Pressure: Check that the shut-off valves are fully open. Also, inspect the aerator (the small screen at the end of the spout) for clogs, as this is a common culprit for reduced flow. Unscrew it and clean it.
- Sprayer Hose Leaking: Ensure the connection is tight and the O-ring or gasket is properly seated if it’s a threaded connection. If it’s a quick-connect, make sure it clicked securely.
- Faucet Wobbles: The mounting nuts under the sink may not be tight enough. Use the basin wrench to snug them up.
Frequently Asked Questions (FAQ)
How much plumber’s putty do I need for a kitchen faucet?
You typically need a piece of plumber’s putty about the size of a golf ball. Roll it into a snake about 1/4 inch thick and place it around the underside of the faucet base or escutcheon plate where it will contact the sink. This creates a watertight seal. Some faucets come with a rubber gasket, in which case you may not need putty. Always check your faucet’s manual.
What is the difference between plumber’s putty and silicone sealant for faucets?
Plumber’s putty is a traditional sealing compound made from calcium carbonate and oils, often used for sealing around drains and faucets. Silicone sealant is a synthetic rubber sealant that provides a more flexible and durable waterproof seal, often preferred for sealing around countertops or where significant movement might occur. For most faucet bases, either is acceptable if the manufacturer allows it. Silicone can sometimes adhere permanently to certain sink materials, so always check compatibility.
How do I know if I need to replace my supply lines?
You should consider replacing your supply lines if they are old, brittle, kinked, corroded, or show any signs of wear. It’s also a good idea to replace them if the fittings on your old lines don’t match the connections on your new faucet. Using new, flexible braided stainless steel supply lines is recommended for a secure and long-lasting installation.
What is a basin wrench and why is it important for faucet installation?
A basin wrench is a specialized tool designed for reaching and turning nuts in tight, awkward spaces, such as those found under a kitchen sink where faucet mounting hardware is located. Its long shaft and swiveling jaw head make it possible to grip and loosen or tighten nuts that are difficult or impossible to access with a standard adjustable wrench. It is essential for a smooth DIY faucet installation.
How tight should I make the connections?
You want connections to be snug and watertight, but not so tight that you strip the threads or crack a fitting. For most connections, hand-tightening followed by a quarter to half turn with an adjustable wrench is sufficient. If you feel significant resistance or hear creaking, stop tightening. Using thread seal tape on threaded connections helps ensure a good seal without needing excessive force.
Can I use Teflon tape on the spray hose connection?
Generally, Teflon tape is not recommended for connections that use rubber O-rings or gaskets, as the tape can interfere with the seal. This is often the case for sprayer hose connections and some flexible supply line fittings. Stick to the manufacturer’s recommendation for each specific connection.
Conclusion
You’ve successfully navigated the process of installing your new Moen kitchen faucet with a sprayer! By following these detailed steps, gathering the right tools, and paying attention to each connection, you’ve completed a significant home improvement project. Remember, a successful kitchen faucet replacement not only improves your kitchen’s functionality but also adds value to your home. Enjoy your new, leak-free faucet!